Thursday, December 15, 2016

ALTENEW Gift Certificate Winner!!

Thanks so much to everyone who stopped by for the Altenew December Blog Hop and for your sweet comments!  It's time to announce the winner of the $30 Altenew Gift Certificate.

CONGRATS:
LISA'S CREATIVE NICHE 
 

Lisa, please email Altenew at winner@altenew.com with the subject line "Reflection Kit Blog Hop Winner from Ashley's blog" to redeem your prize.

Monday, December 12, 2016

Crate Paper | Shine Bright

This is a personal blog. All editorial content and projects are intellectual property of ashleyhortondesigns.com. I do receive compensation and material product from Crate Paper to develop my craft posts, but all ideas and opinions are my own.

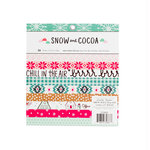
I love to use die cuts to create backgrounds for my layouts, but sometimes I like to take a simpler approach.  There are a lot of ways to use squares on a layout, and I thought it would be fun to cut squares on my paper trimmer from the Snow & Cocoa 6x6 Paper Pad from Crate Paper, to create large plus signs on a wintry layout.


I cut 1 inch squares from several different patterned papers in the 6x6 paper pad.  Then I placed them on the layout, to create the plus symbols.  After I had all of the squares lined up, I added a touch of adhesive to each square and then machine stitched through each symbol.  I wanted to add some more texture to the background, so I also traced 4 more plus signs in the open spaces on the background paper and hand stitched each one with embroidery floss colors that coordinate with the Snow & Cocoa collection.


I moved my photo around several times, trying to find the best place for it.  I finally decided to place it on the far left-hand side of the layout to keep from covering the background design.  I kept my title and embellishments clustered closely to the photo, which helps draw attention to the photo.  Most of the embellishments are from the Snow & Cocoa Stickers.  I love the pops of color they add to the layout!


This technique is a great idea for using up some of your paper scraps!  I know I always have those left over pieces of paper, that I just can't throw away.  You never know when they might come in handy for a fun design!

This post contains affiliate links, which means I will receive a small commission from any purchases made from product clicks on this post.

PRODUCTS USED:
 

Wednesday, December 7, 2016

Altenew Scrapbook Kit Release Blog Hop + Giveaway


Welcome to the Altenew December Blog Hop! You should have arrived here from Meghann Andrew's Blog. We are featuring the new Altenew Reflection Scrapbook Kit. The bright and vibrant colors in this kit will take you back to all those happy moments captured at home or abroad. From trendy watercolor painted papers, to beautiful cityscape postcards and a wide assortment of embellishments, this kit is perfect for creating gorgeous layouts, wall art, mixed media projects, and many more!


 The kit contains:
  1. 48 sheets of 12”x12” patterned paper (two of each design)
  2. One 8.5”x11” cardstock sticker sheet
  3. Two 6”x12” alphabet puffy sticker sheets
  4. 20 8.5”x3.5” watercolor cityscape postcards
  5. One 2x3 photopolymer clear stamp set
  6. 20 epoxy buttons with adhesive back
  7. 34 cardstock and acetate die cuts
  8. 12 origami wood veneer shapes
  9. Two white resin decorative frames
  10. One 8.5”x11” chipboard sticker sheet
  11. One rubber roller stamp

I had so much fun working with the Reflection Kit, and it was definitely hard trying to decide which of he gorgeous papers I wanted to use. I decided to go with the watercolor Yellow paper. Then I cut a butterfly shape on my Silhouette Cameo and covered it with fussy cut roses from the Black & White floral patterned paper.


I love the versatility of the Kit, and I can't wait to use it for upcoming layouts!


To celebrate this release, Altenew is giving away a $50 gift certificate to THREE lucky winners! Please leave a comment on the Altenew blog by Wednesday, December 14th at 11:59pm EST for a chance to win. The winners will be announced on the Altenew blog on Thursday, December 15th.

And I am giving away a $30 Gift Certificate to one lucky winner! Just comment below for the chance to win and make sure you are following my Blog. The winner will be announced here on Thursday, December 15th at 5:00PM EST. The winner will need to contact winner@altenew.com with the subject line "December Release Blog Hop Winner from Ashley's Blog".
 
**Promotion**
Receive a FREE Scrapbook Class with every purchase of the Reflection Scrapbook Kit now through Saturday 12/17, 2016 at 11:59pm EST. When you purchase the kit, please email Altenew at academy@altenew.com with your order number and Altenew will provide instructions on how to redeem your free class to the Timeless Floral Layouts Class.


Now it's time to continue the Hop! You are off to visit the talented, Eveyln Yusuf's Blog! And if you're just now joining in the Hop from my Blog, here is the full Hop order for you to follow:

Ashley Horton <-------- You Are Here

Thanks for stopping by and enjoy the Hop!

Monday, December 5, 2016

Crate Paper | Star Decor

This is a personal blog. All editorial content and projects are intellectual property of ashleyhortondesigns.com. I do receive compensation and material product from Crate Paper to develop my craft posts, but all ideas and opinions are my own.

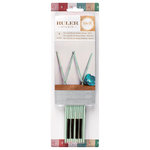
Christmas is right around the corner and it's time to get those decorations up!  If you're looking for some last minute ideas to add to your Christmas decor this year, then check out this fun, rustic Star created with the Crate Paper Snow & Cocoa collection and We R Memory Keepers Ruler Studio.


I adjusted the ruler to a basic star shape and once I had it the way I wanted it, I added a couple of pop dots to some of the joints to secure the shape. I thought it would be fun to use some of the tags/cards from the Ephemera Pack to create a banner across the star shape. Some of the tags/cards already had a hole in the top, and I used my single hole punch to add holes to the other ones.


I wanted the star décor to have a rustic, hand-made look, so I grabbed some twine that I had on hand to string the tags/cards. I placed the twine through the holes on the tags/cards and then tied it off on each end of the star shape. Then I cut some extra twine and tied two bows and secured them on the ends of the banner.


The tags/cards already had some cute images on them, but I wanted to add a bit more embellishing. I cut 5 star shapes from the Snow & Cocoa 6x6 Paper Pad and machine stitched down the center of each one, before adding them to the Ephemera pieces. I also added a few stickers and some of the cute Gold sequins from the Jar Pockets pack.


This rustic Star would look great hanging in a special spot or you could also stand it on a shelf or your fireplace mantle. It’s also a quick and easy project, that is perfect for adding that hand-made look to your holiday!


This post contains affiliate links, which means I will receive a small commission from any purchases made from product clicks on this post.

PRODUCTS USED:
 

Wednesday, November 30, 2016

Crate Paper | Winter Magic

This is a personal blog. All editorial content and projects are intellectual property of ashleyhortondesigns.com. I do receive compensation and material product from Crate Paper to develop my craft posts, but all ideas and opinions are my own.

Happy December 1st!!  I'm stopping in today to share a layout for Crate Paper, using the adorable Snow & Cocoa collection!  I love that this collection can be used for winter photos and Christmas layouts.  And there are so many cute images included in the collection!


The first thing that caught my eye in this collection, was the fun reindeer Printed Vellum sheet.  I just had to use it!  I thought about the best way to use it for my layout, and I decided to layer it over the Rosy Cheeks patterned paper.  This added a variety of color behind the reindeer pattern, without taking away from the design.  It can be tricky when you are adding vellum to a layout, because you don’t want any adhesive showing through the transparent paper.  I solved this problem by adding my adhesive to the vellum where I knew my photo would cover it.  You could also machine stitch the vellum to secure it to your background paper.


When it came to my photo and embellishments, I kept everything clustered near the upper left hand corner of the layout.  I didn’t want to cover too much of the vellum paper…because let’s face it, it’s the star of the layout!!  Keeping all of my embellishments and my title clustered near the photo, also helped the photo stand out from the background design.


I always like to add interest and mix textures with my embellishments, so I mixed some of the die cut snowflakes from the Ephemera Pack, one of the wood veneers and some of the cute puffy stickers.  I also love the glitter texture on the snowflake stickers and the touch of Gold it adds to the layout.


I kept things simple for the title, and used the word Winter from the puffy stickers pack.  I love that each letter included a color from the collection.  Then for contrast, I used the Bright Thickers to add the word Magic.  I really liked the look of the two different sized alphas in the title and the Black Thickers really popped on the background paper.


I hope you find some fun ways to use the Snow & Cocoa collection this holiday season! 


This post contains affiliate links, which means I will receive a small commission from any purchases made from product clicks on this post.

PRODUCTS USED:


Tuesday, November 29, 2016

Crate Paper | Sweet Heart

This is a personal blog. All editorial content and projects are intellectual property of ashleyhortondesigns.com. I do receive compensation and material product from Crate Paper to develop my craft posts, but all ideas and opinions are my own.

I don't think I will ever get tired of using the beautiful Crate Paper Gather collection by Maggie Holmes!  I wanted to squeeze in one more layout, with the collection for November, and I had the perfect photo from our recent Thanksgiving trip to Texas.


The Joyful patterned paper included in the collection is one of my favorites!  I've been waiting for the perfect inspiration to use it, and inspiration finally struck.  I decided to use the paper for my full background, but tone it down a bit with some hand cut leaves from a few of the Black & White patterned papers.  I used the leaves from the Gather Ephemera pack as a stencil to trace on the Black & White 6x6 papers and then hand cut them with my small scissors.  I placed the leaves in a scattered pattern on the background and then machine stitched each one of them.


I put together a quick title for my layout using the Chipboard stickers and the Accent stickers.  I almost always like to have my title layered over the photo or very close to the photo.  I think it makes the two most important elements on your layout, stand out.  The colors from the background paper and the hand cut leaves created a busy look on the layout, so I wanted to keep my embellishing on the simple side.  I placed a few of the phrase stickers from the Accent stickers sheet over some of the leaves, and included a heart sticker with each one too.


This layout was quick and easy to put together, and I loved creating the hand cut leaves by tracing the leaves from the Ephemera pack.  It's an easy way to reproduce a favorite shape from a collection, and a great way to customize it with the patterned papers you decide to use.  I am all for an endless pile of cute, hand cut leaves!


This post contains affiliate links, which means I will receive a small commission from any purchases made from product clicks on this post.

PRODUCTS USED:


Monday, November 28, 2016

Tinsel Town | The Magic of Christmas

I am so excited to stop in today and share my first layout, using my newest collection from Pretty Little Studio, Tinsel Town!!  The collection arrived the day before we went out of town for the Thanksgiving holiday, so I couldn't wait to sit down and make a layout, our first day back home!  


I love using non-traditional Christmas colors, so I knew I wanted a bright, fun color scheme when I created this collection.  I also love Wood Grain papers, so I started the layout by cutting my title from the Yule Log patterned paper.  I used the new Christmas Magic cut file set from The Cut Shoppe, to create a large title on the layout.  Once the title was cut, I added it to a white cardstock background, tilted it a bit and then stitched through it with my sewing machine.


https://www.etsy.com/listing/492374933/the-christmas-magic-cut-file-contains-4?ref=shop_home_active_10

I wanted several textures on the layout, so I used a mix of the Twinkle Acrylics, Twinkle Die Cuts, Wood Veneers, Flair Button and sequins.  I love the scattered look of the embellishments and the various dimension created by each one.  Since the design of the layout gravitated on the left side of the page, I decided to balance it with some patterned papers from the collection on the right hand side.  I cut strips from several of the patterned papers and layered them along the right side of the page.  Then I stitched along each one, to bring some texture to the strips.


I hope you've had a chance to pick up some of the Tinsel Town collection from the PLS shop, and that you've found some inspiration today for working with the collection!  This is a LIMITED EDITION COLLECTION, so make sure you get it while it's available!

I'm also doing a GIVEAWAY on my Instagram account, so make sure you check it out for the chance to win a selection of the Tinsel Town collection.  You can find me on Instagram at @ashleyhorton75.

This post contains affiliate links, which means I will receive a small commission from any purchases made from product clicks on this post.

PRODUCTS USED:


Thursday, November 17, 2016

WRMK Ruler Studio

I've had my eye on the Ruler Studio products from We R Memory Keepers for a while, but just haven't had the chance to pick any up.  But I wanted to update our Christmas decor some this year, because I feel like I've been putting up the same decorations for the past 10 years!  I decided to pick up two of the 9 inch rulers...one in Natural and one in Mint.  I used the Natural ruler to create a star design, and placed it on top of the book shelf with some of our other Christmas decor.


I'll have a post coming up in December using the Mint ruler, for a Crate Paper project, so make sure you watch out for that!

You can pick up the Ruler Studio products from the Scrapbook.com website!

This post contains affiliate links, which means I will receive a small commission from any purchases made from product clicks on this post.

PRODUCTS USED: