Tuesday, December 31, 2013

Get It Scrapped | I'm So Glad I Live in a World Where There are Octobers

Have you ever thought about using Quotes or Sayings as inspiration for your layouts?  If so, make sure you stop by the Get It Scrapped! Blog today and check out the article on Inspired by the Words.  The Creative Team is sharing ideas for taking inspiration from quotes and sayings.

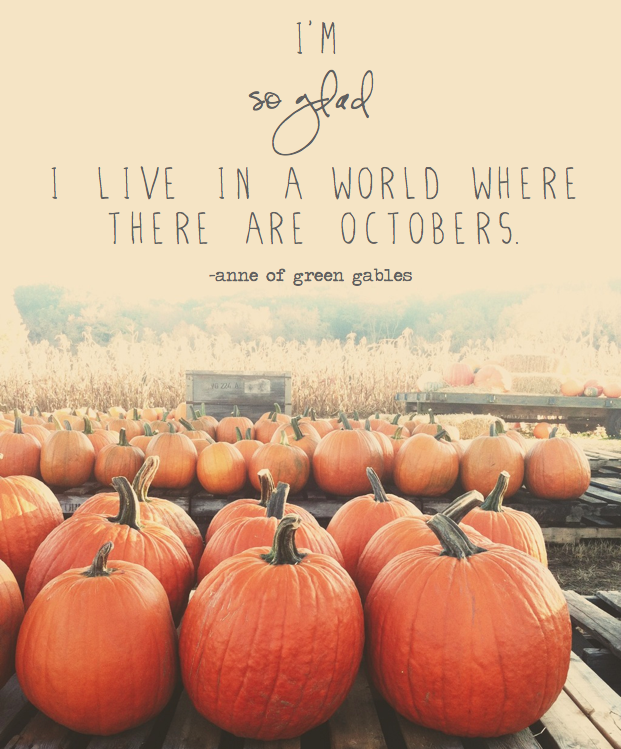
I knew immediately, that I had to use this quote from Anne of Green Gables, shared HERE.  I couldn't find the direct Blog post, but the image is originally from dearfriendblog.


October is my favorite month of the year and I love taking photos during the beautiful Fall days.  I knew I had to use the Anne of Green Gables quote as my inspiration, because I love the book series and October, so it was a perfect match.  I wanted the quote to be just as much of a focus as my photos, so I used my Silhouette Cameo to cut the title in two different fonts on a large scale on my layout.  I incorporated the quote as part of my design and used it above and below my photo strip.  I paired the quote, with the Autumn Crisp line from American Crafts, to reinforce the meaning behind the quote and to work with the Fall theme of my page. 

Supplies:  Patterned Paper, Stamp, Wood Veneer, Buttons, Stickers & Bits:  American Crafts; Spray Mist:  Studio Calico & Heidi Swapp; Enamel Dots:  Freckled Fawn; Chipboard:  Basic Grey; Other:  Embroidery Floss

Monday, December 30, 2013

American Crafts Christmas Card Trio & Top Ten Blog Hop WINNER

Before I share my cards today, I wanted to say thanks to everyone who stopped by to visit my Blog during the Top Ten Blog Hop and for the sweet comments.  Also, welcome to all of my new followers!  So glad to have you and I hope you enjoying visiting my Blog every now and then.  Now, let's announce the winner of my giveaway...

CONGRATS SHERRY ECKBLAD!!

Sherry, please email me at ashleyhorton010675@gmail.com

Last week, there were some amazing Christmas projects shared on the American Crafts Blog.  I was up with a set of handmade Christmas Cards, using the Peppermint Express collection.  You can create unique handmade cards, by using scraps from your collections and mixing in a few fun techniques or adding other paper items, such as vellum.


Supplies: 6x6 Paper Pad (366119) - Peppermint Express, Cocoa Lane (366096) - Peppermint Express, Iceplum (42276) - Remarks, Accent & Phrase Stickers (366106) - Remarks, White (71259) - Cardstock


Supplies: 6x6 Paper Pad (366119) - Peppermint Express, Figgymint (366108) - Bits, Iceplum (42276) - Remarks, Twinkle (366105) - Thickers, Accent & Phrase Stickers (366106) - Remarks


Supplies: Hollymint (366115) - Decorative Clothespins, Figgymint (366108) - Bits, Accent & Phrase Stickers (366106) - Remarks, White (71259) - Cardstock

I'm sure we will all have some leftover pieces from our Christmas collections this year, so if you plan to save them, they will definitely come in handy, when you are getting ready to create your Christmas cards next year!

Thursday, December 26, 2013

Top 10 Blog Hop

2013 is slipping away and next Wednesday, we will welcome our first day of 2014!  But before we welcome January 1, a group of Ladies got together to have a fun Top 10 Blog Hop, and share our 10 favorite projects from 2013!  It is difficult to choose 10 projects from a whole year's worth, but I think I did a good job, in picking some of my favorites and I hope you enjoy them too!

Before I share my layouts, here is the full list of everyone participating in the Hop.  Make sure you visit each Blog, because I know there will be some giveaways along the way!!


This first layout was created for one of my assignments for Get It Scrapped!. I am a big fan of Yellow and i loved this fun Yellow polka dot paper from October Afternoon, that is included in the Farm Girl collection.


This layout was also for a Get It Scrapped! assignment, to use Gold.  In the past, I have never been a big fan of Gold, but this year I found that I was slightly obsessed with it!!


I did this layout just for fun.  The Color Me Happy collection was a favorite release from Glitz Design this past year, and I thought it was just the right one to work with these fun photos of our little guy being silly.  


I did this layout as one of my Guest Designer projects for American Crafts, back in April.  The Lucky Charm collection from Dear Lizzy helped give a great nautical feel to my page!


This layout was created for one of our sketch challenges at Life.Paper.Scrapbook.  The Pier collection from Crate Paper was another favorite of mine this past year, and I loved being able to fussy cut from the awesome chevron paper!


This was a favorite photo and layout.  I love this cute photo of our middle daughter.  I loved it so much, I actually scrapped it twice!  And I used some of my favorite products on this one...a mix of the new lines from Chic Tags.


I had so much fun creating this page, because I used my CAMEO to create most of the elements on my layout.  That little owl cut file, was just waiting to be used and this was the perfect layout for it!


Fall is my favorite time of year, so I knew I had to include a favorite Fall layout.  I love taking photos of the Pumpkins every year, because they just happen to be my favorite color...Orange!  I used the Persimmon collection from Basic Grey on this layout...another favorite release this past year.  


This was another just for fun layout.  I couldn't resist scrapping this photo of our little guy at Bass Pro Shop, holding a cork gun and using the quote from A Christmas Story as the title of my page.  I mixed some of the Good Tidings collection with the December Exclusive Kit from Chic Tags.


And finally, this is a layout, that I actually shared at the beginning on this week, but it's definitely a favorite.  I loved the ornament shapes from the 12 Days of Christmas from Silhouette and I really loved the design I used for this page!


As far as exciting news goes, I had the privilege of Guest Designing this past year with October Afternoon, American Crafts, and My Mind's Eye.  I was also blown away by the opportunities to join several Design Teams this year including, American Crafts, Chic Tags, Silhouette, Echo Park, and Creative Scrappers.  And, there were several terms that ended with amazing Teams including, Let's Get Sketchy, The Paper Bakery, and Life.Paper.Scrapbook.

And while you're here...I can't have a Blog Hop without doing a little giveaway!!  One random winner will be chosen from the comments below, to win a little scrappy giveaway...sorry that I don't have a photo to share, but it's been a little crazy with the holidays going on and CHA work.  But it will be a great prize!!  Just leave a comment below, if you are already a follower.  If you are not following, become a new follower and let me know you did by commenting.  That's it..easy peasy!  I will leave comments open until Sunday, December 29th and announce a winner on Monday, December 30th!

Thanks for stopping by and now you are off to visit Jodi's Blog!


Monday, December 23, 2013

Silhouette 12 Days of Christmas | Happy Holidays

Christmas comes this week...ready or not!!  All of the presents have been bought, but the wrapping is another story!  Where are those elves when you need them??!!  Well, maybe you are a procrastinator like me and are planning to squeeze in some scrappy time, when you should be wrapping presents!!  If that's the case, then make sure you download the Free Shape from the Silhouette Store today, for our 12 Days of Christmas.

Today I am sharing a layout using the Ornament Free Shape.  There are three ornaments in this set, and you can use them to create a great Christmas-y look on your layouts or projects!  Here is a look at my layout and then I have a tutorial sharing how I created the sequin look on my ornaments.

Happy Holidays Layout by Ashley Horton

Happy Holidays4

I used the Vellum pocket technique to add sequins inside two of my ornaments and then finished each one of them off, with some Glitter, using the Double Sided Adhesive Paper, to add some sparkle and shine.

Start out by opening your shape and getting it sized to the dimensions you want to use on your project.  Once you have it at the size you want, follow these steps:

AHortonTutorial3

Once you have the outline created with the larger and smaller shapes, move the individual shapes off of the mat and cut the outline.  After it cuts, bring back the larger outside border shape and cut it twice on your Vellum.  Then you can start assembling the Vellum pocket and adding in your sequins.

AHortonTutorial1
AHortonTutorial2

Now you can decorate your ornament, by moving the decorative shapes from the Ornament back over to your mat and cutting them to fit your completed Vellum filled ornament.

AHortonTutorial4

For my last step, I used the Double Sided Adhesive Paper to add some sparkly touches to my ornaments.

AHortonTutorial5

I wanted to Glitter the ornament toppers and the snowflake piece for the center of one of the ornaments.  Once they were cut, I just placed the adhesive over my ornaments and added the Glitter.

Happy Holidays5

Don't forget to stop by the Silhouette Store and download the Free Shape for today!  You can create a similar look by using my tutorial or find new ways to get a unique look on your projects!

Shapes:
Star of Stars

Supplies:  Die Cut Machine, Cut File & Glitter:  Silhouette; Patterned Paper:  Heidi Swapp, My Mind's Eye & Teresa Collins; Tags & Stickers:  Chic Tags; Sequins:  Studio Calico & American Crafts; Enamel Dots:  My Mind's Eye; Bow & Washi Tape:  Freckled Fawn; Puffy Stickers: Heidi Swapp; Vellum:  Fynmark; Twine:  The Twinery


Sunday, December 22, 2013

Chic Tags Secret Santa Tag

Some of the Team members on the Chic Tags Team participated in a fun Secret Santa exchange over the past month!  We had fun doing a little Christmas shopping for one another, and then we created a tag, to send to our SS recipient for our reveal.  All of the tags were posted on the Chic Tags Blog yesterday and I wanted to pop in and share the tag I created to send to my SS recipient.


I couldn't make a Chic Tags tag, without using the Good Tidings collection.  The frame tag gave me the great idea to create a vellum pocket and add in some sequin stars from Studio Calico.  And I used some of the Gold rub-on stars over vellum and fussy cut them, to add to my tag.  I finished off my tag with some of the Gold letter alphas, enamel dots, and a brad!

Supplies:  Patterned Paper, Tag, Letter Stickers, Sticker, Rub-ons:  Chic Tags; Enamel Dots & Brad:  My Mind's Eye; Sequins:  Studio Calico; Vellum:  Fynmark; Other:  Embroidery Floss


Thursday, December 19, 2013

LIfe.Paper.Scrapbook | Peace on Earth

Today, we have a new Color Challenge on the Life.Paper.Scrapbook Blog and I have to say, that it's a gorgeous one!!  When I first saw it posted for our assignment, I fell in love!  I used a mix of products on my layout to get just the right look to go with the colors.


You can play along with us this month, for the chance to win from our Sponsor!


Project Real Life with Becky Higgins
Cultivate a good life and record it, with Becky Higgins
http://www.bigpictureclasses.com/project-real-life-2014.php
1/9/2014 $99
12 Weeks

About the Class
Becky's motto, "Cultivate a good life and record it," is at the heart of everything she does with her blog, her Project Life products, and her everyday life.
In this 12-week interactive workshop, she'll share the 12 foundational principles she follows in her real life as a mother, memory keeper, blogger, homemaker, author, instructor, and successful business owner. Becky's main goal is to inspire you to see the everyday beauty in your world and celebrate ordinary moments, but she'll also show you how to preserve the real-life pictures you take using her signature Project Life system.
After the overwhelming response to this workshop during its first run in 2012, Becky is thrilled to invite a new crop of memory keepers to plan, create, and remember…together. There are special offers below for the first 500 to sign up, and an exclusive set of Project Life Themed Cards ("Life Lists" theme) available for purchase in February ONLY to Project Real Life students.

Learn more and register here

Promo video code
http://youtu.be/PQq7stchq4A


And before I go today, I just wanted to say that this will be my last reveal with Life.Paper.Scrapbook.  I have loved serving on the Team with such a talented group of Ladies over the past months, and creating for the monthly Sketch and Color Challenges!  I can't wait to see who the new Team members will be for the next term and I think I will still try to sneak in some layouts based on the challenges and link them up each month!!  :)  

Supplies:  Patterned Paper:  My Mind's Eye & American Crafts; Tags:  Chic Tags; Rub-Ons:  Pink Paislee; Candy Dots:  Skipping5; Color Shine:  Heidi Swapp; Brads, Enamel Dots & Washi Tape:  My Mind's Eye; Paper Clip:  Freckled Fawn; Cut Files:  Two Peas in a Bucket; Die Cut Machine:  Silhouette Cameo

Silhouette | Sweater Weather

Are you by any chance getting a CAMEO from Santa this year??!!  I have been a CAMEO owner for a year now, and I am still blown away by all of the fun things it can do…like making your own stickers!  I wanted to work with the White Sticker Paper, so I found this cute Penguin shape in the Silhouette Store, to incorporate on my layout.

Sweater Weather2

How cute is this little Penguin!  Once I had the shape open in Studio, I filled each of the separate pieces with the colors I wanted for my Penguin.  When I had all of the colors in place, I moved all of the pieces together in a single shape.  I wanted a circle outline around the Penguin, so I drew a dark Gray outline with the circle tool.  Once my design was completed, I printed it out on the Sticker paper by using the print feature in Studio.  After it was printed, I lined it up on my CAMEO mat and sent it through the machine to cut around the Gray circle and Viola!, a perfect custom made sticker for my layout!

Sweater Weather5

I also used a few more cut features, by cutting the Sweater Weather cut file into my background paper for my title.  I always love the negative cut look of a title and then it’s fun to back it with a different colored patterned paper.  The Sweater Weather cut file also incorporated a small heart.  I didn’t want to use it as a part of the title, so I ungrouped it and moved it out to the side of my mat in Studio, until after I cut my title.  Then I moved the heart shape back over to the mat and enlarged it, to cut my heart shape.  I cut the same heart in a smaller shape to layer over the larger one, and added dimension by adding pop dots in between the two.  This is a great way to create your own personalized embellishments.  Once my heart shapes were in place, I was able to add some twine, wood veneers, and an arrow cut word to get the look I was going for.

Sweater Weather3


Don’t be afraid to try new things with your shapes!  Creating stickers is a fun way to use the shapes from the store and personalize them with your own color choices.  And I love to look for shapes that have multiple shapes in one purchase.  You can use these shapes to create your own custom shapes by adding to them or welding the various shapes together for a fun look on your layouts and projects!

And don't forget to stop by the Silhouette Blog today, to see how one of our Designers used today's Free Shape, and then pop over to the Silhouette Store to download today's shape!

Shapes:

Supplies:  Die Cut Machine, Sketch Pens & Sticker Paper:  Silhouette CAMEO, Patterned Paper & Tags:  Elle's Studio, Wood Veneers:  Studio Calico; Stamps & Enamel Dots:  My  Mind's Eye; Twine:  American Crafts; Sequins:  The Paper Bakery

Wednesday, December 18, 2013

Echo Park 2014 Design Team!

I have some amazing news that I wanted to share with you today...I've been invited to be part of the Echo Park 2014 Design Team!  I know most of you saw the announcement go up yesterday and I wanted to say thank you for all of the kind words!  Most of my local friends have no idea what goes on in the scrapbook world and I am so thankful for the fun, sweet Ladies, I have met online who share in my love of this hobby!

I was excited to see several friends on the Team along with me and I am looking forward to getting to know the other Ladies on the Team!  And I can't wait to start sharing some of my Echo Park projects with you!  I have loved EP collections for a long time and it is such an honor to be invited to work with their products!  

In case you missed the announcement, here is a look at the upcoming Team for this year!

 
And if you have a minute, make sure you stop by the Silhouette Blog!  I am sharing a layout today, using the fun Sticker paper.  I'm pretty sure the CAMEO can do anything and everything!!  :)

Tuesday, December 17, 2013

You'll Shoot Your Eye Out Kid

If you are a fan of A Christmas Story, then you are definitely familiar with that title!  Some people love the movie, some people hate it...but we LOVE it!  It's on our must watch list every year.  So...I couldn't pass up the opportunity to use one of the most famous quotes from the movie, on this layout of our little guy, as he was posing with a cork gun and wearing a cowboy hat, after visiting Santa.  This one is a just for fun page, because I wanted to get the memory documented, without having any set DT requirements for it.  It is always nice to step back and do a page that you create from scratch, with no sketches or assignments in mind.  


I did use the yummy Good Tidings collection from Chic Tags, mixed with the amazing December Exclusive Kit.  I always say that each month's is my favorite, but then the next one is just as awesome!  I have been hoarding that fab-u-lous wood grain paper, but I thought this page was definitely worthy of breaking it out!  I added a lot of layers under my photos and embellished with the flair button and tiny stars from the December Exclusive Kit.  I also thought it would be fun to do a White title on the White card from the Kit.  I created my title in Silhouette Studio and welded it together.  I cut it on the Adhesive Backed Cardstock from Silhouette, and let me tell you, that stuff is so awesome!  It cuts so smoothly, even intricate cuts, and then it's ready to adhere to your page, as soon as it comes off the mat.  You don't have to deal with any messy adhesives to get your cuts adhered to your page!

Thanks for stopping by today...and all of the other days that you visit my little Blog!  I always appreciate your sweet comments and being able to interact with fellow scrapbook friends!  My second post is also up today, on the My Mind's Eye Blog, if you would like to stop by and check out the rest of my projects!!

Supplies:  Patterned Paper, Tags, Flair Button, Wood Veneers, Stickers:  Chic Tags; Wood Veneers:  Studio Calico; Vellum:  Fynmark; Die Cut Machine & Adhesive Cardstock:  Silhouette 
 

Monday, December 16, 2013

Chic Tags | Me, Myself & I

Notice anything new??!!  I made some little changes to my Blog!  :)  I thought about waiting until January 1st, and have it brand new for the New Year, but I just couldn't wait that long!!  I love the cleaner look...what do you think?

Yesterday, our new Sketch Challenge went up on the Chic Tags Blog!  Hard to believe, that it's the last one for 2013 and then we'll be looking forward to new challenges in 2014!  I wanted to stop in and share my layout based on the Sketch, and I hope you will head over to the Blog to check out more inspiration from the Design Team!!


I changed things up a little bit on this Sketch and decided not to use the banner, but I extended my embellishments by creating a cluster down on the right hand side of my page.  I mixed the Good Tidings collection with some items from the November Exclusive Kit.  I love using holiday collections to create an everyday look on my layouts.

You can play along with the Sketch too, by leaving a link to your layout in the comments on the Challenge Sunday post on the Chic Tags Blog.  The deadline is NOON on Saturday, January 4th.  A random winner will be chosen to win a Chic Tags Grab Bag.  You don't have to use Chic Tags products on your layout, but we love it when you do!

AND...before you go, I just wanted to share that I am Guest Designing with My Mind's Eye!  I will have projects on their Blog today and tomorrow and I would love for you to stop by, check them out and leave a little love!  Here's a sneak at one of the projects I created:


Supplies:  Patterned Paper, Tags, Flair Button, Stamps, Letter Stickers & Rub-Ons:  Chic Tags; Thickers & Wood Veneer:  American Crafts, Enamel Dots:  My Mind's Eye; Resin Flower:  Freckled Fawn; Paper Clip:  Maya Road

Thursday, December 12, 2013

Silhouette | The Wonder of it All

Do you ever get the idea for a layout in your head, but you're kind of afraid to try to put it on paper?  That's the problem I ran into with today's layout.  I had a single photo of the kids standing in front of the tree and looking at the ornaments.  I thought to myself, wouldn't it be great, to use the photo in a Christmas tree design on the page?  I had a picture in my head of what I wanted to do and my Silhouette CAMEO came to the rescue!

Wonder2

I started out by opening my photo in Silhouette Studio and sizing it to 3 by 3.  I placed the photo in the center of the grid for the mat, and added the text for my title above and below the photo.  Then I just cut out the title pieces and placed everything in the same order, on my cardstock.

Picture1

I love the Sketch Pens, and I used the Black pen to do an outline for the word "Wonder".  After I drew out the word with the Sketch Pen, I used the Offset tool to expand the margin around the word and then replaced the blade to cut out the word.

Wonder3

I have also become slightly addicted to the Double Sided Adhesive paper and using it with the Silhouette Glitter.  It adds such a fun look to your projects and a little bit of sparkle too!  I cut the Star shape from the Silhouette store on the Double Sided Adhesive paper, placed it in it's position on my page and then sprinkled over it with the Glitter.  The Starter Kit also comes with a brush that lets you wipe away any excess Glitter.

Wonder4

So, next time you are thinking about trying something a little bit different with your page design, use Silhouette Studio to layout the design of your page.  You will be surprised by all of the fun things you can do!

Shape:


Supplies: Patterned Paper, Brads, Washi Tape, Chipboard:  My Mind's Eye; Sequins & Phrase Stickers:  American Crafts; Die Cut Machine, Glitter & Sketch Pens:  Silhouette