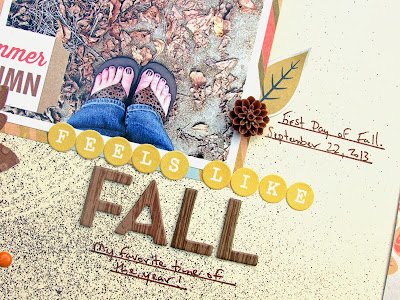
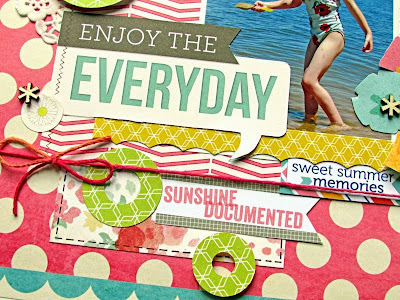
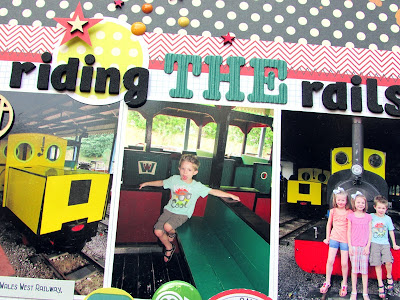
Today, we have a fun new Challenge Sunday up on the Chic Tags Blog! We are also switching things up a bit, and giving you longer to play along. We will have two Sketch challenges each month, that will run two weeks long and one main Challenge Sunday, that will post at the end of the month and run for a full month. Now you will have plenty of time to play along!
Here is a look at our Color Challenge for this month and my take on it:
I like to gather papers and embellishments that incorporate the colors for a Color Scheme and then start putting together in "doses" that work for my page. For this layout, I initially started with the fun Triangle patterned paper from Glitz Design and then started pulling in other papers and some of my Chic Tags, that worked with the Color Scheme.
Come play along with us and don't forget to leave a link to your layout in the comments section of the Challenge Sunday Color Scheme post on the Chic Tags Blog!
Supplies: Patterned Paper: Glitz Design; Cardstock: American Crafts; Tags: Chic Tags; Buttons: October Afternoon; Puffy Sticker: Skipping 5; Flair Button: The Paper Bakery; Color Shine: Heidi Swapp; Wood Veneer: Studio Calico; Polaroid Frame: Maggie Holmes
Sunday, September 29, 2013
Friday, September 27, 2013
Super Friends
Yesterday, I shared a layout on the Chic Tags Blog, using some tags from the Road Trip and Everyday Life II collections. And I also used some of the fun Free Cut Files that are available in the Chic Tags store.
Our four year old son has really gotten into the whole Super Hero thing over the past several months and one of his favorite action figures is Captain America. He plays with him around the house, takes him on walks with us, and usually has to sleep with him too! By some miracle, I managed to get him to stand still for about a second and snapped this cute photo on my phone. Even though it's not the greatest lighting or background, I knew I had to get this photo on a layout. Sometimes those are the best pictures for everyday memories.
You may notice repeating elements on my page...Circles and Stars! The circle tags from the Road Trip and Everyday Life II collections worked perfectly for the circle design on my page and also reference Captain America's shield. I brought the star motif in, by sending the large Road Trip circle tag through my Cameo and cutting a 1 inch star and then backing it with Black Washi Tape. And the circle/star border that is available in the Chic Tags Store, with the Free Cut Files tied the Circle and Star design all together on my layout. And I used some Inky Black Mister Huey's on the Studio Calico wood veneers to create the outer circle of my design.
Supplies: Cardstock & Thickers: American Crafts; Patterned Paper: Pebbles Inc., Tags & Cut Files: Chic Tags; Buttons: October Afternoon; Wood Veneers & Spray Mist; Studio Calico; Star Paper Clip: Two Peas in a Bucket; Washi Tape: Prima
Thursday, September 26, 2013
Get It Scrapped! Motif: Trellis Pattern
I'm always intrigued by the assignments we have at Get It Scrapped!, because Debbie and Amy are always so on trend with what's going on in the scrappy world. I always know, when they choose a trend or motif to work with, I will see it popping up here and there in patterns and embellishments. Yesterday, we shared an article on the Trellis pattern, and yes, it is one that you can see on brand new products right now, including the Cut & Paste collection from My Mind's Eye.
I used my Cameo to create the Trellis pattern on my layout and layered it over a patterned paper.
I went out to do a little photo shoot one afternoon and the kids wanted to join in too...they are not shy when it comes to the camera. My reasoning behind the Trellis pattern, with these photos, is kind of a word reference...a Trellis reminds me of flowers...flowers remind me of gifts for Valentine's Day...and Valentine's Day reminds me of Love, which ties in with the theme of my photos. I love the open look to the Trellis pattern, that I cut on my Silhouette Cameo, and the fact that it lets a lot of the "love this" text from my pattern paper show through, while still keeping a strong look from the Trellis design.
Make sure you stop by Get It Scrapped!, to see how the Creative Team incorporated the Trellis pattern into their layouts!!
Supplies: Patterned Paper: Allison Kreft & Studio Calico; Color Shine: Heidi Swapp; Mask: The Paper Bakery; Tags: Elle's Studio & Chic Tags; Button: October Afternoon; Enamel Dots: My Mind's Eye; Thickers: American Crafts; Font: Pacifico; Wood Veneers: Studio Calico; Other: Cocoa Daisy June Kit
Wednesday, September 25, 2013
Creative Scrappers Sketch 251
I am so excited to see Creative Scrappers back up and running! I served on the Team, before Kristine took a break over the Summer and I loved it! The Sketches are always so awesome and inspiring. So I just knew I had to play along with Sketch 251, and and I had a Fall photo and the Basic Grey Persimmon collection just waiting to be used and I went to work!
I followed the design of the Sketch fairly close. I did do a little bit of a flip flop with the Title and journaling, but most of the elements of the Sketch are in the same place. I added a few die cut leaves in place of the stars on the Sketch. After I cut them, I embossed a dot pattern over the leaves and used an Emery Board to distress over the embossing and remove some of the color from the Brown paper.
Thanks for stopping in today and taking a look at my newest layout! And I do have to mention, that Fall is definitely my favorite time of year...although, I am still waiting for our temps around here, to get a little more Fall-ish!!
Supplies: Patterned Paper, Chipboard & Sticker: Basic Grey; Spray Mist, Circle Mask & Wood Veneer: Studio Calico; Tag & Vellum: Elle's Studio Limited Edition September Kit; Enamel Dots: Freckled Fawn; Thickers: American Crafts; Mini Market Stickers & Buttons: October Afternoon; Resin Flower: The Paper Bakery
Tuesday, September 24, 2013
The Paper Bakery Double the Fun! & CK Mixed Media Winner
***Before we get to my post, I am announcing the Winner of the CK Mixed Media Scrapbooking Volume 2 issue. Random.org selected lucky number 30...JENNIFER SHAW!! Jennifer, please contact me at ashleyhorton010675@gmail.com to find out the details for receiving your issue!!***
Today, I am sharing two layouts using the September Scrapbook Kit, Art Fair, from The Paper Bakery. There is an awesome mix of new Glitz Design, My Mind's Eye, and Bella Blvd. in this month's Kit. I love that you can make so many different looks from TPB kits and today, I have one layout that features a more masculine look and a second that has a more girly look.
My first layout is based on our newest Sketch Challenge. You can play along with our Sketch, created by Juliana Michaels, for the chance to win some awesome Paper Bakery goodies!!
My second layout uses more of the Glitz Design and My Mind's Eye, included in this month's Kit. I also used several of the awesome new Stamps, that we now carry.
I also incorporated a few extras on both layouts, that are not included in the Kit, but are available in The Paper Bakery Shop. And...you still have time to get in on our Free Shipping Sale, that ends tomorrow. You can use the Code FALLDAY2013 at check out to receive Free Shipping on your purchase!
Monday, September 23, 2013
Enjoy the Everyday
We have a new Sketch reveal up today on the Let's Get Sketchy Blog. Today is my final reveal with Let's Get Sketchy and I have loved creating layouts and sketches with this awesome Team for the past six months! They are definitely a fun group of Ladies and we are always chatting about something on FB! I will miss working with them, but I know that I will still be "seeing" them around the webby world! Here's a look at my layout and this week's Sketch:
The Sketch has a slight tilt, but the tilt design is still a little out of my comfort zone, so I decided to straighten up my design. The tilt design is something I have to work on, because I do love it, when I see other pages designed with a tilted photo, papers and embellishments. To recreate the circles from the Sketch, I used a large doily behind my photo and then just cut several circles on my Cameo. I added pop dots under some of them, to add dimension to my page. And most of the product used on this layout is from the June Cocoa Daisy Kit, that I won from one of their Instagram giveaways. I loved the Elle's Studio that they had in the Kit and I mixed in some of my own Elle's from my stash.
We would love for you to play along with us, so just make sure you link up your layout based on this week's Sketch on the Let's Get Sketchy Blog!!
Supplies: Patterned Paper: Elle's Studio, Crate Paper & Simple Stories; Tags: Elle's Studio; Wood Veneers: Studio Calico; Flair Button, Buttons, Doily & Twine: Cocoa Daisy June Kit
Sunday, September 22, 2013
Chic Tags: Sketch It Out | Best Friends
It's time for a new Challenge Sunday at Chic Tags! Today's Sketch features a fun element...large Triangles! I was really blown away with the way the Design Team used this week's Sketch and you can pop over to the Chic Tags Blog, to see what they did. I had fun with this one too, and here is my take!
I don't use black and white photos often, but I thought this one just needed to be b&w. I paired some of the Love Note collection from Chic Tags with the new Hey Kid collection from Pink Paislee. I also used one of the fun Chic Tags Free Cut Files for the title of my page. The Best Friends file folder cut file worked just right for my title space and I outlined some of the letters with a fine tip Sharpie and added some patterned paper behind a few of the letters.
We would love for you to play along with us! All you have to do, is create a layout based on the Sketch and leave a link to your post on the Chic Tags Blog, under this week's Challenge Sunday! A random winner will be chosen to win a $10 Gift Certificate to the Chic Tags store!!
Supplies: Patterned Paper: Pink Paislee; Tags & Cut File: Chic Tags; Wood Veneers & Spray Mist: Studio Calico; Washi Tape & Flair Button: The Paper Bakery; Star Paper Clip: Two Peas in a Bucket; Button: October Afternoon; Vellum: Fynmark
Friday, September 20, 2013
Creating Keepsakes Mixed Media Scrapbooking Volume 2 Blog Hop
Happy Friday everyone and welcome to the Creating Keepsakes Blog Hop, to let you know all about the new Mixed Media Scrapbooking Volume 2 Special Issue. There was a time, that I didn't think Mixed Media was for me, or that I was a Mixed Media Scrapbooker. But did you know, that if you've ever mixed two or more art mediums on a layout, then you are a Mixed Media Scrapbooker??!! I know, right??!! I never considered myself a Mixed Media artist, but by combining things like Spray Mist, acrylic paint, Gesso, Modeling Paste, Glitter, and more, then you are using Mixed Media on your projects!
I have had a chance to look through the issue and there are so many great ideas for using different mediums, colors, fabric, items around the house and much more. I created two layouts for the Around the House article and would like to share one of those with you today.
Unfortunately, there was a printing mishap with this layout, in the issue, so I wanted to share this one with you, so you could see the full layout. I used Mixed Media in several ways on this layout:
1. To create the circles on my layout, I used a paper towel roll dipped in acrylic paint and stamped the circles on my background paper.
2. I covered White cardstock with aluminum foil and cut out heart shapes on my Cameo, to make some of the hearts for the border across my layout.
3. I splattered small touches of Spray Mist across both pages.
Don't be afraid to look for items around your house or items out of the norm, that you wouldn't always immediately think of, to use on your layouts. This is a great way to give your layouts a one of a kind, custom look.
We have some more Ladies, sharing their work from this issue, so make sure you stop by and visit their Blogs!
Mou Saha
Riikka Kovasin
Cindy Tobey
Stacy Cohen
Ashley Horton <-------- You Are Here.
Susan Weckesser
Kim Watson
And before you go, here are some chances for you to win:
1. Make sure you visit the Creating Keepsakes Blog to enter the Contest.
2. You can win your very own issue of Mixed Media Scrapbooking Volume 2. Just leave a comment on this post or become a new follower and let me know you did. I will choose a random winner on Tuesday, September 24. US winners will receive a print copy of the magazine. International winners, you’ll be given a download for a PDF version of the magazine.
Also, if you are looking for more information on this Special Issue, please check out these links:
Mixed Media on CK
Mixed Media in the Online Store
Thanks for stopping by and enjoy the Hop!!
Supplies: Cardstock: Bazzill; Patterned Paper: American Crafts, Crate Paper & Pink Paislee; Acrylic Paint: Plaid Enterprises; Spray Mist: Heidi Swapp & Studio Calico; Flag: Elle's Studio; Buttons & Stitched Hearts: Michael's; Chipboard: Heidi Swapp; Paper Straw: Aardvark Straws; Punch: Anna Griffin; Stickers: American Crafts; Baker's Twine: The Twinery; Washi Tape: Love My Tapes; Other: Aluminum Foil & Paper Towel Roll
I have had a chance to look through the issue and there are so many great ideas for using different mediums, colors, fabric, items around the house and much more. I created two layouts for the Around the House article and would like to share one of those with you today.
(as seen in the Mixed Media Scrapbooking Volume 2 Special Issue. Posted with prior permission by the Creative Crafts group. )
Unfortunately, there was a printing mishap with this layout, in the issue, so I wanted to share this one with you, so you could see the full layout. I used Mixed Media in several ways on this layout:
1. To create the circles on my layout, I used a paper towel roll dipped in acrylic paint and stamped the circles on my background paper.
2. I covered White cardstock with aluminum foil and cut out heart shapes on my Cameo, to make some of the hearts for the border across my layout.
3. I splattered small touches of Spray Mist across both pages.
Don't be afraid to look for items around your house or items out of the norm, that you wouldn't always immediately think of, to use on your layouts. This is a great way to give your layouts a one of a kind, custom look.
We have some more Ladies, sharing their work from this issue, so make sure you stop by and visit their Blogs!
Mou Saha
Riikka Kovasin
Cindy Tobey
Stacy Cohen
Ashley Horton <-------- You Are Here.
Susan Weckesser
Kim Watson
And before you go, here are some chances for you to win:
1. Make sure you visit the Creating Keepsakes Blog to enter the Contest.
2. You can win your very own issue of Mixed Media Scrapbooking Volume 2. Just leave a comment on this post or become a new follower and let me know you did. I will choose a random winner on Tuesday, September 24. US winners will receive a print copy of the magazine. International winners, you’ll be given a download for a PDF version of the magazine.
Also, if you are looking for more information on this Special Issue, please check out these links:
Mixed Media on CK
Mixed Media in the Online Store
Thanks for stopping by and enjoy the Hop!!
Supplies: Cardstock: Bazzill; Patterned Paper: American Crafts, Crate Paper & Pink Paislee; Acrylic Paint: Plaid Enterprises; Spray Mist: Heidi Swapp & Studio Calico; Flag: Elle's Studio; Buttons & Stitched Hearts: Michael's; Chipboard: Heidi Swapp; Paper Straw: Aardvark Straws; Punch: Anna Griffin; Stickers: American Crafts; Baker's Twine: The Twinery; Washi Tape: Love My Tapes; Other: Aluminum Foil & Paper Towel Roll
Thursday, September 19, 2013
Life.Paper.Scrapbook September Color Challenge
It's time for a new challenge at Life.Paper.Scrapbook and we have some great colors for you to work with on your layout or card! When I first saw the color scheme, I didn't initially plan on doing a Halloween layout, but that's exactly what I ended up doing. I've found the easiest way to start with a color scheme is to think about collections that I have, that may encompass all or most of those colors, and when I saw this scheme, the Witch Hazel collection from October Afternoon popped in my head. Once I started looking through my product, I didn't have a whole lot of the collection left, so I pulled a full 12x12 sheet from the Fancy Pants Memories Captured collection and went to work.
This month you could win a place in Craft Happy: 12 weeks of cheerful projects to celebrate the holidays (and life in general)
Supplies: Patterned Paper: Fancy Pants & October Afternoon; Stickers & Tin Pin: October Afternoon; Spray Mist & Wood Veneers: Studio Calico; Enamel Dots: My Mind's Eye; Mask: The Crafter's Workshop; Modeling Paste: Liquitex; Tags: Elle's Studio; Arrow Paper Clip: Two Peas in a Bucket; Chipboard Star: UmWow Studio
I used the soft Yellow for the dominant color on my layout and then added the darker colors in smaller doses. This is also a great way to use a collection, that you may only have scrap pieces left in your stash. And you can always use wood veneers with spray mist, to customize your embellishment colors to match up with a color scheme.
Now, we want you to play a long with us and show us your take on the color scheme!! And here's some exciting news about our monthly color challenge Sponsor:
Life.Paper.Scrapbook is partnering with Big Picture Classes as our sponsor for our Colour Challenges. Every month we will tell you about one of the amazing classes they have over there and one participant will get the chance to win a spot in the class.
This month you could win a place in Craft Happy: 12 weeks of cheerful projects to celebrate the holidays (and life in general)
http:// www.bigpictureclasses.com/ crafthappy/index.php
Spend your holiday months with Amy creating a little something for Halloween and Thanksgiving, plus a whole lot of somethings for Christmas: gifts, wreaths, glitter houses, ornaments, games, and a hip, handmade advent calendar.
Introducing Craft Happy, a 12-week crafting adventure that will have you creating beautiful things just for the fun of it, learning new skills, connecting with cheerful crafters worldwide, and generally smiling from ear to ear.
AND...BPC has added a $10 off offer to the Craft Happy class. Use the Code GRIN.
If you would like the chance to win, make sure you visit the Life.Paper.Scrapbook Blog and link up your project with us. You could also be chosen as one of our Top 3 featured projects! And if you haven't had a chance to play along with our September Sketch Challenge, there are still a few days left, to link up your layout!Supplies: Patterned Paper: Fancy Pants & October Afternoon; Stickers & Tin Pin: October Afternoon; Spray Mist & Wood Veneers: Studio Calico; Enamel Dots: My Mind's Eye; Mask: The Crafter's Workshop; Modeling Paste: Liquitex; Tags: Elle's Studio; Arrow Paper Clip: Two Peas in a Bucket; Chipboard Star: UmWow Studio
September Sketch Week with Allison Davis
I am back today, to share a new Sketch from Allison Davis for September Sketch Week! If you are unsure of what Sketch Week is, you can check out the information HERE on Allison's Blog. The Sketch for this month, is a double page Sketch, but I am a one page kind of girl, so I decided to work with the left hand side of the Sketch and here is what I created:
Even though I worked only with the left hand side of the Sketch, I didn't deviate much from the design. I kept my title and embellishing in the same areas designated on the Sketch, but adjusted my journaling area to the far left hand side of my page, since I didn't use the right hand side of the Sketch.
If you would like to download the September Sketch, make sure you stop by Allison's Blog, for all of the info!
Supplies: Patterned Paper: Pink Paislee; Flair Button: A Flair for Buttons; Wood Veneers: Studio Calico & Freckled Fawn; Color Shine: Heidi Swapp; Enamel Dots: Freckled Fawn & My Mind's Eye; Thickers: American Crafts
Subscribe to:
Posts (Atom)