Showing posts with label The Cut Shoppe. Show all posts

Friday, April 5, 2019

Pinkfresh Studio 5th Birthday Blog Hop Celebration

https://www.pinkfreshstudio.com/

$25 GIFT CERTIFICATE WINNER:
MAUREEN BAUGI!!

Hello there!  Welcome to my Blog!  I am so excited to be a part of Pinkfresh Studio's 5th Birthday Blog Hop Celebration!!  I have been a fan of Pinkfresh Studio since the company began and have served on the Design Team twice!  The products are always fresh and original and I love using them for my projects.  I have two layouts to share with you today, and make sure you read the entire post for some awesome GIVEAWAY information!!

My first layout uses the fun Out & About collection.  It is perfect for any and all travel themed projects, and I LOVE the colors in this collection!!


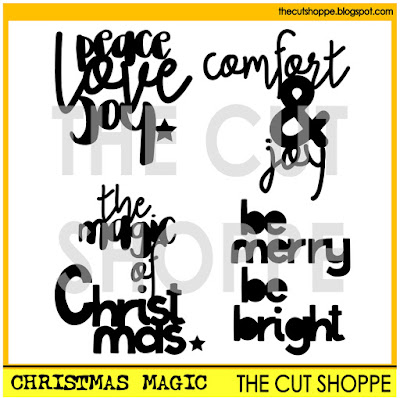
I had so much fun putting this layout together!!  The patterned papers from the collection went great with the Open Letter Alpha Cut File from The Cut Shoppe store!


On my second layout, I used the Everyday Musings collection and I wanted to add dimension and texture!  Layered hearts add lots of dimension and machine stitching bring in some great texture.


I used my Silhouette Cameo to cut the heart shapes from several of the patterned papers in the Everyday Musings 6x6 paper pad.  Then I folded each one down the center, layered them together and machine stitched them.  I also drew a large heart shape on my background card stock and then placed the layered hearts along the shape.


I placed my photo and embellishments in the center of the heart shape.  I love the way it creates a frame around all of the elements on my layout!


There will be (3) Grand Prizes picked from the Pinkfresh blog: 

1. Liquid Watercolor full set

2. Set of our 3 current paper collectionseee

3. Entire April Essentials die release

AND, I am giving away a $25 Gift Certificate to the Pinkfresh Studio Shop!!

ALL WINNERS WILL BE PICKED FROM COMMENTS LEFT ON THE BLOGS!!

Winners will be announced Sunday, April 14th on the Pinkfresh Studio GIVEAWAY PAGE. You MUST check the Giveaway Page and claim your prize within 2 weeks.

1. Free die (XO word) with purchase. There is no code necessary, and the die will automatically load into your cart while supplies last.   


2.  Free/discounted shipping from April 5-7th on orders $25+. Must use the code FREESHIP5THBDAY. Shipping is free in the USA, and $5.50 off for our International friends.

Thanks so much for celebrating with us! Make sure you visit and comment on each of the Designer's Blogs along the Hop. The more Blogs you comment on, the more chances to win these awesome giveaways!!


You are invited to the Inlinkz link party!
Click here to enter

Thursday, July 12, 2018

The Cut Shoppe | Rest Stop

Post contains Affiliate links, which means at no additional cost to you, I will earn a commission if you click on a link and make a purchase.

Hey there!  Today I'm on The Cut Shoppe Blog with a layout using the new Tangled Triangles 8.5x11 cut file and the Super Star Alpha cut file.  I used the new Simple & Sweet collection from Pinkfresh Studio, which you can find HERE in the Scrapbook.com store!


https://www.etsy.com/listing/627789033/the-tangled-triangles-cut-file-can-be?ref=shop_home_feat_1

https://www.etsy.com/listing/627788449/the-super-star-alpha-can-be-used-for?ref=shop_home_feat_2


I used two of my favorite techniques on this layout, hand-stitching and backing a cut file.  I worked on my title first, and used the Silhouette Cameo sketch pens to draw out part of the title for hand-stitching.  And I wanted to use a large, vertical title on the layout to fill in the space next to the Tangled Triangles cut file.


After I finished my title, I worked on backing the cut file with some of the 6x6 papers from the Simple & Sweet collection.  I didn't want to fill in all of the triangle spaces, but I thought it would be fun to bring in some pops of color and pattern with a few of the papers.  


I used a larger than normal photo on the layout, and changed it to black & white because I really wanted it to stand out.  Then I placed embellishments around the Tangled Triangle cut file to add balance to the design.

I have a new Process Video on my YouTube Channel, too!  You can check it out here or head over to my channel and become a new subscriber!!


There are two other new cut file designs in The Cut Shoppe Etsy store.  You can visit the shop to pick up all four new designs!! 

https://www.etsy.com/shop/TheCutShoppe

Thanks for stopping in today!  I'll be back tomorrow with a new layout in my Traveler's Notebook!

Sunday, April 8, 2018

Moodboard Girls | Vacation

Hi there!  I am super excited to join the awesome Moodboard Girls group!  If you haven't had a chance to check them out, it's a group of talented crafters that post projects each month, based on a new Moodboard.  You can find inspiration from each of the Designers by following the line up on Instagram, which I'll have later in the post.

Here is the Moodboard for this month!

  
This Moodboard has some pretty shades of Pink, and that was the first thing that stood out to me.  But once I looked at it a bit more, I decided to go in a totally different direction and take inspiration from the sea bird and sea oats.  That took my layout idea to a beach vacation themed page.


I used the Here & There collection from Crate Paper, because it's a great travel collection.  Then I cut the Outburst cut file from The Cut Shoppe from my background paper.  I used a mix of the 6x6 patterned papers to back the cut file.  I also placed my photo in one of the open spots of the cut file to keep a clean look on the layout.


For my title, I used Thickers from the Here & There collection, and placed a letter in each spot of the cut file.  Then I added embellishments next to some of the letters.  I also used a mix of embellishments in the center of the cut file to add interest and dimension.


I had so much fun being inspired by the April Moodboard, and I hope you've found some inspiration in my layout.  If you create a project based on the mood board make sure you share it on Instagram and use the hashtag #moodboardgirls, so we can leave you some love!! 

Now make sure you follow the line up, to see what everyone else created!

Monday, April 2, 2018

Pinkfresh Studio 4th Birthday Bash Blog Hop!


Hi there, and thanks for joining in the fun as we celebrate Pinkfresh Studio's 4th Birthday!!  There's lots of inspiration along the hop and some awesome prizes up for grabs, so don't miss out!

Before I share my layout with you, let's talk GIVEAWAYS!!  A prize will be given away on each Blog, so make sure you comment on each Designer's post.

One winner from my Blog will win $40 in Pinkfresh Studio products!!  Comments for the giveaway will close on April 9th, at 12:30PM PST.  You will need to check on the Pinkfresh Studio Blog to see if you are one of the lucky winners!

You also have the chance to win a $100 Gift Certificate to the Pinkfresh store by leaving a comment on the PF Studio Blog.

And...there are also chances to win on Instagram!!  One winner will receive a $100 Gift Certificate to the Pinkfresh Studio store, by reposting the PF Birthday Bash IG Story.  A winner will be selected within 24 hours.

Last, but not least, there will be a Stamp and Die bundle giveaway on the PF Studio Instagram as well!

WOW!!  That's a lot of Pinkfresh goodies up for grabs!!  Good luck!

Now for a look at the layout I created, using the new Let Your Heart Decide collection. It's one of my new favorites, for sure!!


I love everything about all of the embellishments in this collection, so I used as many as I could over a cut file in the background!


The colors in this collection are great!  I love that they work for feminine, masculine, or just everyday layouts.


If you're just now joining in the Hop from my Blog, here's a full list of the Hop order, so you don't miss out on any chances to comment.   


Wednesday, October 11, 2017

Crate Paper | Fun Times

Fall is my favorite!  And one of our favorite fall family activities is the fair!  The kids love the rides and the fair food is always so good...even if it isn't good for you.  The Crate Paper Carousel collection by Maggie Holmes, is made for documenting fair photos.  I combined it with a fun cut file, to create multi-patterned paper look on my layout, today.


I cut the cut file design in two different sizes, and then backed each of the open spaces with a different patterned paper.  Once I had that finished, I layered the two cut files, adhering the smaller one with pop dots for dimension.  I placed my photo near the bottom right-hand corner, and layered it with the title.  Then I tucked in a few other embellishments to draw attention to the photo.


I created a second cluster area at the top left-hand corner of the layout, to give the page balance.  Those cut flags from the chipboard sheet were a must have on the layout!  And I couldn't leave off the adorable ferris wheel chipboard embellishment!  I also worked in some of the puffy stickers, to add more interest to the layout.


When I thought I had everything finished, I spied the cute Sticky Note Banner Shapes and had to find a way to incorporate them.  The scalloped half circles fit right in, tucked under the edge of the outer circle, and I love the way it turned out!

You can also find ways to use the Carousel collection for everyday photos and special occasions.  It would be great for a girly themed birthday layout!

Tuesday, September 26, 2017

Crate Paper | Capture Today

The Crate Paper Gather collection by Maggie Holmes, is still one of my favorites for fall layouts.  The calendar says it's fall here, but our temperatures do not!  But I don't let that stop me from documenting my favorite season!


You can never go wrong with a wood grain paper for your background.  It gives you a great pattern and color, but it's subtle enough not to overwhelm the rest of your layout.  I had to have leaves, since the theme of my layout was fall, so I used a cut file from The Cut Shoppe Etsy store.  Then, I backed the leaves with three different papers from the Gather collection.


For the design of the layout, I used the leaves on the cut file to create a visual triangle.  I placed my title at the top, an embellishment cluster to the center right and my photo at the bottom.  I added interest to each area with a variety of embellishments from the collection.


Whatever season it feels like where you are, you can always document your favorite with all of the Crate Paper collections, from Christmas to Halloween or special occasion to everyday!

Tuesday, January 31, 2017

A Flair for Buttons | #Together

I'm stopping in today, to share a layout that went up on the A Flair for Buttons Blog yesterday!  I thought I would work a little bit of Mixed Media into this layout, using a few spray mists.  I chose a couple of Flair Buttons from the AFFB Shop that would coordinate with the new Amy Tangerine On a Whim collection and the spray mist colors that I wanted to work with.


I started the layout with a large alpha die cut for the title and added my spray mist colors where they would coordinate with the patterned papers for each part of the title.  I also hand stitch around each of the letters in the title for extra texture. 


I used both of my Flair Buttons to create small embellishment clusters on two of the letters in the title.  I decided to keep the rest of my embellishing very simple, so I wouldn't cover the large title and Mixed Media.  I had so much color going on with the patterned papers and Flair Buttons, the layout didn't really need a lot of embellishing.


I have a Process Video to go along with the layout, if you would like to see how everything came together.  You can watch it here, and head over to my YouTube channel to Subscribe!


Thanks for stopping by, and make sure you check out the shop and pick up some flair for your next layout!

Wednesday, January 18, 2017

A Flair for Buttons | December Story

Hi there!  Today, I have a new layout to share with you for the A Flair for Buttons Design Team.  I took a little break from AFFB over the past few months, but I'm excited to start sharing some new layouts with Shelley's fun flair designs!  I've got a good bit of Christmas flair buttons in my stash, and I've got a lot of Christmas photos to document, so I decided to create a Christmas layout.


I decided to use the Cork Flair Set, because they are neutral and perfect for any collection that you're using.  I cut a large cut file from White cardstock and backed it with a mix of patterned papers.  The center of the star design on the cut file, was a perfect spot for the December 25 Flair Button.  I wanted to do something a bit different, than the typical photo in the middle of the design, so I made the Flair Button the "star" of the show, and placed my photo on the right hand side of the layout.


I added a mix of embellishments around the photo, for texture and dimension.  I also wanted to bring in another Flair Button, so I placed the star flair below my photo.  I love that it had the star image to go with the cut file and a couple of other star embellishments that I added to the layout.


You can check out the full Flair set that I used, in the A Flair for Buttons shop!  While you're there make sure you take a look at all of the other Christmas designs that are available!

Monday, November 28, 2016

Tinsel Town | The Magic of Christmas

I am so excited to stop in today and share my first layout, using my newest collection from Pretty Little Studio, Tinsel Town!!  The collection arrived the day before we went out of town for the Thanksgiving holiday, so I couldn't wait to sit down and make a layout, our first day back home!  


I love using non-traditional Christmas colors, so I knew I wanted a bright, fun color scheme when I created this collection.  I also love Wood Grain papers, so I started the layout by cutting my title from the Yule Log patterned paper.  I used the new Christmas Magic cut file set from The Cut Shoppe, to create a large title on the layout.  Once the title was cut, I added it to a white cardstock background, tilted it a bit and then stitched through it with my sewing machine.


https://www.etsy.com/listing/492374933/the-christmas-magic-cut-file-contains-4?ref=shop_home_active_10

I wanted several textures on the layout, so I used a mix of the Twinkle Acrylics, Twinkle Die Cuts, Wood Veneers, Flair Button and sequins.  I love the scattered look of the embellishments and the various dimension created by each one.  Since the design of the layout gravitated on the left side of the page, I decided to balance it with some patterned papers from the collection on the right hand side.  I cut strips from several of the patterned papers and layered them along the right side of the page.  Then I stitched along each one, to bring some texture to the strips.


I hope you've had a chance to pick up some of the Tinsel Town collection from the PLS shop, and that you've found some inspiration today for working with the collection!  This is a LIMITED EDITION COLLECTION, so make sure you get it while it's available!

I'm also doing a GIVEAWAY on my Instagram account, so make sure you check it out for the chance to win a selection of the Tinsel Town collection.  You can find me on Instagram at @ashleyhorton75.

This post contains affiliate links, which means I will receive a small commission from any purchases made from product clicks on this post.

PRODUCTS USED:


Wednesday, November 9, 2016

Oakley Avenue | Love Us

When the whole family wears plaid, it calls for a layout!  We were off to church this past Sunday, and I grabbed the selfie stick to snap a photo before we headed inside.  As I got started on the layout, I knew I wanted to use the Cozy Blanket patterned paper from my Oakley Avenue collection with Pretty Little Studio, for some die cut leaves from the Leaf It To Me cut file set from The Cut Shoppe!


https://www.etsy.com/listing/246935501/the-leaf-it-to-me-cut-file-consists-of?ga_search_query=leaf&ref=shop_items_search_1

There was a lot of color going on in the photo, since all of our shirts had different colored plaids.  I didn't want to change the photo to black & white and take away from the plaid pattern, so I had to figure out a way to make the photo work with the colors in the Oakley Avenue collection.  I decided it would work best, to cut all of the leaves from the Cozy Blanket patterned paper, instead of bringing in more color and pattern with other papers from the collection.  This gave me a contrast between the colors in the photo and the colors in the patterned paper, that helped complement one another, instead of fighting with one another on the layout.


Instead of cutting all of the leaves as solid shapes from the Cozy Blanket paper, I also cut the outline of a few of them from White cardstock.  Then I backed the open leaf design with the solid leaf cut from the patterned paper.  Once all of the leaves were cut, I arranged them in a scattered look and machine stitched each one to my White cardstock background.  Since these leaves gave me two layers, I folded up the edges to create a fun dimensional look on the layout.


I wanted to keep the leaves uncovered, so I left a space on the bottom left for my photo.  Then I used some of the Oakley Avenue die cuts scattered among the leaves and two flair buttons, layered over a couple of the leaves.  I completed the layout with a bit of Black Color Shine splatters. 

If you need a fun Fall collection to document your photos or use for your paper crafting projects, make sure you visit the Pretty Little Studio shop and check out the full Oakley Avenue collection! 

This post contains affiliate links, which means I will receive a small commission from any purchases made from product clicks on this post.

PRODUCTS USED:
 

Monday, November 7, 2016

Pink Paislee | Leaf Love

This is a personal blog. All editorial content and projects are intellectual property of ashleyhortondesigns.com. I do receive compensation and material product from Pink Paislee to develop my craft posts, but all ideas and opinions are my own.

This week on the Pink Paislee Blog, the Design Team will be sharing projects with a Leaves theme.  I kicked things off yesterday, with a hand-stitched leaf look, using the Take Me Away collection from Paige Evans.


I knew right away what I wanted to do for the background of the layout… a scattered, stitched leaf look. I decided to work with the Take Me Away collection because of the embroidery floss color range, I could choose to coordinate with the colors in the collection. I started with the teal woodgrain paper and used my Silhouette Cameo sketch pens to draw the leaf shapes from the Oakley Avenue cut file set from The Cut Shoppe. Then I used my paper piercer to punch quarter inch holes along each leaf. I used 5 different colors of embroidery floss to stitch over the leaf shapes.

https://www.etsy.com/listing/480477205/the-oakley-avenue-cut-file-set-includes?ga_search_query=oakley+avenue&ref=shop_items_search_1


When it came to the photo and embellishments on my layout, I created a cluster. Since I had such pretty stitching in the background, I didn’t want to spread out the other elements on my layout and cover up the stitched leaves. I used pop dots to adhere my photo which helped in 3 ways: 1) it made it easier to attach the photo since I was placing it over embroidery floss, 2) it added a dimensional look to my layout, and 3) it allowed me space to tuck some of the Take Me Away embellishments under my photo.


There are so many fun ways to use a leaf design on your layout! If hand stitching isn’t your thing, you could work with leaf die cuts or fussy cut leaf shapes from some of your favorite Pink Paislee patterned papers. I hope you’ve found some leafy inspiration today for your upcoming layouts or projects!


Make sure you check out the Pink Paislee Blog all this week for lots of leaf inspiration!!

This post contains affiliate links, which means I will receive a small commission from any purchases made from product clicks on this post.

PRODUCTS USED: