This is a personal blog. All editorial content and projects are intellectual property of ashleyhortondesigns.com. I do receive financial compensation and material product from American Crafts to develop my craft posts, but all ideas and opinions are my own.
Are you ready to celebrate the 4th of July this weekend? We are already celebrating this week on the American Crafts Blog, and I was up yesterday, with a new Patriotic themed layout, using the True Stories collection from Shimelle!
How To: Die cut (or punch) stars from White cardstock and back with Red and Blue patterned papers. Place stars on White cardstock background and machine stitch a few of the stars, to adhere it to your paper. Create a photo strip look by printing your photos in a strip format or place individual photos in a strip design on the background paper. Embellish the left side of the photos with wood veneers, cork stickers and wood buttons. Create a long title on the right side of the photos using your favorite Thickers.
Today is the final day of my Zoned Out video series, and I have my last layout and video to share with you. For this last layout, I downsized from a 12x12 layout to an 8.5x11 layout. This was probably one of the hardest for me out of the series, because I am so programmed for 12x12. I've done a few 8.5x11 layouts in the past, but I am never 100% happy with the end result. I did like the completed design on this layout, but I still kept thinking at the end, should I add more, does it need anything else, what if I did this?? But that's what this series is all about...getting out of your comfort zone and trying new ideas!
I decided to go with a photo strip look on this layout, to follow the rectangle shape of the 8.5x11 paper, compared to the square shape of the 12x12 size. I kept the photos a little under 2 inches, so that left room for a larger title. And I wanted to keep everything layered and close together, since I was working with the smaller background paper.
If you would like to check out my process for this layout, you can check out the latest Zoned Out video!
Supplies: Patterned Paper, Wood Buttons, Stickers, Frames, Bits & Wood Veneers: Crate Paper; Die Cut: The Cut Shoppe; Color Shine: Heidi Swapp; Stamps: October Afternoon & American Crafts; Tiny Attacher: Tim Holtz; Die Cut Machine: Silhouette Cameo
I'm up on the Illustrated Faith Blog today, and wanted to stop in and share with you here! I've been going through the Brave Devotional by Emily Karwoski, and on Day 2 the words Grand Plan caught my attention. I'm a planner. I always have been, for as long as I can remember. I remember packing a week in advance for a vacation and having a check list to make sure I had everything I needed for the trip. As I've gotten older (much older!), I've realized that my plans don't always work out the way I think they should. And when that happens, it usually leads to disappointment and frustration.
Emily's words in the Brave Devotional immediately brought Jeremiah 29:11 to mind. It's a verse I've known and committed to memory a good many years ago. "For I know the plans I have for you, declares the Lord, plans for welfare and not for evil, to give you a future and a hope." (ESV) So it makes me wonder why I don't always live like I believe that God's got it all under control. It kind of reminds me of the scenario with your kids...don't touch the stove, because it's hot. I don't know about your kids, but mine are most definitely going to touch it, even though I told them it was hot. I am the same way. I want to know for myself, right now, on my terms. What if God's plan for me isn't my plan for me, what if He doesn't tell it to me right now, what if I have to do something I don't want to do? And let me just answer those questions for myself right now...yep, that's pretty much how it's going to happen!
I know from many years of experience, that when I try to plan my life, it somehow manages to end up as a small catastrophe. And I do have the reminders and moments to look back on in my life, when I've followed God's plans and how they have been just what I needed, just when I needed it. But I still have those temporary amnesia moments, when I think okay, I think I've got things figured out and I'll just handle this life stuff all by myself.
But I am thankful that God does send us those reminders of His faithfulness. When I sat down to the devotional, I didn't even plan (see what I did there?) to work on Jeremiah 29:11. But that's where God spoke to me. Someone else could take away something totally different from Day 2, but God knows what we need to hear and when we need to hear it.
I really wanted to highlight the verse illustrating it with a mix of typography, hand-writing and water colors. I wanted it to be BOLD and stand out, as a reminder that it's okay to plan, but to make sure that my plans line up with God's plans for me!
Supplies:
Be Brave Devotional Illustrated Faith/Bella Blvd. Genesis Kit Water colors Tim Holtz Tiny Attacher Amy Tan Stamp HS Black Color Shine
I'm still having a blast creating with the June 2015 Hip Kit & Add-On Kits from Hip Kit Club!This week, I knew I wanted to create a layout, using the fun Fancy Pants tags that are included in the June 2015 Embellishment Kit! The idea popped in my head, to use them for a background look, with the Simple Stories Summer Vibes paper, included in the June 2015 Main Kit and here's what I came up with!
I'm pretty sure I used a little bit of everything from the June Kits on this layout...everything but the kitchen sink. I pulled products from the June Main Kit, June Embellishment Kit and the June Project Life Kit. The FP tags and Project Life cards, created by Kim Watson this month, were perfect for creating a free form grid on my layout. And then the tags and PL Cards, gave me lots of room for using embellishments from this month's Kits.
I changed my photo to Black & White, because I wanted it to contrast all of the color from the tags and embellishments. This was a really fun design to put together, and it was quick and easy. And I've already created three other layouts with this month's Kits and still have a ton of product left, even after using so much of it on this layout! I think for my next layout, I'll see what I can do with the fun Crate Paper frames that are included in the June 2015 Main Kit!
This past week, the American Crafts Design Team shared projects to celebrate Dad! I had two new Father's Day Cards that were up on the Blog, and wanted to stop in and share them here, today.
How to: Cut White cardstock base 5x10" and then fold in half. Cut a 5" square from the Lemon & Ginger patterned paper and place it over the cardstock base. Add a thin strip of the Berry Infusion patterned paper to the top and bottom of your card. Machine stitch across both pieces of patterned paper. Die cut or hand-cut three bow tie shapes. Stitch "seams" in the center of your bow ties. Adhere the bow ties to your card with pop dots to add dimension. Place a Shimelle Wood Button in the center of each of the bow ties. Add your sentiment using the Hipster Thickers and letter stickers.
How to: Cut white cardstock base at 4.25x11" and fold in half. Cut the Croissant patterned paper at 4.25x5.5" and place it over the cardstock base. Use scrap brand strips or patterned paper strips to create a diagonal design on your card background. Machine stitch along each of the diagonal patterned papers. Die cut a large #1 and adhere to your card using pop dots. Add the word Dad over the number 1 using the Hipster Thickers. Finish the card by adding a wood button and rocket die cut from the die cut cardstock shapes pack.
Today, I'm here to share two new Simple Stories layouts with you, for the month of June!How is it June already??!! Time flies when you're having fun! And I must admit, that I am having tons of fun with the new collections from Simple Stories. On today's layouts, I worked with the Summer Vibes collection and the So Fancy collection.
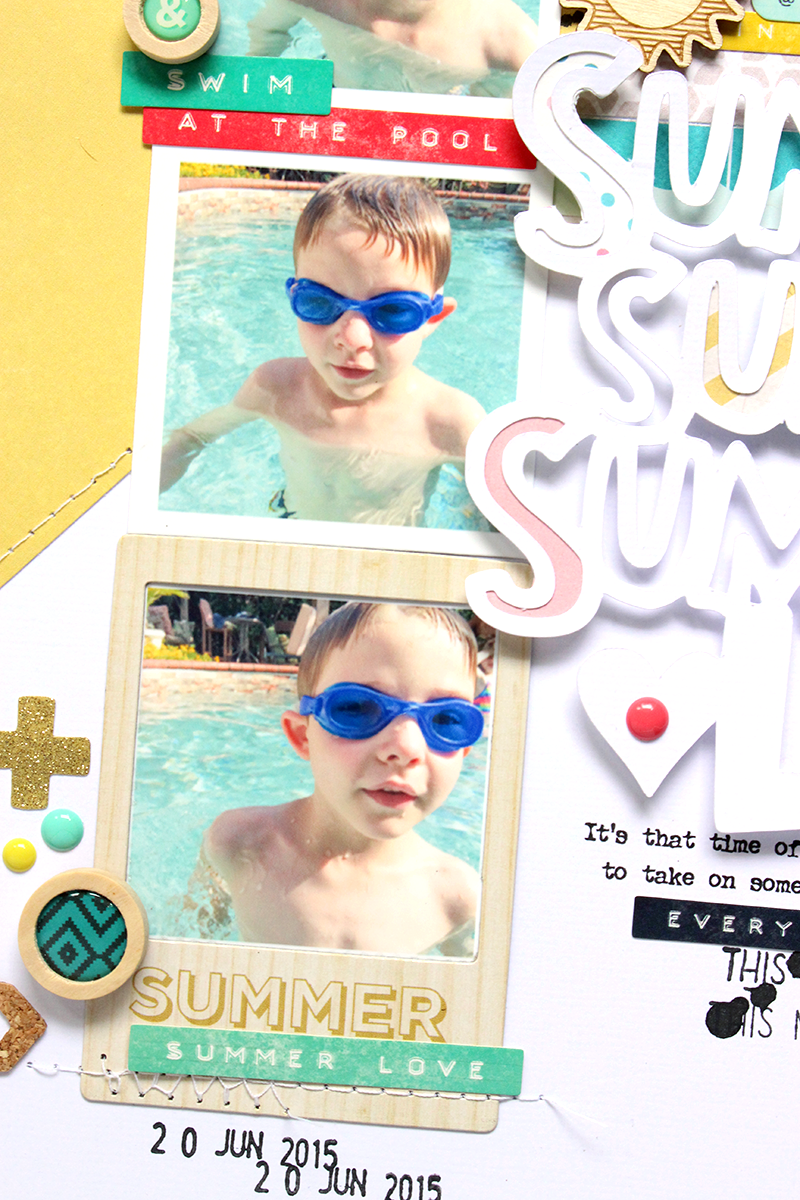
I'll start off with my layout, using Summer Vibes, since summer is now upon us! There is a little touch of a vintage vibe to this collection and I really love it! I started my layout by choosing one of my favorite patterns to work with...wood grain! The wood grain paper from the Summer Vibes Simple Basics Kit made a perfect background for my layout, and worked great with the large title I had in mind.
I chose the "You Can Never Have Too Much Happy" phrase from the Simple Stories images in the Silhouette Store. Before cutting the phrase, I created an offset image in Silhouette Studio and used a Black sketch pen to draw out the phrase on my paper. Then I deleted the offset lines and went back and cut the phrase by placing my blade back in the machine. Once the cutting finished, I backed each of the words with a different patterned paper from the Summer Vibes 6x6 Patterned Paper Pad.
I enlarged the title to fill up my background, but created a space in between the last two lines of the phrase. This gave me the perfect spot for adding my photos and a mix of embellishments from the Summer Vibes collection. I created dimension by layering the Chipboard Frames, Chipboard Stickers, Bradz, Bits & Pieces and stickers.
If you're looking for fun ways to incorporate cut files and large titles in your layouts, then make sure you check out the Simple Stories portfolio in the Silhouette Store. There are tons of great cut files that coordinate with each of the Simple Stories collections!
Supplies:
White Wood/Grid Patterned Paper #6316
Expressions Cardstock Stickers #6303
6x6 Paper Pad #6322
Bradz #6327
Chipboard Stickers #6328
Bits & Pieces #6329
Enamel Dots #6331
Chipboard Frames #6338
Now, it's time to go girly with the new So Fancy collection! I have two daughters and the So Fancy papers and embellishments are perfect for your girly layouts. I snapped a photo of our oldest daughter on a recent family vacation, and I wanted to pair it with this collection.
The idea for the design of this layout, started with the cards from the So Fancy SN@P pack. I chose three that I wanted to use to create a grid design on my layout, along with my photo. Before I placed the cards and photo on the background paper, I added a messy stitched circle with my sewing machine. Then I started layering the cards and my photo.
I also did something on this layout that's a little different for me. I didn't create a separate title for the layout. A lot of the cards in the SN@P packs have great phrases on them, so I decided to use "You Make My World Sparkle" from the top card, as the title for my layout. And the bottom two cards worked great as supporting sentiments for the layout.
Since I had the stitched circle in the background, I thought it would be fun to contrast the grid shape, by adding my embellishments in a circle around the grid. I went through the Bits & Pieces pack, stickers, enamel dots and Bradz to pull out embellishments that would work well around the circle. And I even pulled out a couple of wood veneer pieces from the I AM collection, to add a different texture to the layout!
So next time you're looking for a different design element on your layout, take out your SN@P pack and build your page off of some of your favorite cards from the pack!
Supplies: Pink Watercolor/Triangles Patterned Paper #6419 6x6 Paper Pad #6422 Fundamentals Cardstock Stickers #6402 Expressions Cardstock Stickers #6403 SN@P! Cards #6423 Enamel Dots #6427 Chipboard Stickers #6428 Bits & Pieces #6429 Bradz #6431 Photo Stickers #6433 Chipboard Frames #6438 I AM Wood Veneer #4541
Welcome to a new layout and video, this week for the Zoned Out: Creating Outside Your Comfort Zone series! This week, I'm focusing on PL or Pocket Scrapbooking inspired layouts. The whole idea of Project Life is completely outside of my comfort zone, but minimizing that idea to a single 12x12 layout makes it a lot more manageable. And who doesn't love a good grid!
Here's the new video that's up to go with today's layout! You can check out my full process for putting this layout together, and you'll also see a preview at the end, of what's coming up next Monday! Thanks to everyone, that's joined me so far for this series, and if you haven't had a chance to check it out yet, you can find the first two videos HERE and HERE!
Hi everyone! I’m back to share not one, but two layouts with you today! Did you know that you can download FREE Cut Files from the Hip Kit Club Member Forum on Facebook? Nicole Nowosad and I have created several Freebie Friday cut files, and you can come over and join the Member Forum for chatting, challenges, cut files and lots of fun! Today on the layouts I’m sharing with you, I used the Freebie Friday cut file I designed, that was added to the Member Forum last week. I wanted to use the same cut file on two layouts to create totally different designs.
Now, let's get to the layouts!
I wanted to use the cut file on this layout, as a large circle element. I used the Ellipse tool to add a circle around each of the rows of XOs, and then cut each one out on a different patterned paper included in the June 2015 Main Kit. Once the circles were finished cutting, I just used my scissors to snip each one in half and then placed them on the White cardstock from the June 2015 Cardstock Add-On, according to their size. I used the Kitten Thickers from the June 2015 Project Life Add-On, to create my title around the outer edge of the circles on the right hand side of the layout. Then I placed my photo strip to the left side of the title. I embellished with some of the fun Evalicious Wood Veneers included in the June 2015 Embellishment Kit and the Project Life Kit, and bits and pieces of the Crate Paper embellishments.
I also have a new Process Video to go along with this layout, and it shows a bit of both layouts at the beginning, and how I set up the cut file to create the two different pages.
I used a fun and easy technique for this layout. I cut the XO cut file from a piece of cardstock, and placed it over the Crate Paper patterned paper I wanted to use for my background. Once it was in place, I used it as a template to add the Xs and Os back into the negative spaces. I adhered each of the letters and then removed the cardstock piece. Before I added my photo and embellishments, I stitched around the circles with my sewing machine. I arranged the photo title and embellishments in a horizontal design on this layout, compared to the more vertical design on the first. I placed my photo to the right of the layout, and then added in some of the cute die cut flowers from the CP Poolside Ephemera pack included in the June 2015 Main Kit. I wanted to balance out the left side, so I used a large Fancy Pants tag from the Embellishment Kit, as a base for a few more embellishments.
I really love the variety that’s included in our Hip Kits every month! It’s fun to create so many different looks on your layouts, with products that all coordinate in the same Kit!
And did you know, there’s a great deal going on right now for NEW Subscribers! If you become a New Subscriber, you will receive a FREE Paper Add-On with your Subscription. You can use the PROMO CODE ASHLEY, when you place your Subscription order!
I'm excited to be joining Scrap Our Stash, for their June Sketch Challenge! I create a Sketch, layout and card for this month and wanted to stop in and share it today. You can come play along for the chance to win an awesome prize on the Scrap Our Stash Blog!
And there's a fun twist this month too! Create a card using the Sketch, and the left overs you have from your layout!
Stop by the Scrap Our Stash Blog, to check out all of the details for playing along this month! Supplies: Patterned Paper, Flair Button, Ephemera, & Buttons: Fancy Pants, Color Shine: Heidi Swapp, Die Cuts: The Cut Shoppe; Die Cut Machine: Silhouette Cameo, Enamel Dots: Simple Stories, Wood Veneers: Studio Calico, Tiny Attacher: Tim Holtz
I'm here today, to share a fun, new layout for A Flair for Buttons, using the cute Got Dog Flair set! I have this "thing" where I really love incorporating my Flair Buttons in my layout titles. You've probably noticed, this technique on some of my other pages. My philosophy is, if it ain't broke, don't fix it!! HA! It's really fun to find ways to incorporate the Flair into your title. For this layout, I created a large die cut title and added a couple of Flair Buttons from the Got Dog Flair set, to the center of the two O's in my title.
I also added a few other embellishments with the Flair Buttons, to create some different dimensions and texture on my layout. This is definitely a fun way to add some "flair" to your layout.
If you're a pet lover, there are several sets in the A Flair for Buttons Shop, that would be perfect for your projects! Here's a look at the Got Dog Flair set, that I used on my layout.
Thanks for stopping by today!
Supplies: Flair Buttons: A Flair for Buttons; Patterned Paper, Wood Veneers, Phrase Stickers, Puffy Stickers, Glitter Heart Stickers: Studio Calico; Wood Veneers: Elle's Studio & Pinkfresh Studio; Color Shine: Heidi Swapp; Tiny Attacher: Tim Holtz; Stamps: October Afternoon & American Crafts; Die Cut Machine: Silhouette Cameo