The days of adding just paper and stickers to our scrapbook pages are a thing of the past! These days, there are so many fun products and great ideas that can help add texture to our pages. Have you ever thought about adding Metal to your pages?? If so, or if it's a new idea you want to try, then come join us this week at Frosted Designs for our Fabulous Friday challenge...using Metal on your layout or project. There's a variety of ideas for using metal from metal tags, flowers, metal letters, wire, pins...just be creative and have fun. Our family went to the Blue Angels Air Show a couple of weeks ago and I got a great pic of my hubby and son looking at one of the planes. I thought this would be a perfect challenge to use on this page. I have some of the EK Success tags (one of my favorite products) and I just popped out the center piece of paper, to leave just the metal ring and added them as an embellie to my page. I also had some cool nail-head brads from Recollections that were a perfect compliment to theme of my page.So come join along in the fun this week and you could have the chance to win an amazing prize from our Sponsor, One Stop Card Crafts.Products Used:Paper: October Afternoon & BazzillTags (Metal Rings): EK SuccessBrads: RecollectionsLetter/Journaling Stickers & Mini Market Stickers: October AfternoonEmbroidery Floss: JanlynnPen: Sharipe
I hope that everyone enjoys a great Thanksgiving today! We will be spending time with family and stuffing our faces!! We can be thankful everyday, but it is nice to have one special day set aside each year to stop and reflect on all of the things we are really thankful for. From our family to yours, have a blessed day everyone!!
My 5 year old started taking Ballet for the first time this year, back in August. During the month of November, the parents are invited to come into the classes for observation. I got to go into her class and snap some pictures last Monday. I was amazed to see how much she has learned in a few short months...especially since she hasn't taken dance before. She is definitely still a 5 year old little girl and still working on her coordination...but there were definitely moments when she was very graceful in her movements. It was hard to get great pics in the studio, with the artificial lighting and all of the movement. But I think these were some of the best and really showed those moments of what she has learned.I decided to take on the Weekend Warm Up #18 challenge at ScrapFit and use stamping on my layout. I have a ton of stamps and ink, but don't use them as much as I should. The black flourishes are stamped with the Black ink pad from Stampin' Up and I wound some baker's twine around the swirls for a little more texture. I also used the Stampin' Up Vanilla ink pad with some bubble wrap to create a little more depth on my background paper. This was one of my first times to use a lighter ink on a darker colored paper and I really like the way it turned out. I used the 11.17 sketch from Sketchy Thursdays on this one, too. Products Used:Paper: Echo Park, Ho3, BazzillStickers: Echo Park Ink: Stampin' UpMini Round Gems: RecollectionsPen: SharpiePaper Crimper: FiskarsBaker's Twine: The TwineryPunch: MarvyButtons: Michael'sFont: CK Believe
Earlier this week, I was contacted by my friend and fellow Club CK Peep, Erika Hayes. She has been hosting a Weekly Challenge at Club CK for over a year now, known as the Issue Challenge. The concept of the challenge, is taking inspiration from each month's magazine and challenging the players to use that inspiration in their project or layout. I have been playing along since the first challenge and haven't missed a week yet! These are great ways to get out of your comfort zone and find a jumping off point in your creativity. Anywho, Erika asked if she could use one of the sketches I've been working on as this week's inspiration for the challenge! She wants to start incorporating a Player's Challenge too each month and I am so honored to be the first one to kick that off! And if all of that isn't enough, she contacted me again yesterday afternoon and said that she had been asked to be the Contributing Writer for today's Creating Keepsakes Blog post, featuring the Issue Challenge for this week, which just happens to be my Sketch! WOW! I am still super-excited and excited for Erika for being today's writer!!Here is the Sketch for the challenge and the layout I did based on it: Products Used:Paper: Crate PaperStickers & Embellishments: Crate PaperInk: MementoThickers: American CraftsTeeny Alphas: Glitz DesignEmbroidery Floss: JanlynnPen: ZigBrads: The Paper StudioBaker's Twine: The TwineryI would also like to share the sample layout that Erika created from the sketch, to post along with the challenge: She did such a great job and I love how she added another photo and the fun way she did her title! That corrugated heart is too, too cute!!
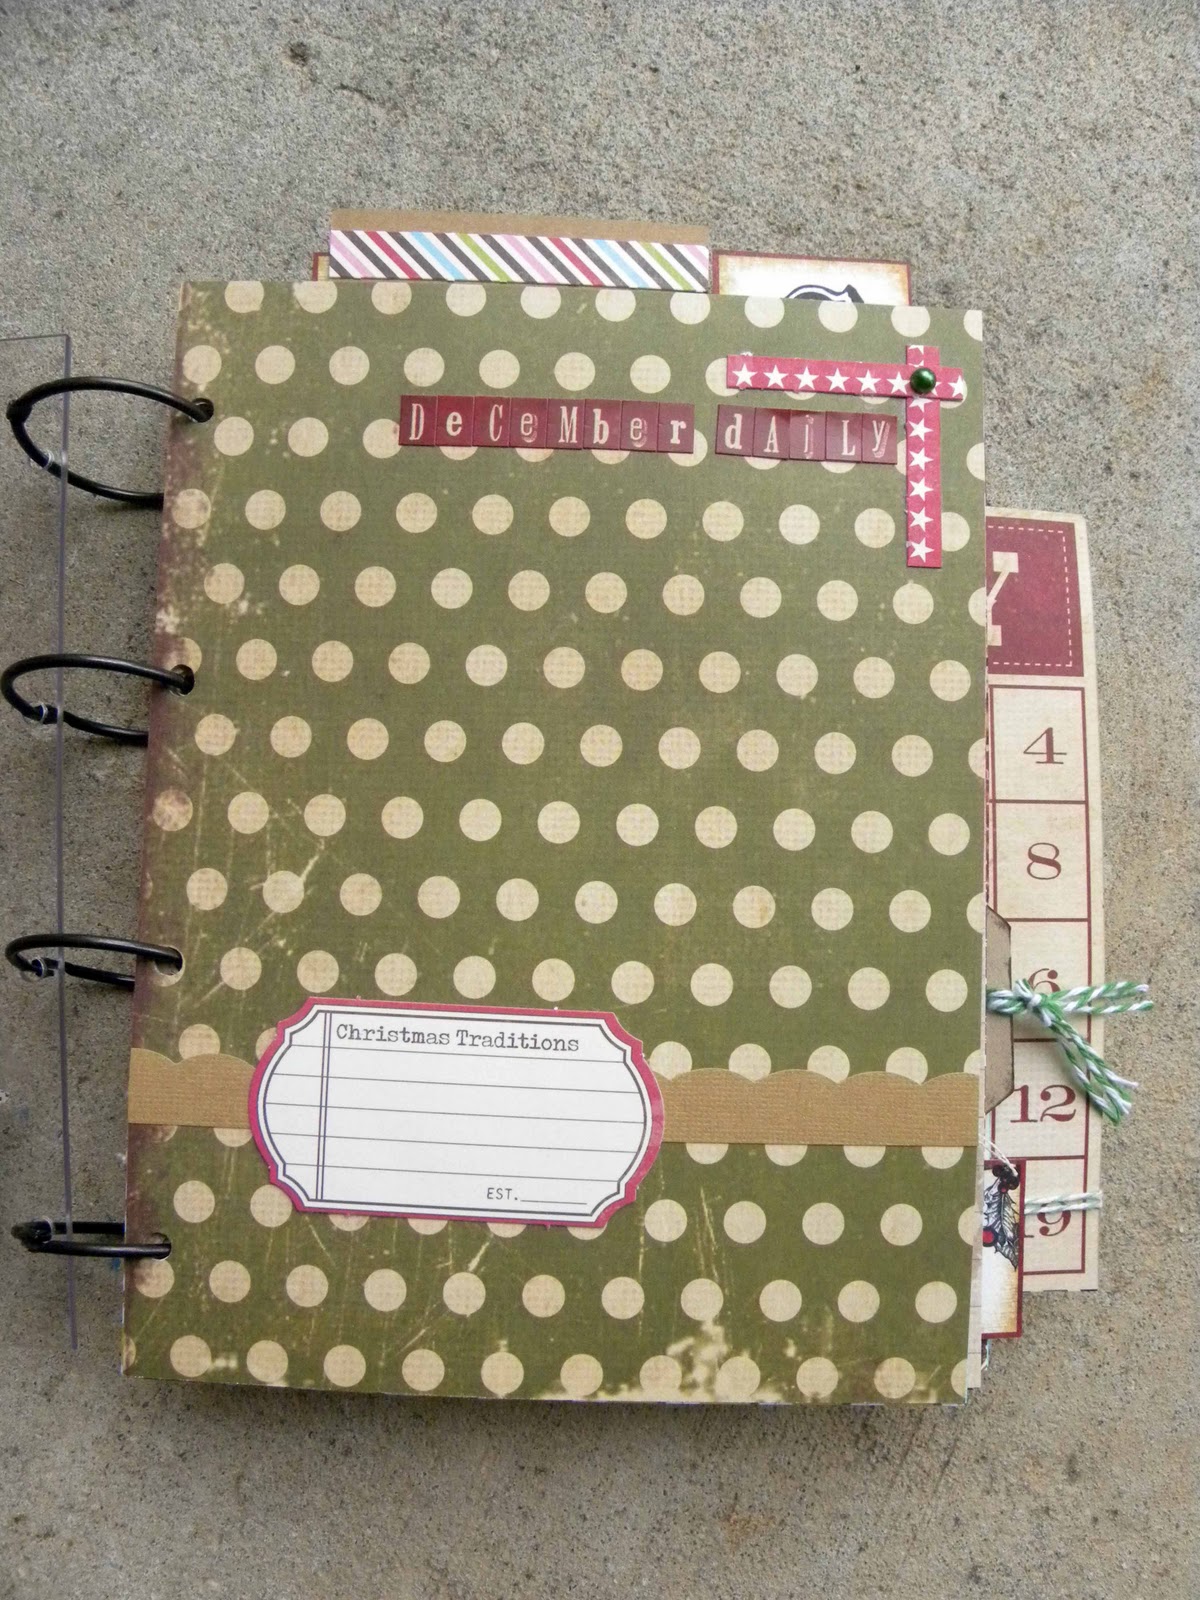
Can you believe that Christmas is a little over a month away?? Are you ready?? If you're like me, probably not!! :) I always have grand dreams of all of the crafty goodness I am going to get done during the Christmas season and usually if I make it through my Christmas cards, I am happy. Well, this year I decided to get a head start on Christmas and get my December Daily album ready for all of the great pictures I'm planning to take! What's a December Daily you ask? Basically, it's a pre-made album for each day in December (mine only goes up to December 25, but you can do the whole month if you want to) and you can take a photo or photos each day and add them to your album. It's a really fun idea that was originally started by Ali Edwards and once you are done, you have a great little mini to document all of the fun Christmas festivities!I was able to create this album with 99% of supplies from my LSS, ScrapHappy. I decided to go a little different route with this one and mix papers from the Simple Stories 25 Days of Christmas line and Jillibean Soup's Christmas Eve Chowder line. I thought it would be fun to mix in a little bit of the traditional Christmas look, with a little of the more contemporary and I love the way it turned out! For the front and back covers of my album, I got some of the 8x6 acrylic sheets from the store. These are great to decorate, and help protect the pages in your album. The binder rings are also available in the store and I just used my Crop-a-Dile to punch through the acrylic and add the rings. To create the base for my pages, I took some old cardstock and cut it to 8x6 pages and then cut and added my patterned paper to the front and back. Once I had the bases, I added the numbers for each day and then started decorating. Here is my finished product:


I hope you enjoyed seeing how I made my December Daily and that you will take time to do one too this year! There is no formula or directions, just have fun and start creating!!Products Used:Papers: Simple Stories, Jillibean Soup, Tim Holtz, Teresa CollinsClips: Basic GreyStick Pins: Little Yellow BicycleButtons: My Mind's EyeChipboard Buttons: Jenni BowlinPearl Accents: KaiserCraftLetter Stickers: My Little Shoebox & Doodlebug Design Inc.Other: Ribbon & Poinsettia Flowers
WOW! How excited am I today??!! I get to share the two layouts I created for Little Yellow Bicycle using their Hello Fall collection. First off, let me say how honored I am and how completely blown away I was when I was chosen as one of the designers for Little Yellow Bicycle's Cycling Team. I was chosen along with four other talented scrapbookers to use the Hello Fall collection to create projects or layouts using these fun products. Here is a little bit about each of the layouts I created:"A Harvest of Fun" One of the great things about working with coordinating products, is how quick and easy your pages can be. You don't have to sit for hours trying to pick out the products you want to use and lose time working on your pages!! That's what I loved about this fun page, using the Hello Fall line from Little Yellow Bicycle! It took less than an hour to get my page completed. I started by cutting a scalloped frame in the Burnt Orange Knit paper and attaching it to my background Autumn Tree paper. I then cut 5 inch squares from Golden Flourish, Harvest Rings, Green Splendor, and Walnut Knit. Then I inked the edges of each of the papers to add a little more definition. I created a grid with the 5 inch squares and then placed my photos in the center of the layout. There were a few scraps of paper after cutting, and I used those to create a few border strips under my photos. There are some adorable alphas included in the Family Tree kit I received, and they were perfect for using in my title. I adhered each letter to a scrap piece of the Walnut Knit paper to make them stand out a little more against my background paper. Finally, I started adding some of the adorable embellishments in the Hello Fall line. The Chipboard Shapes worked great on the right hand side of my page, and I decided to add a little bling to my border strips with the Jewel Stickers. I finished my title off with the word "Fun", which was included in the Chipboard Sticker Words package. There are so many fun banners and penants also included in this line, and I decided to balance out the left side of my page by adding several of the pennants. For a little fun touch, I added one of the Clear Cuts Shapes to the center of the yellow pennant and attached it with a brad. For my journaling strips, I just used a Desktop Publishing program to type up my journaling and printed it out on a scrap piece of the Autumn Tree paper.