Today, I'm sharing my last Design Team layout for A Flair for Buttons. I have loved being a part of the team and designing with the gorgeous flair from the shop. I still have plenty of flair on hand, so you'll still be seeing it on my layouts.
Some of my all time favorite Flair Buttons in the AFFB shop,
are the black & white designs. You can use them with any project,
because black & white goes with everything! On my layout today, I
used two black & white flair from the Shop, to add a contrasting
look with the Dream On collection from Pinkfresh Studio. I love the way
the dark flair buttons contrast with the lighter colors in the
collection.
Most of my layouts usually have a much busier background, but I wanted
to try something different on this layout. I chose one of the patterned
papers from the Dream On collection and fussy cut several of the
square/rectangle shapes to place around my photo. I wanted a clean look
with a lot of white space on this layout, to really bring out the
photo.
Once I had all of the fussy cut pieces arranged around the photo, I
machine stitched around each one. Then I placed my two flair buttons. I
wanted them on opposite sides of the photo and a little offset from
each other. I liked the look of having one flair button with a phrase
and a second flair button with a pattern. After adding the flair, I
used a mix of embellishments from the Dream On collection to finish the
layout.
Be sure to follow A Flair for Buttons! You can find them on Instagram and follow the AFFB Blog for inspiration from the Design Team. This post contains affiliate links, which means I will receive a small commission from any purchases made from product clicks on this post. PRODUCTS USED:
The great thing about love themed products, is that they can be use all year long! I have a lot of love themed flair buttons in my stash, so I thought it
would be fun to pair them with the Crate Paper Heart Day collection for
today's layout. The flair I used on my layout are all from different
sets, but they coordinate perfectly together...Chalkboard Valentines 2 Flair, XOXO Flair and Selfie Flair. You can never go wrong with mixing and matching flair from the A Flair for Buttons Shop!
I started with the idea of creating a large fringe heart for the layout,
and I wanted to use the flair buttons in clusters around the photo for
dimension and texture. I have a new Process Video to go along with the
layout, showing how I created the fringe heart.
I love that the Red and Black color scheme on the flair buttons blends
in perfectly with the Heart Day collection. They look like they were
made for each other! It's fun to mix flair buttons into clusters,
because it gives the eye a lot of fun things to look at on your layout.
This was a fun design and the right flair buttons made the layout come
together so easily. You can visit the Shop to check out the sets I used
and make sure you browse through for any other designs that might catch
your eye!
This post contains affiliate links, which means I will receive a small commission from any purchases made from product clicks on this post. PRODUCTS USED:
I'm stopping in today, to share a layout that went up on the A Flair for Buttons Blog yesterday! I thought I would work a little bit of Mixed Media into this layout,
using a few spray mists. I chose a couple of Flair Buttons from the AFFB Shop that would coordinate with the new Amy Tangerine On a Whim collection and the spray mist colors that I wanted to work with.
I started the layout with a large alpha die cut for the title and added
my spray mist colors where they would coordinate with the patterned
papers for each part of the title. I also hand stitch around each of
the letters in the title for extra texture.
I used both of my Flair Buttons to create small embellishment clusters
on two of the letters in the title. I decided to keep the rest of my
embellishing very simple, so I wouldn't cover the large title and Mixed
Media. I had so much color going on with the patterned papers and Flair
Buttons, the layout didn't really need a lot of embellishing.
I have a Process Video to go along with the layout, if you would like to
see how everything came together. You can watch it here, and head over
to my YouTube channel to Subscribe!
Thanks for stopping by, and make sure you check out the shop and pick up some flair for your next layout!
Hi there! Today, I have a new layout to share with you for the A Flair for Buttons Design Team. I took a little break from AFFB over the past few months, but I'm excited to start sharing some new layouts with Shelley's fun flair designs! I've got a good bit of Christmas flair buttons in my stash, and I've got
a lot of Christmas photos to document, so I decided to create a
Christmas layout.
I decided to use the Cork Flair Set, because they are neutral and
perfect for any collection that you're using. I cut a large cut file
from White cardstock and backed it with a mix of patterned papers. The
center of the star design on the cut file, was a perfect spot for the
December 25 Flair Button. I wanted to do something a bit different,
than the typical photo in the middle of the design, so I made the Flair
Button the "star" of the show, and placed my photo on the right hand
side of the layout.
I added a mix of embellishments around the photo, for texture and
dimension. I also wanted to bring in another Flair Button, so I placed
the star flair below my photo. I love that it had the star image to go
with the cut file and a couple of other star embellishments that I added
to the layout.
You can check out the full Flair set that I used, in the A Flair for
Buttons shop! While you're there make sure you take a look at all of
the other Christmas designs that are available!
This is a personal blog. All editorial content and projects are intellectual property of ashleyhortondesigns.com. I do receive compensation and material product from A Flair for Buttons to develop my craft posts, but all ideas and opinions are my own.
Every once in a while, I like to create a layout that uses a lot of words or phrases. This kind of layout, can make it a little tricky for me to choose a main title, so I decided to go with a Flair Button from the Just Words 2 Flair set from A Flair for Buttons as the title of this layout. I chose the You Are Loved button and placed it on a tag, that I layered over my photo, to help it stand out.
I added all of the words and phrases on the left hand side of the layout, and placed the photo on the right hand side, with fewer embellishments. I liked the way the You Are Loved button looked layered over the photo and I wanted one other Flair Button to place on the far right hand side of the photo. This helped add balance around the photo area.
The photo Flair Button from the Arrows and Camera Flair 2 set was perfect, because it went with the theme of the layout and had neutral colors. I created a cluster with the Flair Button, sticker and enamel dot to add interest around the photo, since the majority of embellishments were on the left side of the layout.
If you need some fresh inspiration for titles on your layouts, then make sure you check out all of the word and phrase flair in the A Flair for Buttons shop!!
Happy Monday everyone! I'm excited to share a new YouTube Video Series that starts today. Missy Whidden and I have teamed up for Stretch Your Sketch. Over the next four weeks (on Monday), we'll have a new layout and video to share with you on our YouTube channels. Our layouts are based on a Sketch, that we will use in four different ways. We hope this series inspires you to look at sketches in whole new ways and get more out of the sketches you're using.
In addition to the free Sketch, there is also a Free Cut File set to go along with the series. You can download the Sketch and Cut File set, by visiting our YouTube channels and checking out today's video. A link for the download is included in comments section of each of our videos.
I hope you'll visit our channels today and check out both videos!
If you haven't subscribed to our channels yet, we would love for you to become a new subscriber. And don't forget to leave a thumbs up for this week's videos!
This is a personal blog. All editorial content and projects are intellectual property of ashleyhortondesigns.com. I do receive compensation and material product from A Flair for Buttons to develop my craft posts, but all ideas and opinions are my own.
Summer activities are in full swing, and most of our outside time is spent at the pool or splash pad. I decided to create a summer layout, with products and Flair Buttons that weren't really summer themed. The On Trend 2 collection from My Mind's Eye has some summer elements included, but it's not necessarily a summer collection. And since I have so many Flair Buttons in my stash from A Flair for Buttons, I decided to choose a couple that would work with my layout, but didn't have a summer design.
I went with two Flair Buttons for this layout. I chose one from the Words to Live By 1 set and one from the So Retro 2 set. They both coordinated with the On Trend 2 collection. The Believe flair was perfect for the cluster near my photo and I tucked the Let's Roll flair near my title. I have such a variety of Flair and it's fun to find different ways to use the themes of the buttons.
Don't be afraid to use your Flair Buttons outside of their typical theme. There are a lot of different ways you can incorporate them into your projects, even if they aren't an exact match for the project. Make sure you stop by the A Flair for Buttons shop to check out all of the new...and old...flair sets that are available!!
This is a personal blog. All editorial content and projects are intellectual property of ashleyhortondesigns.com. I do receive compensation and material product from A Flair for Buttons to develop my craft posts, but all ideas and opinions are my own.
I have a thing for words and phrases...whether it's a sticker, patterned paper or a Flair Button! So, it goes without saying, that I am a BIG fan of the Word Flair set, in the A Flair for Buttons Shop! I recently picked up the new Life Is Beautiful collection from Fancy Pants, and I knew I wanted to use a couple of the Word Flair buttons to go with it.
I decided to use one of the cut files from The Cut Shoppe, from the product swap with AFFB! I cut the flower wreath from White cardstock, fairly large, and then placed it on my background paper slightly off center. Then I started adding my Flair Buttons, embellishments and photo inside the flower wreath cut file!
The Life Is Beautiful collection comes with a set of flair, that is a little bit larger than the buttons in the AFFB Shop. I thought it would be fun to mix one of the Fancy Pants flair in with the Word Flair for a contrast of size. And I placed them on the layout in a visual triangle, to help guide the eye around the inside of the cut file.
You can find the Word Flair set in the A Flair for Buttons Shop, along with many other sets that include fun words and phrases! Make sure you stop by to check them out!!
Last year, I didn't get a lot of photos from Easter weekend onto layouts. This year, I'm trying to use some of the 2015 photos and make sure I document some of our 2016 photos, too. The Hello Spring Flair set is perfect for spring photos, and I still had several left over from the recent AFFB and The Cut Shoppe product swap. I chose three buttons from the set, and decided that the Happy Place collection from Fancy Pants would coordinate well with the Flair and the colors in my photo.
I chose the Happy Place collection based on the color scheme, even though I knew I didn't have a lot of embellishments left after using it so many times. So I decided to do a less is more look on this layout. The Flair Buttons from the Hello Spring set were the perfect substitute for the lack of embellishments I had to go with the collection, and I also mixed in several die cuts.
I wanted each of the Flair Buttons to have their own spot on the layout, so I welded several messy circle die cuts together to create the die cut background. The smallest circles on the die cut were just the right size for the Flair. And I made sure to adhere a contrasting patterned paper behind each of the small circles, so the Flair buttons would stand out.
This is a personal blog. All editorial content and projects are intellectual property of ashleyhortondesigns.com. I do receive compensation and material product from A Flair for Buttons to develop my craft posts, but all ideas and opinions are my own.
Next time you have a collection that you want to use that's short on embellishments, take a look at your Flair Buttons, and find coordinating colors or designs. And if you're interested in picking up the Hello Spring Flair set, you can visit the A Flair for Buttons shop and find it HERE!
This is a personal blog. All editorial content and projects are intellectual property of ashleyhortondesigns.com. I do receive compensation and material product from A Flair for Buttons to develop my craft posts, but all ideas and opinions are my own.
We have a 6 year old boy, who is always on the go! The only time he is quiet and still is when he's sleeping! With that said, it's hard to get him to stop and sit still for photos, but I got lucky and snapped this cute photo of him at the park one afternoon. There are a lot of great boy themed Flair sets in the shop, but I just had to use the cute paper airplane Flair from the Paper Airplanes 2 Flair set on my layout.
I wanted to create a lot of motion on the layout, to reflect his busy personality. I used a bold, black & white striped patterned paper for the background. To contrast the stripes, I used a pie chart cut file, to add a circular element to the layout. I left the pie chart cut file in tact for the smallest circle and backed it with various patterned papers from the Amy Tangerine Better Together collection. Then I placed three of the Flair Buttons from the Paper Airplanes 2 set in several sections of the pie chart shape.
I continued the circle design, by removing the pie chart triangle shapes out of the circle and cut two more large circles to add to the layout. I kept all of the embellishments clustered inside the two smaller circles at the center of the page. And I added some wood veneer arrows and Thicker phrases to continue the motion on the layout. The Paper Airplane Flair Buttons also add motion to the layout, because the planes are pointing in different directions.
I also love how well the colors on the Paper Airplane Flair Buttons worked with the Better Together collection! They look like they were made for each other! You can check this set out in the A Flair for Buttons Shop. Here's a look at the full set, and the other designs that are included with the paper airplanes.
This is a personal blog. All editorial content and projects are intellectual property of ashleyhortondesigns.com. I do receive compensation and material product from Pink Paislee to develop my craft posts, but all ideas and opinions are my own.
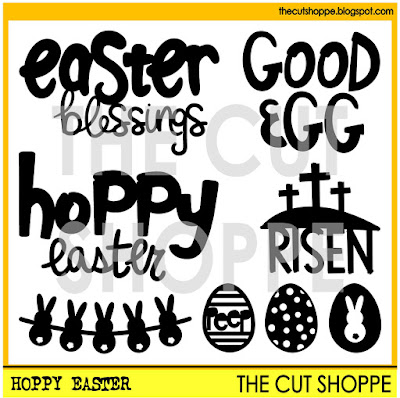
Happy Good Friday and Easter weekend! I have a lot of photos from last year's Easter weekend, but somehow I haven't put any of them on layouts yet. So I decided to make one! I used the Fancy Free collection by Paige Evans from Pink Paislee, with the Hoppy Easter cut file set from The Cut Shoppe.
AND I AM GIVING AWAY A LITTLE PRIZE AT THE END OF THE POST...SO MAKE SURE YOU READ ALL THE WAY THROUGH!!
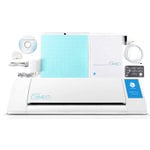
I love searching Pinterest for inspiration, and I came across several Easter banners. I thought that would be a fun idea to translate to my layout. I cut the banner pieces on my Silhouette Cameo, using a mix of patterned papers from the Fancy Free collection and from White cardstock. Once I had all of the banner pieces arranged on the background paper, I machine stitched through all of them.
I wanted to add watercolor to the layout, so I painted the White cardstock banner pieces with colors that coordinated with the Fancy Free collection. I embellished all of the banner die cuts with ephemera, Thickers, chipboard and die cuts from the Hoppy Easter cut file set. And I added a Flair Button from A Flair for Buttons.
I love the bright colors in this collection, and mixing them with the cut file from The Cut Shoppe, made for the perfect Easter layout!
Now, it's time for a GIVEAWAY!! I am giving away a $10 Gift Certificate to The Cut Shoppe! All you need to do is comment below, and I will announce a random winner on Monday, May 28th! Just make sure you check back on Monday, to see if you're a winner!