Who's happy it's Friday??!! I know I am! We're half way through summer and we've taken a couple of trips over to the neighborhood pool. Honestly, it's been too hot even to go to the pool! HA! I've made sure to take some photos of the kids while we've been there, because I love documenting summer layouts. Today I have a new layout in my Traveler's Notebook, with a full page photo from one of our trips to the pool.
It's so fun to use a full page photo in the TN! I loved this photo of our oldest daughter and the Teal color of the pool water. I placed it next to a Yellow patterned from Pink Paislee to give a bright contrast. I also incorporated the Crate Paper Oasis stamp set and some of the fun puffy stickers. You can find some of the Oasis collection HERE in the Scrapbook.com store.
Before creating this layout, I had the idea in my head to fussy cut these cute frames from the Pick Me Up patterned paper from Pink Paislee and stamp inside each one. After fussy cutting the frames, I machine stitched around each one before adding it to the layout. I used three of my favorite Color Theory Inks from Studio Calico to stamp phrases inside each frame, with the Oasis alpha stamp.
And like I said before, I am having so much fun using my stamps in the TN, so I had to bring in one more. The sun design from the Studio Calico Alfresco 6x8 stamp worked perfectly with the theme of this layout. I stamped it in Black ink to make it really stand out on the spread.
I finished the layout with a few Oasis stickers, and added some texture with my tiny attacher. And I used the White alpha stickers from the Pinkfresh Studio Simple & Sweet collection to add the title. I found THIS fun Washi Tape from an Etsy shop and just had to have it! I love the way it looks and placed it in the bottom corner, layered over my photo.
What are your favorite moments to document? Everyday moments are definitely my favorite!!
If you've had a chance to stop by my Blog this week, you're probably wondering if you're in the right place. You normally expect to see 12x12 layouts when you stop by my Blog, but lately it's been all about Traveler's Notebooks! You're definitely in the right place, and I'm excited to share new projects with you!
I have been away from posting on my Blog for the past couple of months, but I'm planning to be back on a more consistent basis. There are two reasons for that:
1. For a while, I was on several Design Teams and keeping up with my own DT and Etsy shop, that I just couldn't find the time. And with all of the social media channels out there these days, sometimes certain ones get neglected. Now that my DT commitments are more manageable, I have more time to focus on other areas of the crafty community.
2. Because I am a WAHM and I consider paper crafting to be my favorite hobby, but also my at home job, I want to be able to share what I'm creating with you and the products I'm using. I will never share anything with you, that I don't love myself. Some of the products I use on my projects are purchased by me and some are provided from companies that I've worked with or purchased from for years. You may run across affiliate links in my posts, which means I just make a commission if you click on a link and make a purchase while visiting that site. And if you're like me, you probably can't resist awesome scrappy purchases every once in a while...or a few times a week! HA!
So, with all of that out of the way, I've got a new Traveler's Notebook layout to share with you today. And I'll tell you a little bit about why I'm so in love with documenting in a TN.
If you're wondering why the switch from 12x12 to Traveler's Notebooks, here's a few reasons: 1. The size and they are self contained! After so many years on Design Teams, I have accumulated quite the stack of layouts. There were some months where I would be creating 15-20 layouts. That means lots of Scrapbook albums. I am not big on clutter, so having Scrapbook albums shoved in all parts of the house is just not appealing to me...currently the reason that almost all of them are at my husband's office. I have a few at our new house, but they are not something I put on display, so having to store them in a closet just doesn't do it for me. With Traveler's Notebooks, I could have 10 covers filled with inserts and not make a dent in storage space.
2. I like to use my stamps in the TN. You will not find much stamping on my 12x12 layouts. I usually make a big mess when I'm stamping and just can't ever seem to work them into my layout designs very well. But I love that they are so easy to use in my TN. It's another flat embellishment I can add to my TN layout, that doesn't add bulk to the insert.
3. Journaling. I am not a journaler on my layouts. I gave it a try back in the day when I first started, but it just wasn't something I enjoyed doing. In the TN, I feel like they are easier for me to journal in. It's just one of those things, it doesn't make sense to me either! HA!
4. Time. Most of my 12x12 layouts are pretty time consuming. It can take an hour or two to complete one layout. Documenting in the TN is so much faster, but I still end up with a fun layout and the time to sit down and create.
5. They are just fun!
Hopefully this gives you a little more insight into the world of TN. If you haven't tried it, I highly recommend it!
Now, onto some info about my Traveler's Notebook spread. This notebook is one I am working in for Reese. Right now, I have one for Madison, Emma, Reese, and an everyday insert that I created after watching a tutorial from Heba Alsibai. For this layout, I used the center pages. I wanted my photo to span across both pages. I snapped this photo on my phone one afternoon, when we were heading home from our swim at the neighborhood pool.
For my title, I used a mix of alpha stickers from Pinkfresh Studio and the new Max Outlined Alpha from Studio Calico. I used the stamp set on a scrap piece of patterned paper and fussy cut each letter to add to my layout. I also used the Here & Now Stamp on a piece of White card stock and then cut it out, to layer over my photo. To complete the layout, I grabbed the Wild Child collection from Pink Paislee and embellished with a few stickers.
Thanks for stopping by today, and I hope you enjoyed a look at my new Traveler's Notebook layout!
Hi scrappy friends!! I'm kicking things off this week with a Scrap Stash Giveaway on my INSTAGRAM feed! It's easy to enter, so head over to my Instagram and and follow me for a chance to win a selection of the Crate Paper Carousel collection and the Pink Paislee Turn the Page collection!
This week, the Pink Paislee Design Team has been sharing a look at our craft spaces. I kicked things off earlier this week with a tour of my craft area. My craft space is in the master bedroom and has been for many years
now. It’s been a functional space over the years, but because of the
small size, I never really invested time into making it a stylish space.
But this past December, I decided to do something about that!
I’ll start out with everything at my desk area. And if you’re wondering
if it is always this clean, the answer is YES! HA! The kids wreak havoc
on the rest of the house, so I love keeping my own little area of the
world neat and organized. The only time you will find it messy is when
I’m working on a project and if I have to leave a project unfinished for
a while. But as soon as I’m done I always clean up, even if I plan on
starting a new project.
Let me just tell you, if you can do it, put up peg boards for storage!
It’s awesome! I love having it on the wall over my desk. I keep things
close at hand that I use frequently when I’m working. And it’s
functional and cute! You can hang wire baskets for storage, a screw
driver holder turns into great scissor storage, and you can even display
things like mini albums by hanging them on your peg board.
I also like to keep my current design team collections nearby, so I
store them in the knock off Ikea cart next to my desk, along with the
notebooks I use on a daily basis. And pencil/pen storage is a must. I
picked up this wooden “bottle” container at Michael’s and it’s perfect
for storing my favorite mechanical pencils and a few small scrapbooking
tools.
For more storage, I have a shelf above my desk that is attached over my
peg board… thank goodness for a handy hubby! I have a mix of products,
photos, and decorative items that I keep on the shelf. And the brackets
that hold the shelf in place are perfect for stringing thin wire and
creating a photo line across the bottom of the shelf. Can you tell by
now what my favorite colors are in my craft space??!!
I have an OLD table that used to serve as the table for my sewing
machine until I made room for it on my desk because I used it so much. I
turned the table into a space for things like my Silhouette Sketch
Pens, roller stamps, flair buttons, and stamp paraphernalia. Recently, I
decided to purchase contact paper that looks like butcher block and I
used it to cover the top of the old table and also to cover the 8 foot
white table that I use for my desk. I took some inspiration from Paige
Evans and I have a small empty wall area that serves as a display for
some of my favorite layouts.
I have two, large wire shelving units that are placed on opposite
walls that make for great storage. I like to keep my collections in 13
inch Zip Lock bags to keep things all together and I store those
collections by manufacturer in 13×13 boxes. I also have several white
photo boxes that hold our photo CD’s, any loose photos, and small
miscellaneous items that I may need. I keep a good bit of my scrapbook
albums on the larger of the two shelves, but have recently slacked on
putting layouts in albums. I probably have at least 150 layouts that are
not in albums. I know… the horror!! I decided it would be fun to create a video tour to go along with the
photo tour, so you can check out my video for more on my Craft Room!
I hope you’ve enjoyed a look into my craft room! It’s a small space, but
fits my needs perfectly! My advice to any of you that don’t have a
separate craft room is to make what you have your dream space. With a
bit of paint, a trip or two to the hardware store, and helpful hands, my
space is just what I want it to be and I love sitting down at my desk
to make pretty things!
I am so excited to join the Pink Paislee Design Team for a new term! I had so much fun last year, and I'm glad they let me stick around for another year! This week, the new and returning designers are in the Spotlight, showcasing their signature style. I kicked things off yesterday, with my layout using the new Oh My Heart collection by Paige Evans. I love to work with cut files, a lot of patterned papers, and hand stitching, so I decided to include all three on my layout.
I wanted to use as many patterned papers from the new collection as
possible, so I set up the 6 pointed star design in Silhouette Studio.
Once I had it sized correctly, I repeated the diamond shape on the mat
in Studio. And believe it or not, all of these colors and patterns are
from only two patterned papers in the collection. Paper #12 and Paper
#24 have a mix of patterns and colors from the entire collection, so it
was easy to cut my diamond shapes from just these two sheets, but make
it look like I used multiple papers from the collection. Once all of the
diamonds were cut, I arranged them on a white cardstock background to
recreate the original star shape I designed in Silhouette Studio.
After all of the star shapes were completed, I used my paper piercer to
poke holes along the Hexagon shapes created by the pattern. I used
several embroidery floss colors that coordinated with the Oh My Heart
collection to stitch around each of the shapes. I really liked that the
hand stitching added more texture to the layout and helped define the
hexagons on the layout.
To continue the hexagon shape, I printed and trimmed my photos into
hexagons also. I placed the photos on opposite sides of the layout and
added a mix of embellishments around each photo to draw attention to
them and help bring them out from the colorful background. I used the
“Love Your Laugh” chipboard piece from the Good Life Chipboard Stickers,
to create my title. The placement of the title helps connect the photos
and embellishment clusters on the layout. I completed the layout with a
few hearts from the Ephemera pack placed in the center of some of the
hexagon shapes.
Make sure you stop by the Pink Paislee Blog all this week, and get to know all of the Designers that will bring you inspiration this year!
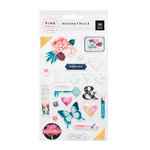
This week on the Pink Paislee Blog, the Design Team is sharing ideas for using Rub Ons. I wanted to feature the rub ons from the gorgeous, Moonstruck collection on my layout. I tend to use rub ons sporadically on my layouts… one or two strategically placed among other embellishments, but I thought it would be fun to incorporate them in a large focal design.
I wanted a patterned paper background so I chose a subtle design that
would allow the rub ons to stand out. I used my Silhouette Cameo to cut a
large heart shape. Then I used a pencil to lightly trace the shape onto
my background paper. I started placing the rub ons at the bottom of the
heart on the left hand side of the heart shape. Then I continued
following the pencil outline until all of the shape outline was filled
with the rub ons.
Once I had all of the rub ons in place, I machine stitched around the
heart shape so I could cover any of the pencil line that might show
through. I placed the photo and title inside the heart to fill the open
shape. Since the rub ons were a flat element on the layout, I used some
of the cork pieces and puffy stickers to add dimension to the layout.
Once I had everything in its place, I decided to add some black Color
Shine splatters. I loved the contrast it added against the watercolor
look of the background paper. If I’m adding my Color Shine to a
completed layout, I always cover my photo with scrap paper to keep any
of the mist from getting on it. But I don’t mind it splatters over my
embellishments.
If you're looking for more ideas on how to use rub ons for your projects, make sure you stop by the Pink Paislee Blog and check out all of this week's posts.
Trends come and go, but washi tape is here to stay! It’s just such a fun product… totally cute with all of the
different patterns and very versatile in its uses. I love the washi
sheets that come with the Moonstruck collection. They are perfect for
layouts and cards, but you can also use the sheets for other projects as
well. I have a washi photo board to share with you today, and a
tutorial to go along with my project!
Step 1: Gather the supplies you’ll need. I picked up an inexpensive
plank board at my local craft store. Print your photos ahead of time so
you’ll be ready to get started. Make sure you leave your photos
untrimmed after they are printed.
Step 2: Use twine to wrap around the board. I started on the back side
of the board and used a stapler to secure the twine to the wood.
Step 3: After you secure the end of the twine, you can begin wrapping it
around the board. I criss-crossed my twine to create an interesting
pattern on the front side of the board.
Step 4: Now it’s time to play with the washi tape. I chose the skinny
strips from the Moonstruck washi sheets and placed them along the four
edges of each of my photos.
Step 5: After each side of your photo is covered with washi tape, you
can trim away the excess photo paper with your paper trimmer.
Step 6: I decided to use small clothespins to attach my photos to the
twine. The clothespins are perfect for covering with washi tape too. I
placed a few designs on my clothespins. If you need to trim off any
excess washi tape, just use a craft knife along the edges of the
clothespin.
Step 7: Now you can add your photos to the board. Just clip them to the
twine with your clothespins and grab some of the embellishments from the
Moonstruck collection to embellish your photos.
And that’s it! You can interchange the photos and coordinate your
collections and washi tape to create unique looks for your project!
This past week on the Pink Paislee Blog, the designers shared ideas for fussy cutting. Fussy cutting can be as simple or intricate as you want it. It’s great
for creating extra embellishments and for adding texture and dimension
to your projects. I have a card set to share with you using the Take Me Away collection by Paige Evans.
The first card was easy peasy! I decided to cut one of the cute windows
from the Paper 09. When I fussy cut, I usually like to leave a margin
around whatever I am cutting. This helps your fussy cut image stand out
from the background you’re adding it to. I covered a white card base
with Paper 07. I liked that it had a subtle pattern with the small polka
dots and it was a great contrasting color against the yellow on the
cute window image.
I wanted to have more of a separation between the patterned paper and
fussy cut window, so I chose one of the tags from the Ephemera Pack as a
layering piece. Once I had the tag in place, I added several pop dots
to the fussy cut window to give it dimension on the card. I completed
the card design with a couple of chipboard pieces and embellishments.
My second card features more intricate fussy cutting. Flower patterns
are perfect for fussy cutting. Fussy cut flowers can be used as extra
embellishments for your projects or you can create a totally different
background look with them. I chose Paper 02 and cut most of the flowers
from the paper. I kept my card base white because I just wanted to cover
the entire front of the card with the fussy cut flowers. I cut and
layered the flowers on the front of the card until I reached my desired
look.
When adding adhesive to the back side of the flowers, I didn’t cover
them completely. This allowed me the ability to slide the fussy cut
pieces under one another and gave texture to the card. I really loved
the final result of all of the flowers on the front of the card. This
technique would work great on a layout too You could use a larger
flower pattern to cover the bigger area. I wanted to keep the
embellishing very simple, so I chose two chipboard pieces for the card
and finished with one of the white foam hearts.
You can find more ideas for fussy cutting, by checking out the posts from this past week on the Pink Paislee Blog!
This
is a personal blog. All editorial content and projects are
intellectual property of ashleyhortondesigns.com. I do receive
compensation and material product from Pink Paislee to develop my craft
posts, but all ideas and opinions are my own.
It's Home Decor week on the Pink Paislee Blog, and the Design Team has some great inspiration in store for you! I started things off yesterday, with a Dreamcatcher created with the new Moonstruck collection and an Embroidery Hoop.
The Dreamcatcher trend has been popping up in the paper crafting world, so I thought it would be fun to interpret it into a Home Decor piece. My daughter's love it when I make projects like this and they usually fight over who gets to have it in their room. HA! This time the younger sister won out.
This project was fun and easy to put together. I used a 9″ embroidery
hoop which you can find at your local craft store for a very low price. I
cut a circle from one of the Moonstruck patterned papers to fit behind
the embroidery hoop. You could also do the opposite if you wanted to and
add your circle over the top of the embroidery hoop. Next, I cut a 9″
spiral cut file to layer over the patterned paper before adhering it to
the embroidery hoop.
Once I had the paper adhered to the embroidery hoop, I grabbed the three
feathers from the Moonstruck ephemera pack. I machine stitched through
each of the feathers, leaving a long piece of thread at the top and
bottom of each one. I also die cut two feathers on my Silhouette Cameo
from two different Moonstruck patterned papers and stitched those as
well. Then I hung each feather by placing the thread on the back side of
the patterned paper and securing it with washi tape.
I finished the dreamcatcher design with a few more embellishments from
the Moonstruck ephemera pack and puffy stickers. I added dimension to
the project by stitching through the butterflies and folding the wings
before adhering them to the patterned paper. If you wanted to
personalize your home decor dreamcatcher even more, you could paint your
embroidery hoop before assembling it or even add your favorite ribbon
or trim on the outside edge of the circle.
If you're looking for more inspiring ideas for home decor, make sure you check out the Pink Paislee Blog all this week!
This
post contains affiliate links, which means I will receive a small
commission from any purchases made from product clicks on this post.