Showing posts with label Moonstruck. Show all posts

Thursday, January 19, 2017

Pink Paislee | Shine Bright

This week on the Pink Paislee Blog, the Design Team is sharing ideas for using Rub Ons.  I wanted to feature the rub ons from the gorgeous, Moonstruck collection on my layout.  I tend to use rub ons sporadically on my layouts… one or two strategically placed among other embellishments, but I thought it would be fun to incorporate them in a large focal design.


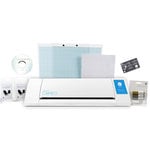
I wanted a patterned paper background so I chose a subtle design that would allow the rub ons to stand out. I used my Silhouette Cameo to cut a large heart shape. Then I used a pencil to lightly trace the shape onto my background paper. I started placing the rub ons at the bottom of the heart on the left hand side of the heart shape. Then I continued following the pencil outline until all of the shape outline was filled with the rub ons.


Once I had all of the rub ons in place, I machine stitched around the heart shape so I could cover any of the pencil line that might show through. I placed the photo and title inside the heart to fill the open shape. Since the rub ons were a flat element on the layout, I used some of the cork pieces and puffy stickers to add dimension to the layout.


Once I had everything in its place, I decided to add some black Color Shine splatters. I loved the contrast it added against the watercolor look of the background paper. If I’m adding my Color Shine to a completed layout, I always cover my photo with scrap paper to keep any of the mist from getting on it.  But I don’t mind it splatters over my embellishments.

If you're looking for more ideas on how to use rub ons for your projects, make sure you stop by the Pink Paislee Blog and check out all of this week's posts.

Thursday, January 12, 2017

Pink Paislee | Washi Photo Board


Trends come and go, but washi tape is here to stay!  It’s just such a fun product… totally cute with all of the different patterns and very versatile in its uses. I love the washi sheets that come with the Moonstruck collection. They are perfect for layouts and cards, but you can also use the sheets for other projects as well. I have a washi photo board to share with you today, and a tutorial to go along with my project!


Step 1: Gather the supplies you’ll need. I picked up an inexpensive plank board at my local craft store. Print your photos ahead of time so you’ll be ready to get started. Make sure you leave your photos untrimmed after they are printed.


Step 2: Use twine to wrap around the board. I started on the back side of the board and used a stapler to secure the twine to the wood.


Step 3: After you secure the end of the twine, you can begin wrapping it around the board. I criss-crossed my twine to create an interesting pattern on the front side of the board.


Step 4: Now it’s time to play with the washi tape. I chose the skinny strips from the Moonstruck washi sheets and placed them along the four edges of each of my photos.


Step 5: After each side of your photo is covered with washi tape, you can trim away the excess photo paper with your paper trimmer.


Step 6: I decided to use small clothespins to attach my photos to the twine. The clothespins are perfect for covering with washi tape too. I placed a few designs on my clothespins. If you need to trim off any excess washi tape, just use a craft knife along the edges of the clothespin.


Step 7: Now you can add your photos to the board. Just clip them to the twine with your clothespins and grab some of the embellishments from the Moonstruck collection to embellish your photos. 


And that’s it! You can interchange the photos and coordinate your collections and washi tape to create unique looks for your project!


Monday, November 14, 2016

Pink Paislee | Home Decor Dreamcatcher

This is a personal blog. All editorial content and projects are intellectual property of ashleyhortondesigns.com. I do receive compensation and material product from Pink Paislee to develop my craft posts, but all ideas and opinions are my own.

It's Home Decor week on the Pink Paislee Blog, and the Design Team has some great inspiration in store for you!  I started things off yesterday, with a Dreamcatcher created with the new Moonstruck collection and an Embroidery Hoop.


The Dreamcatcher trend has been popping up in the paper crafting world, so I thought it would be fun to interpret it into a Home Decor piece.  My daughter's love it when I make projects like this and they usually fight over who gets to have it in their room.  HA!  This time the younger sister won out.


This project was fun and easy to put together. I used a 9″ embroidery hoop which you can find at your local craft store for a very low price. I cut a circle from one of the Moonstruck patterned papers to fit behind the embroidery hoop. You could also do the opposite if you wanted to and add your circle over the top of the embroidery hoop. Next, I cut a 9″ spiral cut file to layer over the patterned paper before adhering it to the embroidery hoop.


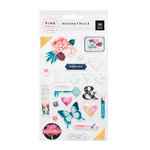
Once I had the paper adhered to the embroidery hoop, I grabbed the three feathers from the Moonstruck ephemera pack. I machine stitched through each of the feathers, leaving a long piece of thread at the top and bottom of each one. I also die cut two feathers on my Silhouette Cameo from two different Moonstruck patterned papers and stitched those as well. Then I hung each feather by placing the thread on the back side of the patterned paper and securing it with washi tape.


I finished the dreamcatcher design with a few more embellishments from the Moonstruck ephemera pack and puffy stickers. I added dimension to the project by stitching through the butterflies and folding the wings before adhering them to the patterned paper. If you wanted to personalize your home decor dreamcatcher even more, you could paint your embroidery hoop before assembling it or even add your favorite ribbon or trim on the outside edge of the circle.

If you're looking for more inspiring ideas for home decor, make sure you check out the Pink Paislee Blog all this week!   

This post contains affiliate links, which means I will receive a small commission from any purchases made from product clicks on this post.

PRODUCTS USED: