Friday, February 1, 2013

I Have Issues...Paper Issues!!

Happy Friday everyone!!  I know you are probably ready for the weekend and I know I am!  Even Stay at Home Moms look forward to Saturday and Sunday!!  :)  

I just wanted to pop in for a quick **EXCITING** announcement!!  I was contacted earlier this week by the the fabulous Cassie Box and she invited me to be a part of the Paper Issues Team!  Paper Issues hosts a fun theme every two weeks and you can link up a project for the chance to win some great prizes.

Paper Issues also has an awesome ETSY SHOP, that is stocked full of fabulous scrappy goodies!  And Cassie ships fast!!!  I have been ordering from Paper Issues for a while and have loved the service and products!  And here's some good news for you...if you shop in the Paper Issues Etsy Shop, you can use the Code ASHLEY75 to receive 20% off of your purchases!!  Who doesn't love a discount!! I hope you'll check out the Paper Issues Blog and become a Follower and stop by the shop to browse through some of the goodies.


Wednesday, January 30, 2013

December Daily...DONE!

Well, I am pretty excited to say, that I finished up my 2012 December Daily...and only a month after Christmas, too.  That is definitely a BIG accomplishment.  I finished up my album for 2011 within the week before this last Christmas, so I am definitely way ahead of the game this year.  I had a lot of fun mixing in so many products on my December Daily and was so excited to win one of the Kitschy Kristmas Kits from Paper Issues.  Having all of my papers and embellishments ready ahead of time, really helped me to stay on top of working on my album.

Before I share the final pages, here are the links to the first three posts, so you can check out the complete album:

December Daily Part 1 

December Daily Part 2

December Daily Part 3


I tried not to use a lot of bulky embellishments, but my album is still pretty thick.  Thankfully it all fit in the binder album I picked up at Michael's.  But I've learned something new each year, for the past 3 years, that I've been doing a December Daily...so for Christmas 2013, I will definitely look for an album with a wider binding!  :)


Monday, January 28, 2013

Love This

I am not a Project Lifer, but I still love participating in the Photo A Day challenge.  Some of those photos are just snapped and live in Instagram and Facebook, but others will sometimes end up as the subject of a layout.  That's exactly what happened with the photo for January 18th.  The photo prompt that day, was Shadow.  I decided to get the kids together and take a fun shot of their shadows together.  I love the way the photo turned out and decided to use it along with the January Kit from Artful Delight.  This page came together surprisingly easy and it is one of my favorites using the January Kit.


The Teal patterned paper with the Cloud cut out, was actually a left over piece that I used on my Just Play layout from last Monday.  I just grabbed it from the pack and layered it behind my photo.  I also fussy cut around one of the other negative cut clouds and added it as a second cloud.  And I had some fun using the BoBunny Jewels and Stamps.  I used the banner stamps on some of the paper in the Kit and then just cut them out, to layer under my photo.

Artful Delight will be revealing the February Kit soon, so make sure you check it out and get one for yourself.  And make sure you check in with my Blog on Mondays during the month of February, to see what I create with the Kit!!

Sunday, January 27, 2013

Creative Scrappers Sketch #245

It's almost time to put January 2013 in the books, but before we do, Creative Scrappers has a new sketch this week!  Nicole Nowosad created a great sketch with a beautiful burst pattern.  I really loved working with Nicole's sketch, because it leaves so much freedom for your embellishments and title and journaling area.  Here is how I used the sketch:


I love this cute photo of our middle daughter, that I snapped on her birthday.  She is a December 26th baby, so we always try to take her out to do something fun and let her pick somewhere that she wants to eat for dinner.  She looked adorable in her Pink coat and her hat, which has Hello Kitty on the front...hence some of the Hello Kitty supplies on this page. I wish the Hello Kitty was showing a little more in the photo, but hey, I got her to cooperate for the picture and smile, so I wasn't about to ask to try again!!  :)  I used the Hello Kitty Washi Tape, Date Stamp, and Envelope.  I also fussy cut the cute little Hello Kitty logo out of some of the packaging to use as one of my embellishments.

Make sure you squeeze in some time to play along with this week's Sketch and you can have the chance to win from our January Sponsor, My Creative Scrapbook!

Supplies Used: Patterned Paper:  Crate Paper; Washi Tape; Date Stamp; Envelope, & Packaging:  Hello Kitty; Flair Buttons:  BossyJoscie; Baker's Twine:  The Twinery; Chipboard Number:  Martha Stewart;  Font: CK Grapevine; Enamel Dots:  My Mind's Eye; Spray Mist:  Studio Calico; Other:  Toothpick & Embroidery Floss


Friday, January 25, 2013

And Now For Something Completely Different

Before I share my final Guest Designer post for October Afternoon, I would like to say a BIG Thank You to Jon Flatland and the OA Staff for inviting me to join them this month.  I am still over the moon, to have been given this opportunity and can't say how exciting it was to design with October Afternoon's amazing products.

Now, on to the great OA products!  I don't know about you, but one of my favorite things to see on a Manufacturers Blog, is when one of the DT members uses a collection out of context.  Say for example, taking a Christmas line and using it to create an everyday page.  So when I say all of the goodies in the Midway collection, I just knew I had to take the Fair/Carnival themed line and use it in a totally different way.  I have two layouts today, that both use the Midway collection out of context. 

First up, is a layout using the Midway collection for a Halloween themed layout.  Yes, you heard that right!  If you check out all of the patterned papers in this line, there is such a great range of color, and I pulled out patterns that used the colors Yellow, Green, Orange, Teal, Black, and Gray...perfect for creating a Halloween layout!


I really had a lot of fun working out the patterns/colors and embellishments for this page.  And one of my favorite things, was stamping with the Pie Chart from the Midway Rubber Stamps set.  Before getting started, I cut out three circles on my background page, measuring a little over 2 inches.  Then I stamped three of the Pie Charts, using Black ink and adhered them to the backside of the page.  I embellished each of the circles, by punching the smaller Pie Chart shapes from the patterned paper and added buttons and brads to the center.


To add some interest to the journaling area, next to my photo, I layered several bits from the Tidbits pack, the Doo-Dads pack, the Journal Cards pack, and one of the Tin Pins.  I also decided to again, sneak in the October Afternoon logo from the bottom of the patterned paper, by making a fun little flag.  I finished off my layout, by cutting the title for the page on my Cameo with Black cardstock and searched around in my stash for some google eyes, just for a little extra fun!


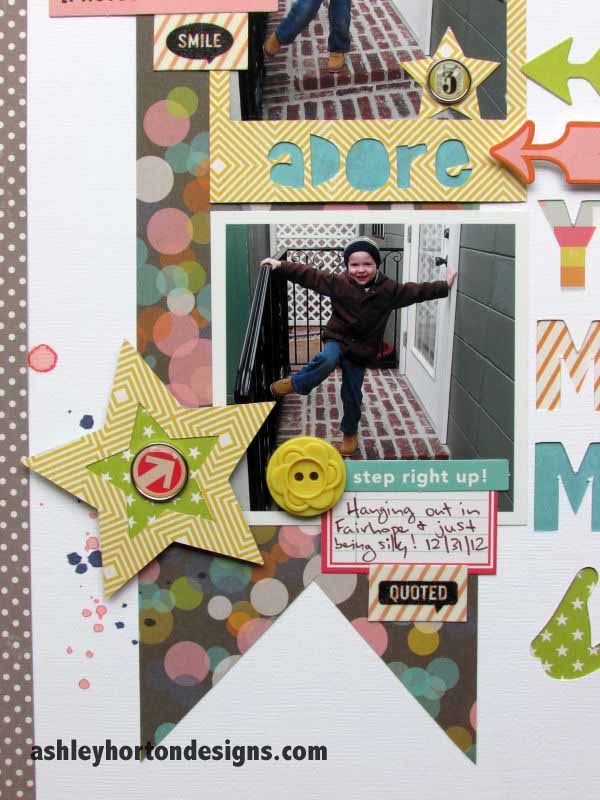
For the second layout, I decided to take an everyday approach, with the Midway line.  Just in case you're wondering, the Carousel patterned paper is one of my favorites from this line.  I LOVE both patterns...the great Bokeh look and the Orange diagonal stripe on the B side!!  I knew the Bokeh pattern would work well with this layout, because the Brown picked up the Brown from my photos and the Bokeh pattern allowed me to bring in all of the other colors from the line. 


I used some of the 12x12 sheets for the longer border strips and I have loved the 8x8 pad that comes with this line.  It is great for those elements, when you don't want to cut into a full 12x12 sheet.  I used some small pieces from the 8x8 pack, to back the title letters cut from the White cardstock.


I completed the final touches for this layout, using some of the brads, buttons, a few of the stickers, and a Tin Pin.  I also cut two of the sentiments from the Washi Tape and backed them with the diagonal Orange stripe from the Carousel paper.  I also had some of the Sprinkles that come along with the Midway collection, so I removed the nozzle from the Token and Pink Balloon Sprinkles and tapped it over my page, to give a splattered mist look over the White cardstock.


I hope you have enjoyed seeing my work this month, as much as I have enjoyed sharing it with you!!  I can't believe the month flew by so fast, but I still have plenty of the OA Farm Girl and Midway goodies to continue using on my work.


Tuesday, January 22, 2013

This Happened 2012

We all know time flies, and we are already getting close to reaching the end of January!!  So now is a great time to sit down and look back on some of your photos from 2012...or maybe 2011...1995??!!  HA!  We all photos sitting around that need to be scrapped, so I am here to share a fun idea with you today, for Love My Tapes.  Why not do a Year In Review page?  With the popularity of small, square photos this can be a fun and easy page to put together.  I decided to do a layout based on 2012 and picked a significant photo from each month.  I printed the photos at 2.5x2.5 and then cut each one, with thin White border around it.  I set my page up similar to a calendar and then I broke out my Washi Tape, to use as month banners for each photo.


I added strips of tape to White cardstock and then cut the name of each month on the Cameo.  I used toothpicks for the banner and placed them over each of the photos.  I debated on using a colored paper behind the month names, but decided just to do a Brown outline with my fine point Zig pen.  I used a few embellishments, but didn't want to overdo it, because the photos took up a large part of my page.

So why not take a look back over your photos and see what kind of fun theme you can come up with for a Year In Review page, and figure out some inventive ways to work in your rolls of LMT Washi Tape!!


Monday, January 21, 2013

Just Play

Hope you all had a great weekend...and that maybe you are getting an extra day today, for the MLK holiday!!  I am stopping in, to share another layout using the January Kit from Artful Delight.  I decided to step "out of the box" on this layout.  This month's Kit features a lot of great love themed papers that are perfect for your Valentine's Day and love photos.  But I thought it would be fun, to see how the papers and embellishments could be used for an every day layout.


I grabbed the Woodland Park papers from October Afternoon and used the Green patterned paper as a border around my layout.  Then I fussy cut some of the pretty flowers and scattered them below my photos.  I love the cute paper clip birds that are included in this Kit and one of them made a perfect embellishment for this layout.  I used one of the BoBunny brads to attach the bird to the layout.

So here's a fun little challenge for you...next time you purchase a Kit or themed collection, figure out fun ways to use it outside of the theme.  I bet you will be surprised by what you come up with.

_________________________________________________________

On another note, I would like to ask for prayers for a family in our church.  About five minutes after we sat down in our class yesterday morning, we found out the Davis family's 24 year old son had been killed the night before.  Cade was such a sweet guy and my husband, Tyler, and I taught him in our College class around a year or so ago.  He was one of those people, that you just instantly liked.  His parents have another College age daughter, so please remember Jeremy, LaDonna, and Katelyn as they deal with the loss of Cade.

I also wanted to share this photo that I took yesterday.  The photo prompt for the Photo a Day was "something you saw".  I thought the sun over the church Steeple was a sight for sore eyes, because it has been so dreary around here for a while.  Once we were inside the church and found out the news about Cade, the meaning of the photo took on a little bit of a different meaning.  It reminded me that no matter what comes our way, God is still in control...even when we don't understand what is going on.  And I decided to print it out, and send it to the family in a sympathy card, as a reminder that their church family was all under that roof lifting them up in prayer during one of their hardest struggles.