Wednesday, September 16, 2015

Pretty Little Studio Guest Designer & Giveaway!

I am excited to be guest designing this month with Pretty Little Studio!  I received lots of goodies from the new Let's Go and Treasure Island collections, to work with.  I wanted to stop in today and share my first layout that went up yesterday on the PLS Blog.


Grids are a favorite go to design, so I thought it would be fun to trim down four of the 8×8 Treasure Island papers to 6×6 and create a grid in the background.  Then I placed a photo in three of the squares, and embellished with the Die Cut Frames, Die Cut Arrows, Ahoy Mate Phrase Strips and Arrow Adventure Flair.  I wanted to add a different texture to the layout, so I used embroidery floss to hand stitch my title in the final square.

PLS Products Used:  Treasure Island Collection: Pattern Papers, Phrase Strips, Arrow Flair, Word Stickers, Mini Cut-Apart Word Strips, TabsLet’s Go Collection: Pattern Paper (Diamonds) Zurich


I am giving away 5 of my favorite Pretty Little Studio products to one random Winner!  Just leave a comment on this post by Tuesday, September 22, to win these favorites:

http://www.plspapershop.com/

The Winner will be announced here on Wednesday, September 23rd!

https://www.etsy.com/shop/TheCutShoppe

Monday, September 14, 2015

Simple Stories & The Cut Shoppe Product Swap!

This past week, Simple Stories and The Cut Shoppe got together for a fun Product Swap.  I was up on Saturday for the final day of the swap and wanted to stop in and share my layouts with you today!

One of my favorite looks to use on a layout, is a large die cut backed with multiple patterned papers.  I started this layout by cutting the I Heart Plaid cut file from the So Very Loved patterned paper in the We Are Family collection.  Once the heart finished cutting, I used a mix of patterned papers from the collection to back the inside shapes of the heart.  This is a great technique if you're using papers from a 6x6 paper pad, or have a lot of scrap pieces that you want to use up!


https://www.etsy.com/listing/246935237/the-i-heart-plaid-cut-file-is-a-large?ref=shop_home_active_8

https://www.etsy.com/listing/246935749/the-tall-type-alpha-includes-all-the?ref=shop_home_active_1


After I finished backing all of the open spaces on the heart, I added it to the center of the layout.  Then I backed the words in the title, that I also cut on the Cameo, with some of the same patterned papers.  I wanted to add a positive and negative look to the title around the heart, so I also cut the word "Heart" from the Tall Type cut file set.  I wanted the word to stand out, so I enlarged the letters and cut them from the Making Memories patterned paper.


When the title work was finished, I added my photo to the center of the heart.  I like to layer my photo and embellishments over the die cut elements, to give dimension to the layout.  I also like to draw attention to my photo, by clustering various embellishments, so I added some of the Bits & Pieces, stickers and wood veneers from the collection.


Supplies:
#4702 - Fundamentals Cardstock Stickers
#4703 - Expressions Cardstock Stickers
#4705 - Perfect Together Patterned Paper
#4706 - Dreaming Big Patterned Paper
#4707 - Simply Us Patterned Paper
#4708 - Making Memories Patterned Paper
#4709 - So Very Loved Patterned Paper
#4715 - 2x12, 4x12 & 6x12 Elements Patterned Paper
#4727 - Bradz
#4728 - Chipboard Stickers
#4729 - Bits & Pieces
#4731 - Enamel Dots
#4738 - Chipboard Frames
#4751 - Wood Veneers

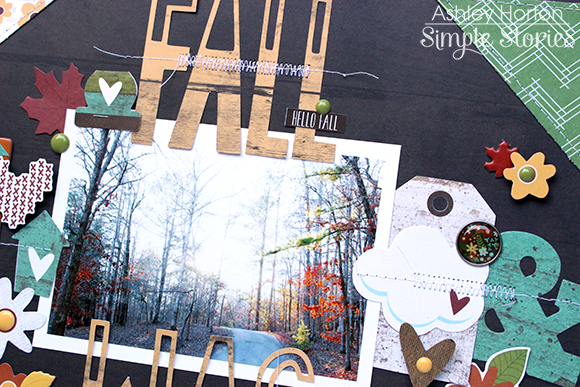
On my second layout, I used the Tall Type cut file to create a large title element.  I cut the title letters from the Pumpkin Spice Simple Basics Apple Cider/Gingham patterned paper.  Then I placed the title and photo on the Acorn/Gingham background paper in a vertical design.


https://www.etsy.com/listing/246935749/the-tall-type-alpha-includes-all-the?ref=shop_home_active_1


I wanted to balance the vertical look of the title and photo, with a horizontal embellishment grouping.  I placed several different types of embellishments from the Pumpkin Spice collection on both sides of the photo.  Once the embellishments were in place, I added some machine stitching to add texture and interest to the embellishing.


And here's a fun side note about something on this layout.  See the patterned paper triangles in the corner?  Those were left over from the "Fall Is My Happy Place" layout from last month.  My first round of triangles for the quilt design on that layout, ended up being just a bit too large for the design.  So I thought it would be fun to add some quick machine stitching and place one of the triangles in each corner on this new layout.  That's why it's a good idea to keep things like that lying around for future layouts!


I hope you've found some inspiration today for using die cuts on your layouts.  It's a great way to add your own unique look to a project, and some patterned paper from your favorite Simple Stories collection + your electronic die cut machine can go a long way in creating fun looks on your projects!
Supplies:
#4602 - Fundamentals Cardstock Stickers
#4603 - Expressions Cardstock Stickers
#4604 - Autumn Splendor
#4605 - Fall Delight
#4509 - Pumpkin Everything
#4617 - Apple Cider/Gingham
#4621 - Acorn/Gingham
#4627 - Bradz
#4628 - 6x12 Chipboard
#4629 - Bits & Pieces
#4631 - Enamel Dots
#4683 - Chipboard Frames

And, you can still save 30% off of your purchase in The Cut Shoppe through tomorrow!  The Discount Code also includes the new Let's Cut Class Lesson 01, so don't miss out on getting it for the discounted price!

https://www.etsy.com/shop/TheCutShoppe
 

Friday, September 11, 2015

Let's Cut Class!

I've got something NEW and exciting to share with you today!  The Cut Shoppe is now offering a mini class, Let's Cut Class in The Cut Shoppe Etsy store.  Lesson 01 is now available for purchase in the Shop.

https://www.etsy.com/listing/247532361/lets-cut-class-01?ref=shop_home_feat_4

What does the Class offer?

*Exclusive Chevron Burst cut file
 
https://www.etsy.com/listing/247532361/lets-cut-class-01?ref=shop_home_feat_4


*PDF 6 Page Lesson

*Layout Inspiration

*Sketch Alternative to Original Layout

*Silhouette Studio Photo Tutorials

*Layout Process Photos

*Tips & Ideas

*Access to Private Let's Cut Class Facebook Group

The class price if $4.00, but if you purchase between now and Tuesday, September 15th, you can save 30% with our current Discount Code FALLFINDS30!

I hope to see you in the Let's Cut Class Facebook group!

https://www.etsy.com/shop/TheCutShoppe

Thursday, September 10, 2015

Hip Kit Club | What a Wonderful World

It's time for my first post using the September 2015 Hip Kit & Add-On Kits!  If you love the new collections from Amy Tangerine and Dear Lizzy, then you need this month's kits!  They are packed with so many amazing goodies!  For my first layout this month, I decided to use a large die cut star, which will also be available to those that are signed up with a free account on the Hip Kit Website.  Just head over and sign up to have access to the Free Cut Files!


I cut the Super Star cut file on my Silhouette Cameo, from White Cardstock included in the September 2015 Cardstock Add-On.  Then I backed each section with a different patterned paper from the September 2015 Main Kit.  I wanted to add the title to the center of the star, so I used a mix of Thickers, letter stickers and chipboard from the Main Kit.


After I had the title and photo in place, I started looking through the Finders Keepers Bits pack from the Main Kit, for pieces that I could place around the outside edge of the star shape.  I also added in some of the Dear Lizzy Wood Buttons from the September 2015 Embellishment Kit and the Finders Keepers Enamel Dots from the Main Kit.  I wanted to include several different textures to create interest on the layout.


If you haven't had a chance to check out the September Kits, make sure you head over to the Hip Kit Website and while you're there sign up, so you can have access to all of the amazing Free Cut Files!!

https://www.etsy.com/shop/TheCutShoppe

Monday, September 7, 2015

The Cut Shoppe & Simple Stories Product Swap!

Happy Labor Day...and Happy Monday!  I'm happy today about an awesome Product Swap going on this week with The Cut Shoppe and Simple Stories!  There is a lot going on over on TCS Blog today.  I am sharing a new layout, we have three new cut file sets in the Shop, there's a Simple Stories Pumpkin Spice collection Kit giveaway AND...you can save 30% off of your purchase in The Cut Shoppe all the way through Tuesday, September 15th!

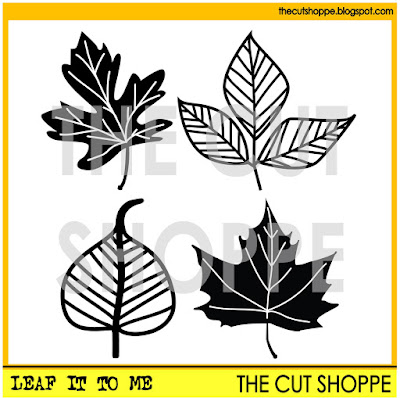
I wanted to stop in today, and share the layout that's up on TCS Blog, using the new Leaf It to Me cut file and the Tall Type cut file (a new favorite for me!!).


https://www.etsy.com/listing/246935501/the-leaf-it-to-me-cut-file-consists-of?ref=shop_home_active_2

https://www.etsy.com/listing/246935749/the-tall-type-alpha-includes-all-the?ref=shop_home_active_1

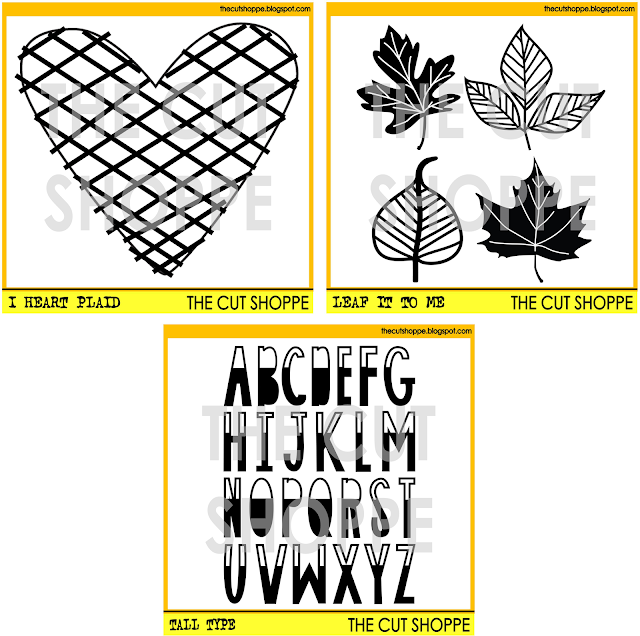
While you're here, here's a look at all three of the new sets in the Shoppe and the Discount Code you can use for the 30% discount!

https://www.etsy.com/shop/TheCutShoppe

https://www.etsy.com/shop/TheCutShoppe
Make sure you head over to The Cut Shoppe Blog and the Simple Stories Blog!  You can comment all week long for the chance to win a Pumpkin Spice collection kit or a $25 Gift Certificate from The Cut Shoppe!

https://www.etsy.com/shop/TheCutShoppe

Thursday, September 3, 2015

Hip Kit Club | Have Fun OK

This is a personal blog. All editorial content and projects are intellectual property of ashleyhortondesigns.com. I do receive compensation and material product from Hip Kit Club to develop my craft posts, but all ideas and opinions are my own.

It's time to share a new layout for Hip Kit Club, using the August 2015 Hip Kit & Add-On Kits!  This week I decided to go with the flow...the flow of the awesome Pinkfresh Studio patterned paper from the August Main Kit, that is!  I love wood grain and triangles, so put those two things together and it's a match made in heaven!  I also wanted to incorporate the fun Pinkfresh Acetate Triangles included in the August 2015 Embellishment Kit, so I layered those over the patterned paper triangles and added machine stitching for texture.


I wanted to keep the diagonal design, so I added my photo to overlap the triangle pattern.  I clustered a couple of the Pinkfresh Studio embellishments from the August Main Kit and August Embellishment Kit around the photo.  And the Dear Lizzy chipboard piece from the Embellishment Kit made a perfect title for my layout.  I used a couple of the Project Life cards from the August 2015 Project Life Kit to add a couple of layers behind the photo.


Once I had my photo in place, I finished embellishing with some of the Crate Paper Enamel Dots, Freckled Fawn Glitter Hearts and Pinkfresh Studio Wood Veneers.  I really liked the way the patterned paper and embellishments came together to create a fun confetti look on the layout.  And I couldn't go without a touch of Black Color Shine, so I added some splatters throughout the diagonal design.


I've still got a lot of awesome goodies left in my August 2015 Hip Kits, so I might be able to squeeze in another layout to share here on the Blog, before the September 2015 Hip Kit & Add-On Kits arrive!  But once I have that new box in my hands, I can't make any promises!  I know I'll dig into those new goodies right away!!

https://www.etsy.com/shop/TheCutShoppe

Wednesday, September 2, 2015

American Crafts | Back to School Clipboard

This is a personal blog. All editorial content and projects are intellectual property of ashleyhortondesigns.com. I do receive financial compensation and material product from American Crafts to develop my craft posts, but all ideas and opinions are my own.

School supplies can be so much more than actual school supplies.  And when they are cute clipboards from the AC Designer Desktop Essentials collection, you can create a fun Back to School DIY project to display in your home!


How To:

1.  Chose one of the Designer Desktop Essentials Gallery Prints, and place it on the clipboard.  Arrange your photos over any design or type on the Gallery Print.  Use a ruler to measure spacing for die cutting a date on the Gallery Print paper.


2.  Cut the date on your Electronic Die Cut machine, according to the previous measurement.  If you don't have an Electronic Die Cut machine, you can use Thickers or Letter Stickers for adding your date.


3.  Once the date is finished cutting, back it with a different color paper.  Add some Washi Tape to hold the paper in place behind the date.


4.  Place some double sided adhesive on the back of the Gallery Print and then adhere it to the clipboard, placing the top edge under the clip.


5.  Back each of your photos with adhesive foam dots, and then adhere them to the paper.  Once your photos are in place, add a Clothespin to each one in varying colors.


6.  Cut a 3x8.5 strip and a 1x8.5 strip to add to the bottom of the paper on your clipboard.  


7.  Use a Glue Gun to attach one of the Dotted Pencils below your photos.


8.  Place Thickers along the edge of the ruler to add the words "School Days" to the paper on the clipboard.


9.  Finish by adding "ABC123" to the clip on the clipboard, using Yo-Yo Thickers.


This is such a fun way to display your child's school year photos! 


Supplies:  Designer Desktop Essentials (37080) - Clipboard with Print, Designer Desktop Essentials (370793) - Gallery Prints, Designer Desktop Essentials (370795) - Gallery Prints, Designer Desktop Essentials (370794) - Gallery Prints, Designer Desktop Essentials (37081) - Clothespins Dots, Designer Desktop Essentials (370834) - Dotted Pencils, Designer Desktop Essentials (370821) - Gold Arrow Paper Clip, Fine & Dandy (370086) - Woodland Thickers, Serendipity (366773) - Yo-Yo Thickers, True Stories (370740) - Wood Borders 


https://www.etsy.com/shop/TheCutShoppe