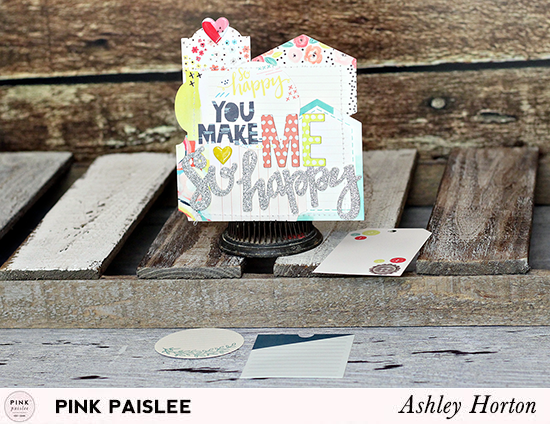
This past week on the Pink Paislee Blog, the designers shared ideas for fussy cutting. Fussy cutting can be as simple or intricate as you want it. It’s great
for creating extra embellishments and for adding texture and dimension
to your projects. I have a card set to share with you using the Take Me Away collection by Paige Evans.
The first card was easy peasy! I decided to cut one of the cute windows
from the Paper 09. When I fussy cut, I usually like to leave a margin
around whatever I am cutting. This helps your fussy cut image stand out
from the background you’re adding it to. I covered a white card base
with Paper 07. I liked that it had a subtle pattern with the small polka
dots and it was a great contrasting color against the yellow on the
cute window image.
I wanted to have more of a separation between the patterned paper and
fussy cut window, so I chose one of the tags from the Ephemera Pack as a
layering piece. Once I had the tag in place, I added several pop dots
to the fussy cut window to give it dimension on the card. I completed
the card design with a couple of chipboard pieces and embellishments.
My second card features more intricate fussy cutting. Flower patterns
are perfect for fussy cutting. Fussy cut flowers can be used as extra
embellishments for your projects or you can create a totally different
background look with them. I chose Paper 02 and cut most of the flowers
from the paper. I kept my card base white because I just wanted to cover
the entire front of the card with the fussy cut flowers. I cut and
layered the flowers on the front of the card until I reached my desired
look.
When adding adhesive to the back side of the flowers, I didn’t cover
them completely. This allowed me the ability to slide the fussy cut
pieces under one another and gave texture to the card. I really loved
the final result of all of the flowers on the front of the card. This
technique would work great on a layout too You could use a larger
flower pattern to cover the bigger area. I wanted to keep the
embellishing very simple, so I chose two chipboard pieces for the card
and finished with one of the white foam hearts.
You can find more ideas for fussy cutting, by checking out the posts from this past week on the Pink Paislee Blog!
Showing posts with label Cards. Show all posts
Saturday, January 7, 2017
Thursday, October 20, 2016
Pink Paislee | Floral Cards
One of my favorite designs in any scrapbook collection would have to be
florals! You can use flowers or floral designs in such a variety of
ways. I used some of the floral papers and embellishments from the Pink Pasilee Take
Me Away collection to create a fancy, floral card set.
For my first card, I wanted to include a couple of the pretty chipboard flowers from the chipboard stickers included in the Take Me Away collection. I cut white cardstock to fold to a 4.25×5.5 card base. Then I cut one of the patterned papers from the collection to fit the front of the card. I used my adhesive roller to adhere the patterned paper to the cardstock base. Next I placed the two chipboard flowers in an offset position on the card. I used the word “smile” from the foam Thickers as the sentiment of my card. I also incorporated one of the cute paper clips that resembled a floral design and clipped it to the top of the card.
On the second card, I decided to just use the white cardstock as the base of my card. I fussy cut a large floral design from one of the Take Me Away patterned papers and added it to the center of the card. I really liked the contrast of the navy outline from the patterned paper against the white card base. Since the floral design was on the large side, I was able to add my sentiment directly over the fussy cut flower. I layered the “Wild Heart” from the foam Thickers over the flower for the card sentiment. And I finished my card with one of the chipboard embellishments and cute bows included in the collection.
Try some floral designs on your next hand-made cards, or any of your paper crafting projects.
PRODUCTS USED:
For my first card, I wanted to include a couple of the pretty chipboard flowers from the chipboard stickers included in the Take Me Away collection. I cut white cardstock to fold to a 4.25×5.5 card base. Then I cut one of the patterned papers from the collection to fit the front of the card. I used my adhesive roller to adhere the patterned paper to the cardstock base. Next I placed the two chipboard flowers in an offset position on the card. I used the word “smile” from the foam Thickers as the sentiment of my card. I also incorporated one of the cute paper clips that resembled a floral design and clipped it to the top of the card.
On the second card, I decided to just use the white cardstock as the base of my card. I fussy cut a large floral design from one of the Take Me Away patterned papers and added it to the center of the card. I really liked the contrast of the navy outline from the patterned paper against the white card base. Since the floral design was on the large side, I was able to add my sentiment directly over the fussy cut flower. I layered the “Wild Heart” from the foam Thickers over the flower for the card sentiment. And I finished my card with one of the chipboard embellishments and cute bows included in the collection.
Try some floral designs on your next hand-made cards, or any of your paper crafting projects.
PRODUCTS USED:
Monday, July 4, 2016
Pink Paislee | Fancy Free Cards
This is a personal blog. All editorial content and projects are intellectual property of ashleyhortondesigns.com. I do receive compensation and material product from Pink Paislee to develop my craft posts, but all ideas and opinions are my own.
Take your journaling out of your hand made cards, and feature it on the front of your cards! There are some fun journaling tags included with the Pink Paislee Fancy Free collection by Paige Evans, that are perfect for adding a decorative journaling look to the front of your cards!
For my first card, I added the Favorites journaling tag to the front of the card. Before placing it on my card base, I journaled some “favorites” in the available spaces on the tag. The hand-writing on the front of the card adds a personal touch that you can’t find on store bought cards! I used pop dots behind the journaling tag to give it dimension. I liked having the dimension from the pops dots because it allowed me to tuck in some fussy cut flowers, stickers, and buttons.
On the second card, I continued using the journaling tags from the Fancy Free collection. This time, I thought it would be fun to use the tags as the design element on the front of my card. I cut my card base from cardstock and then arranged the journaling tags until I liked the composition. Once I had the tags in place, I added a bit of adhesive to hold them in place and then ran the card through my sewing machine to emphasize the handmade look and secure the tags to the card. I used a mix of hand cut letters and Thickers from the Fancy Free collection to add the sentiment to the card. And I completed the card with a couple of the cute puffy sticker hearts!
Both of these card designs were a bit different from what I normally create, but I loved the challenge of looking at journaling on cards in a new way. Don’t be afraid to step out of your comfort zone and find ways to use journaling in a different way on your next project!
Take your journaling out of your hand made cards, and feature it on the front of your cards! There are some fun journaling tags included with the Pink Paislee Fancy Free collection by Paige Evans, that are perfect for adding a decorative journaling look to the front of your cards!
For my first card, I added the Favorites journaling tag to the front of the card. Before placing it on my card base, I journaled some “favorites” in the available spaces on the tag. The hand-writing on the front of the card adds a personal touch that you can’t find on store bought cards! I used pop dots behind the journaling tag to give it dimension. I liked having the dimension from the pops dots because it allowed me to tuck in some fussy cut flowers, stickers, and buttons.
On the second card, I continued using the journaling tags from the Fancy Free collection. This time, I thought it would be fun to use the tags as the design element on the front of my card. I cut my card base from cardstock and then arranged the journaling tags until I liked the composition. Once I had the tags in place, I added a bit of adhesive to hold them in place and then ran the card through my sewing machine to emphasize the handmade look and secure the tags to the card. I used a mix of hand cut letters and Thickers from the Fancy Free collection to add the sentiment to the card. And I completed the card with a couple of the cute puffy sticker hearts!
Both of these card designs were a bit different from what I normally create, but I loved the challenge of looking at journaling on cards in a new way. Don’t be afraid to step out of your comfort zone and find ways to use journaling in a different way on your next project!
Friday, April 8, 2016
Pink Paislee | Paige Kits Card Couple
This is a personal blog. All editorial content and projects are intellectual property of ashleyhortondesigns.com. I do receive compensation and material product from Pink Paislee to develop my craft posts, but all ideas and opinions are my own.
The Paige Kits created by Paige Evans for her Fancy Free collection, with Pink Paislee are so fun! You can get the look of Paige's signature style on your layouts, but what about other uses for the Paige Kits? I used them to create two cards, that were on the Pink Paislee Blog yesterday, and loved the way they turned out!
I really love the die cuts that are included in the Paige Kits. But they are both obviously a little large for cards, so I thought of a different way to use the heart die cut. I placed the heart over a white cardstock card base and traced the triangle shapes with a pencil. Then I used a paper piercer to poke holes along the lines for stitching. I chose 5 colors of embroidery floss that coordinate with the Fancy Free collection and hand stitched each of the triangles. Once you finish stitching, you can cut a piece of patterned paper to the dimensions of your card base and adhere it to the inside of the card to cover your stitching.
The Paige Kits created by Paige Evans for her Fancy Free collection, with Pink Paislee are so fun! You can get the look of Paige's signature style on your layouts, but what about other uses for the Paige Kits? I used them to create two cards, that were on the Pink Paislee Blog yesterday, and loved the way they turned out!
I really love the die cuts that are included in the Paige Kits. But they are both obviously a little large for cards, so I thought of a different way to use the heart die cut. I placed the heart over a white cardstock card base and traced the triangle shapes with a pencil. Then I used a paper piercer to poke holes along the lines for stitching. I chose 5 colors of embroidery floss that coordinate with the Fancy Free collection and hand stitched each of the triangles. Once you finish stitching, you can cut a piece of patterned paper to the dimensions of your card base and adhere it to the inside of the card to cover your stitching.
I kept the rest of the card fairly simple so the stitched pattern wouldn’t be completely covered. I wanted to use the “love this” acetate phrase as the sentiment on my card so I placed it on a tilt and used a stapler to attach the words to the card. I completed the design with a few of the pop out heart shapes included in the Paige Kit.
You could create an alternate look for your card with the die cut heart using patterned paper: instead of tracing the triangle shapes directly onto your card, trace them on different patterned papers. Then you can cut out all of the shapes, place the die cut heart over your card base, and then adhere the patterned paper shapes into the coordinating spot on the die cut heart. Once you pull it up, you will have a fun pattern on the front of your card!
I created a different look on my second card by mixing one of the Paige Kits with some of the patterned papers from the Fancy Free collection. I covered my card base and then cut the manufacturer strips from four different patterned papers. Then I added a strip along each edge of the card. I wanted some extra texture on my card, so I machine stitched around the entire outside edge before embellishing.
The Paige Kit included the word “Today” in a navy chipboard piece. I knew that it would make the perfect sentiment for my card. The letters were too large to go across the front of the card as one word so I split it to create fun look. Then I took a couple of the punch out pieces and added them to the card to finish it. I even had the negative chipboard piece leftover from the word “Today”, so I’m saving it to use on a future layout or project!
If you've been waiting to get your hands on the Paige Kits or any of the new Fancy Free collection, your wait should be over soon! It's already starting to show up in some stores, so make sure you check in to see if your favorite shop has it!
I really love the die cuts that are included in the Paige Kits. But they are both obviously a little large for cards, so I thought of a different way to use the heart die cut. I placed the heart over a white cardstock card base and traced the triangle shapes with a pencil. Then I used a paper piercer to poke holes along the lines for stitching. I chose 5 colors of embroidery floss that coordinate with the Fancy Free collection and hand stitched each of the triangles. Once you finish stitching, you can cut a piece of patterned paper to the dimensions of your card base and adhere it to the inside of the card to cover your stitching. - See more at: http://www.pinkpaislee.com/?p=49795#sthash.DRHodqPa.dpuf
Monday, March 7, 2016
Pink Paislee | C'est La Vie Card Trio
This is a personal blog. All editorial content and projects are intellectual property of ashleyhortondesigns.com. I do receive compensation and material product from Pink Paislee to develop my craft posts, but all ideas and opinions are my own.
Patterned paper is definitely my favorite scrapbooking supply! I love the patterns, colors and all of the different ways you can use it! Last week on the Pink Paislee Blog, I shared a Card Trio using a mix of patterned papers from the gorgeous C'est La Vie collection!
I repeated some of the patterns on each card, but I was able to create a different look on each of them, based on the design. For the first card, I created a patchwork look. This is a fun technique and can easily be used for a layout, too. I cut squares from several of the C'est La Vie papers and then cut each one in half to create triangle shapes. Then I pieced the triangle shapes together on my card base, alternating patterns and colors. To complete the patchwork look, I added machine stitching. And I finished the card with a few of the embellishments and alphas from C'est La Vie.
On the second card, I cut circles from the Brick patterned paper, using my Silhouette Cameo. Then I placed the die cut piece over my card base, and added pop dots, to give it dimension. I backed each of the circles with a different paper to bring more color and pattern to the card. And the circles were perfect for adding a mix of embellishments from the C'est La Vie collection.
For the final card, I decided to use my Cameo once again, to cut heart shapes from three of the patterned papers. This time I used a dark paper for the front of my card base, so the color from the patterned paper hearts would pop. Then I machine stitched down each row of hearts, before adding embellishments from the collection.
These ideas are great for cards, but don't be afraid to try them on your next layout, too!

Patterned paper is definitely my favorite scrapbooking supply! I love the patterns, colors and all of the different ways you can use it! Last week on the Pink Paislee Blog, I shared a Card Trio using a mix of patterned papers from the gorgeous C'est La Vie collection!
I repeated some of the patterns on each card, but I was able to create a different look on each of them, based on the design. For the first card, I created a patchwork look. This is a fun technique and can easily be used for a layout, too. I cut squares from several of the C'est La Vie papers and then cut each one in half to create triangle shapes. Then I pieced the triangle shapes together on my card base, alternating patterns and colors. To complete the patchwork look, I added machine stitching. And I finished the card with a few of the embellishments and alphas from C'est La Vie.
On the second card, I cut circles from the Brick patterned paper, using my Silhouette Cameo. Then I placed the die cut piece over my card base, and added pop dots, to give it dimension. I backed each of the circles with a different paper to bring more color and pattern to the card. And the circles were perfect for adding a mix of embellishments from the C'est La Vie collection.
For the final card, I decided to use my Cameo once again, to cut heart shapes from three of the patterned papers. This time I used a dark paper for the front of my card base, so the color from the patterned paper hearts would pop. Then I machine stitched down each row of hearts, before adding embellishments from the collection.
These ideas are great for cards, but don't be afraid to try them on your next layout, too!

Tuesday, August 25, 2015
American Crafts | Fun in the Sun Cards
This is a personal blog. All editorial content and projects are intellectual property of ashleyhortondesigns.com. I do receive financial compensation and material product from American Crafts to develop my craft posts, but all ideas and opinions are my own.
Even though the school year has started back for almost everyone, I'm sure we all have lots of Summer photos that need to be scrapbooked. If you're busy creating Summer layouts, don't throw away your scrap pieces of paper. You can whip up some fun and bright cards, like these two that I shared on the American Crafts Blog for Fun in the Sun week!
How to: Cut a white cardstock base at 5.5 x 11" and fold in half. Cut the #Sunglasses patterned paper to 5.25x5.25" and stitch it to the front of your card base. Select a mix of die cut cardstock shapes and place them across the card. Add a cork sticker. Create your sentiment with one of the stickers from the journaling and phrase sticker book then adhere it with pop dots to add dimension to your card.
Supplies: #Summer (366955) - #Sunglasses, #Summer (366971) - Die Cut Cardstock Shapes, #Summer (366965) - Cork Stickers, #Summer (366963) - Jouranling and Phrase Sticker Book
How to: Cut a white cardstock base to 4.25x11" and fold in half. Cover the bottom half of the card front with a piece of scrap patterned paper. Stitch around the outer edges of your card. Create a sentiment with a die cut cardstock shape. Embellish your card with stickers and wood veneers.
Supplies: #Summer (366985) - #Summer Paper Pad, #Summer (366971) - Die Cut Cardstock Shapes, #Summer (366972) - Screenprinted Clothespins, #Summer (366964) - Wood Veneers, #Summer (366963) - Journaling and Phrase Sticker Book
Even though the school year has started back for almost everyone, I'm sure we all have lots of Summer photos that need to be scrapbooked. If you're busy creating Summer layouts, don't throw away your scrap pieces of paper. You can whip up some fun and bright cards, like these two that I shared on the American Crafts Blog for Fun in the Sun week!
How to: Cut a white cardstock base at 5.5 x 11" and fold in half. Cut the #Sunglasses patterned paper to 5.25x5.25" and stitch it to the front of your card base. Select a mix of die cut cardstock shapes and place them across the card. Add a cork sticker. Create your sentiment with one of the stickers from the journaling and phrase sticker book then adhere it with pop dots to add dimension to your card.
Supplies: #Summer (366955) - #Sunglasses, #Summer (366971) - Die Cut Cardstock Shapes, #Summer (366965) - Cork Stickers, #Summer (366963) - Jouranling and Phrase Sticker Book
How to: Cut a white cardstock base to 4.25x11" and fold in half. Cover the bottom half of the card front with a piece of scrap patterned paper. Stitch around the outer edges of your card. Create a sentiment with a die cut cardstock shape. Embellish your card with stickers and wood veneers.
Supplies: #Summer (366985) - #Summer Paper Pad, #Summer (366971) - Die Cut Cardstock Shapes, #Summer (366972) - Screenprinted Clothespins, #Summer (366964) - Wood Veneers, #Summer (366963) - Journaling and Phrase Sticker Book
Subscribe to:
Posts (Atom)