I am so excited to join the Pink Paislee Design Team for a new term! I had so much fun last year, and I'm glad they let me stick around for another year! This week, the new and returning designers are in the Spotlight, showcasing their signature style. I kicked things off yesterday, with my layout using the new Oh My Heart collection by Paige Evans. I love to work with cut files, a lot of patterned papers, and hand stitching, so I decided to include all three on my layout.


I wanted to use as many patterned papers from the new collection as
possible, so I set up the 6 pointed star design in Silhouette Studio.
Once I had it sized correctly, I repeated the diamond shape on the mat
in Studio. And believe it or not, all of these colors and patterns are
from only two patterned papers in the collection. Paper #12 and Paper
#24 have a mix of patterns and colors from the entire collection, so it
was easy to cut my diamond shapes from just these two sheets, but make
it look like I used multiple papers from the collection. Once all of the
diamonds were cut, I arranged them on a white cardstock background to
recreate the original star shape I designed in Silhouette Studio.

After all of the star shapes were completed, I used my paper piercer to
poke holes along the Hexagon shapes created by the pattern. I used
several embroidery floss colors that coordinated with the Oh My Heart
collection to stitch around each of the shapes. I really liked that the
hand stitching added more texture to the layout and helped define the
hexagons on the layout.
To continue the hexagon shape, I printed and trimmed my photos into
hexagons also. I placed the photos on opposite sides of the layout and
added a mix of embellishments around each photo to draw attention to
them and help bring them out from the colorful background. I used the
“Love Your Laugh” chipboard piece from the Good Life Chipboard Stickers,
to create my title. The placement of the title helps connect the photos
and embellishment clusters on the layout. I completed the layout with a
few hearts from the Ephemera pack placed in the center of some of the
hexagon shapes.
Make sure you stop by the Pink Paislee Blog all this week, and get to know all of the Designers that will bring you inspiration this year!
One of my favorite designs in any scrapbook collection would have to be
florals! You can use flowers or floral designs in such a variety of
ways. I used some of the floral papers and embellishments from the Pink Pasilee Take
Me Away collection to create a fancy, floral card set.
For my first card, I wanted to include a couple of the pretty chipboard
flowers from the chipboard stickers included in the Take Me Away
collection. I cut white cardstock to fold to a 4.25×5.5 card base. Then I
cut one of the patterned papers from the collection to fit the front of
the card. I used my adhesive roller to adhere the patterned paper to
the cardstock base. Next I placed the two chipboard flowers in an offset
position on the card. I used the word “smile” from the foam Thickers as
the sentiment of my card. I also incorporated one of the cute paper
clips that resembled a floral design and clipped it to the top of the
card.


On the second card, I decided to just use the white cardstock as the
base of my card. I fussy cut a large floral design from one of the Take
Me Away patterned papers and added it to the center of the card. I
really liked the contrast of the navy outline from the patterned paper
against the white card base. Since the floral design was on the large
side, I was able to add my sentiment directly over the fussy cut flower.
I layered the “Wild Heart” from the foam Thickers over the flower for
the card sentiment. And I finished my card with one of the chipboard
embellishments and cute bows included in the collection.
Try some floral designs on your next hand-made cards, or any of your paper crafting projects.
PRODUCTS USED:
Angles can be used to add a lot of interest to your projects. I
love to use diagonal lines on my layouts, but it’s also fun to create a
diagonal look on your other projects. I used a mix of patterned paper
strips to create a diagonal design on an 8×8 canvas that would look
great displayed on the wall.
I’ve got a step-by-step tutorial to share with you, showing how easy it is to create this canvas.
Step 1: Use your paper trimmer to cut a variety of paper strips. The
manufacturer strips at the bottom of the 12×12 patterned papers are
perfect for this step.
Step 2: Use a liquid adhesive or Mod Podge to cover your canvas. I used a
foam brush to add the adhesive and only coated one half of the canvas
at a time so I could add the patterned paper strips before the adhesive
had time to dry. Start your diagonal design by adding your first strip
along the diagonal of the canvas.
Step 3: Once your first strip is in place, start adding the rest of the
patterned paper strips that you cut. Place them right up against one
another so the canvas doesn’t show through.
Step 4: Once all of the paper strips have been added and your adhesive
is dry, use a pair of scissors or craft knife to trim the excess paper
from the canvas.
Step 5: Now that your diagonal design is finished, grab some coordinating embellishments and decorate your canvas.
This project can be altered in so many ways to fit your home decor and it’s a fun technique to try on your layouts too!
This is a personal blog. All editorial content and projects are intellectual property of ashleyhortondesigns.com. I do receive compensation and material product from Pink Paislee to develop my craft posts, but all ideas and opinions are my own.It's Travel week on the Pink Paislee Blog, and I kicked things off yesterday with a new layout using the Take Me Away collection by Paige Evans! I love that this collection can be used in a variety of ways. It’s perfect for everyday layouts, but also has a mix of travel elements that are perfect for documenting road trips, vacations, etc. I decided to go with the US map paper, but wasn’t sure at first how I wanted to use it… then inspiration hit!I had the idea to use the paper to document all of the places I’ve visited. I wanted the map as the full background, but thought it might be too busy and distract from my photo, title, and embellishments. To solve the problem, I added a sheet of vellum over the background paper to soften the look of the map. I stitched along the top of the page to secure the vellum to the background paper.Then I used a second sheet of the map paper and cut out the states and countries I’ve visited and layered them over the coordinating spot on the map background. This was a fun effect because the fussy cut states and countries stand out from the softer states in the background. It was a perfect way to highlight all of the places I’ve visited so far.Since the focus of the layout was on the places I’ve been, I chose a selfie for my photo and placed it in the negative space around the places I’ve visited. I had a lot of room left at the top of the page, so it was the perfect spot for a large title. I chose the Dr. Seuss quote, “Oh the Places You’ll Go” and varied the colors in the Carefree Thickers. To complete the layout, I created a visual triangle using the Take Me Away wood ephemera pieces and chipboard pieces.Make sure you stop by the Pink Paislee Blog all this week, for more travel inspiration from the Design Team!
This month, The Cut Shoppe Design Team is teaming up with Creative Scrappers for Sketch #297! Today is the reveal for TCS Design Team. I'm stopping in to share my layout here, and you can head over to the Creative Scrappers Blog to see the full reveal. You can see the Creative Scrappers reveal HERE.
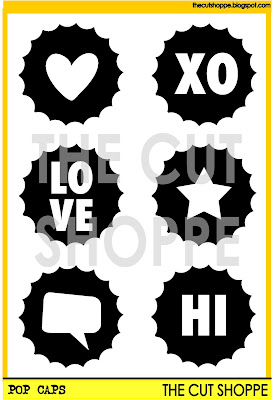
I used two cut file sets on my layout. The Pop Caps cut file worked perfectly with the sketch design and I wanted to use the Open Letter Alpha for my title.
We also have some fun things going on during the team up, that you won't want to miss!
You can download the FREE Inner Circle cut file set HERE.There's also a Discount Code for The Cut Shoppe Etsy store that is valid ALL month long! Use TCSCS25 at checkout to save 25% off of your purchase!And if you play along with Sketch #297, you can win a Gift Certificate to TCS Etsy store, by linking up on the Creative Scrappers Blog! While you're there to link up, make sure you check out some of the new Cut Files that are being offered by Creative Scrappers!
This is a personal blog. All editorial content and projects are intellectual property of ashleyhortondesigns.com. I do receive compensation and material product from Pink Paislee to develop my craft posts, but all ideas and opinions are my own.Last week I got to share my first layout with the new Take Me Away collection from Paige Evans on the Pink Paislee Blog! Take Me Away has so many pretty papers and embellishments, so I decided to use the collection for a girly themed layout. Any time I receive a new collection, I almost always base my first layout with it on one of the patterned papers. The one that caught my eye for this layout was paper #09. I had several ideas pop in my head as soon as I saw it.The first thing I did was add some embroidery floss along the lines separating each of the colors on the patterned paper. I used black embroidery floss to add a nice contrast and boost the dividing line between the colors. I placed my photo over the center spot where the embroidery lines met, to cover the spot, but also to draw the attention to my photo.I had a lot of room on the layout to add a large title, so I mixed the Dream Thickers with the wood ephemera pieces. I always like to mix different fonts or textures in my title to add interest. And the wood veneer “Hey” worked perfectly above the photo as a part of the title, because it matched the yellow at the top of the paper.Once the photo and title were in place, I started embellishing. I wanted to fussy cut some shapes from other patterned papers in the collection and color coordinate them with the colors on the background paper. I cut the rounded diamonds, hearts, and chevron shapes and adhered them to their matching color. I really loved the different look this technique added to the background design. I finished the layout with some of the Take Me Away Chipboard pieces, buttons, and paper clips.I can't wait to create more with the Take Me Away collection! I've got a fun travel themed layout coming up later this month, so make sure you're checking out the Pink Paislee Blog for daily inspiration.
This is a personal blog. All editorial content and projects are intellectual property of ashleyhortondesigns.com. I do receive compensation and material product from Pink Paislee to develop my craft posts, but all ideas and opinions are my own.This past week, the Pink Paislee Design Team shared projects using Grid Designs. I love using grids on my layouts! There are so many different ways to use them. You can use grids to add multiple photos to your layouts or just one like I did and still have plenty of room for your favorite patterned papers and embellishments.I knew I wanted to do a symmetrical grid design for this layout, but wanted to do something a bit different with the layout title. So I hit Pinterest for some inspiration and found this fun design. I loved the way the letters were included in the squares and I wanted to recreate the look for my layout. I cut each of my squares from the Fancy Free 6×6 paper pad a bit smaller than 3×3″, so I could fit four squares across the layout. I used my Silhouette Cameo to cut the letters in the squares that I needed for the title, Book Lover.
I only had one photo for this layout since it was just snapped in a moment of reading at the library. I sized it to the same dimensions as the patterned paper squares and added one of the puffy stickers over the photo to make it stand out. I also wanted the title letters to stand out more, so I hand stitched around each one with embroidery floss that coordinated with the colors in the Fancy Free collection. I finished the layout with a variety of embellishments including ephemera pieces, wood veneers, chipboard, and buttons. I liked that each of the square spaces had its own type of embellishment.If you missed any of the projects this past week, head over to the Pink Paislee Blog to see how everyone used grids!