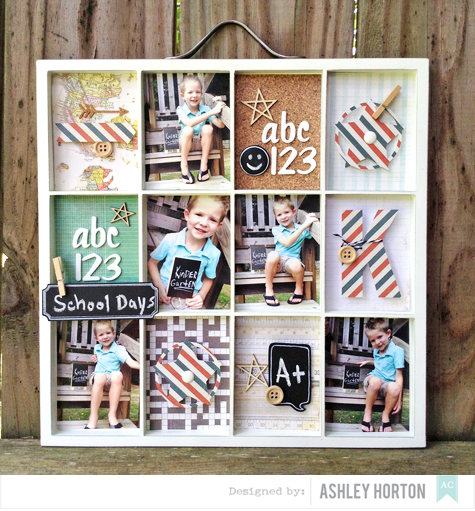
Supplies: DIY Shop (366665) - 12x12 Paper Pad, DIY Shop (366983) - 6x6 Paper Pad, DIY Shop (366611) - Wood Buttons, DIY Shop (366620) - Wooden Clothespins, DIY Shop (366633) - Chalk Badges, DIY Shop (366623) - Chalk Labels, DIY Shop (366634) - Chalk Speech Bubble Stickers, DIY Shop (366631) - Cork Stickers Arrows, Thickers (366057) - Collage
I also have a tutorial to share with you, showing how I put my Painter's Tray together.
1. You need a Painter's Tray and the DIY Shop 6x6 Paper Pad to get started. If you don't want to purchase a Painter's Tray for your project, check out the Silhouette Store for shadow box cut files.
2. After you choose your papers from the 6x6 Paper Pad, cut each one to 2.75x3.75. Then you can add adhesive to the back and place them in the spaces on the Painter's Tray.
3. I chose 7 papers to fill the spaces on my Painter's Tray, so next I printed 5 photos for the remaining spaces and added them to the tray.
4. Now you are ready to embellish your Painter's Tray! Choose a pack of Thickers and add "ABC" "123", to one or two of the spaces in your tray.
5. I wanted to add a chalk element to my project, so I used some of the Chalk Labels, Stickers and Badges from the DIY Shop collection. The chalk goes on easily and this is a great way to personalize your project.
6. Add your handwritten chalk embellishment to the spaces on the tray and embellish with wood buttons and wooden clothespins.
7. Use your Silhouette Cameo to cut letters or numbers for your child's coordinating Grade and school themed die cuts. If you don't have an electronic die cut machine, you can use stickers or Bits to embellish your project.
8. Add dimension to your die cuts, using pop dots. I wanted some of the die cuts to stand higher, so I layered two pop dots, to get more dimension.
So if you're looking for ways to get your children's school photos out of albums and on display, then I hope you'll try this fun Painter's Tray look!


No comments:
Post a Comment