This is a personal blog. All editorial content and projects are intellectual property of ashleyhortondesigns.com. I do receive compensation and material product from Hip Kit Club to develop my craft posts, but all ideas and opinions are my own.
WOW! That pretty much sums up the way I feel about the November 2015 Hip Kit & Add-On Kits from Hip Kit Club! There is a great mix of the Christmas Wishes collection from Pinkfresh Studio and a ton of exclusive papers and embellishments!
I used some of the exclusive papers created by Kim Watson for my background and for the die cut I used, also created by Kim. Then I filled in the circle with my photo and embellishments from the kits. This month's Kit and Add-On Kits are perfect for all of your Christmas layouts, and would even be great in your December Daily!
We've also got some amazing cut files for the month of November, created by Nicole Nowosad, Kim Watson and ME!! You can download the FREE cut files by visiting the Hip Kit Club website and signing up for a free account. Subscriber cut files are only available to those that are subscribing to the monthly Kits. So it's a great incentive to check out the Subscription info!!
Stay tuned here, the Hip Kit Blog and the Hip Kit Facebook page for more inspiration using the November 2015 Hip Kit & Add-On Kits!
Thursday, November 12, 2015
Friday, November 6, 2015
Hip Kit Club | Perfect Pumpkins
I have another layout to share with you today, using the gorgeous October 2015 Hip Kit & Add-On Kits from Hip Kit Club! I wanted to create a fun background element on this layout, and mix in several patterned papers from the October 2015 Main Kit. I designed the background in Silhouette Studio, and worked on putting it together before adding my photo and other embellishments.
Once I had the background finished, I placed my photo and the embellishment cluster to the right, using some of the Simple Stories wood veneers included in the Main Kit and one of the Pink Paislee arrows from the October 2015 Embellishment Kit. I also layered one of the Project Life cards from the October 2015 Project Life Kit, behind my photo, because the "such a good time" sentiment was perfect with my photo.
I liked that my photo had a good bit of White space at the top, and I used it to place my title. This is a great way to keep your title from getting lost in the background, if you have a busy background pattern. I wanted to include several embellishments from the Kits, so I placed a few more wood veneers from Simple Stories, Bits & Ephemera from Pink Paislee and Pebbles Inc., and enamel dots from Heidi Swapp around the layout.
Once I had the background finished, I placed my photo and the embellishment cluster to the right, using some of the Simple Stories wood veneers included in the Main Kit and one of the Pink Paislee arrows from the October 2015 Embellishment Kit. I also layered one of the Project Life cards from the October 2015 Project Life Kit, behind my photo, because the "such a good time" sentiment was perfect with my photo.
I liked that my photo had a good bit of White space at the top, and I used it to place my title. This is a great way to keep your title from getting lost in the background, if you have a busy background pattern. I wanted to include several embellishments from the Kits, so I placed a few more wood veneers from Simple Stories, Bits & Ephemera from Pink Paislee and Pebbles Inc., and enamel dots from Heidi Swapp around the layout.
To finish off the layout, I added a bit of machine stitching to a few of the embellishments. I love the extra texture that stitching adds to a layout!
I also have a Process Video to go along with my layout, if you would like to check it out!
And now, it's time to be on the look out for the November 2015 Hip Kit & Add-On Kits! If you're a subscriber, they'll be coming your way soon! If you have subscribed yet, make sure you visit the Hip Kit Website and sign up today!
Monday, November 2, 2015
Page Maps & The Cut Shoppe Team Up!
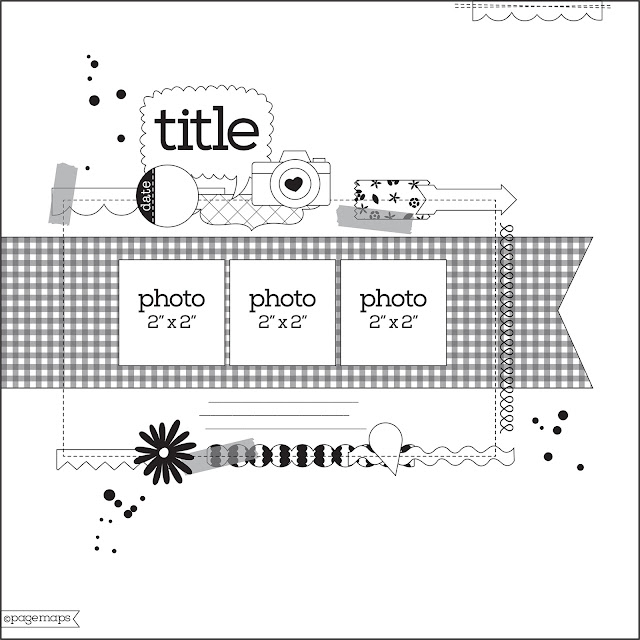
This month The Cut Shoppe teamed up with Page Maps for the November Page Maps reveal! I wanted to stop in and share the layout I created based on a single page sketch, along with the Pie Hearts cut file and the Borderlines cut file from The Cut Shoppe.
I used the new Shine collection from Maggie Holmes, and used the Dazzle patterned paper to back the Pie Heart cut files. I stayed close to the sketch, but changed from three photos to one photo, and added a cut out from one of the Shine patterned papers.
Make sure you visit the Page Maps website to check out the other amazing layouts created for the November Page Maps!
And we are having a sale all through this week, at The Cut Shoppe! Just use the Discount Code PMTCS30 to save 30% off of your purchase!
Supplies: Pie Hearts cut file & Borderlines cut file: The Cut Shoppe; Patterned Paper, Thickers, Stickers & Wood Veneers: Maggie Holmes; Color Shine: Heidi Swapp; Die Cut Machine: Silhouette Cameo
I used the new Shine collection from Maggie Holmes, and used the Dazzle patterned paper to back the Pie Heart cut files. I stayed close to the sketch, but changed from three photos to one photo, and added a cut out from one of the Shine patterned papers.
Make sure you visit the Page Maps website to check out the other amazing layouts created for the November Page Maps!
And we are having a sale all through this week, at The Cut Shoppe! Just use the Discount Code PMTCS30 to save 30% off of your purchase!
Supplies: Pie Hearts cut file & Borderlines cut file: The Cut Shoppe; Patterned Paper, Thickers, Stickers & Wood Veneers: Maggie Holmes; Color Shine: Heidi Swapp; Die Cut Machine: Silhouette Cameo
Thursday, October 29, 2015
Hip Kit Club | Curiouser & Curiouser
This is a personal blog. All editorial content and projects are intellectual property of ashleyhortondesigns.com. I do receive compensation and material product from Hip Kit Club to develop my craft posts, but all ideas and opinions are my own.
I love the versatility of the October Hip Kits from Hip Kit Club! They can be used for Fall layouts, everyday layouts, or even Halloween layouts...like the one I'm sharing today!
I used a mix of the Cedar Lane collection from Pink Paislee and Jen Hadfield from Pebbles Inc.. And I incorporated two of our challenges for this month. I took inspiration from the Gold topped pumpkin from the October Mood Board, and added in touches of Orange and Gold on my page. I also used the Sketch from this week's Weekly Challenge for the design of my layout.
And I can't resist adding cut files to my layouts, so I used one of the feather cut files from Nicole Nowosad. You can have access to Free Cut Files, by signing up for a FREE account on the Hip Kit Club website!
I love the versatility of the October Hip Kits from Hip Kit Club! They can be used for Fall layouts, everyday layouts, or even Halloween layouts...like the one I'm sharing today!
I used a mix of the Cedar Lane collection from Pink Paislee and Jen Hadfield from Pebbles Inc.. And I incorporated two of our challenges for this month. I took inspiration from the Gold topped pumpkin from the October Mood Board, and added in touches of Orange and Gold on my page. I also used the Sketch from this week's Weekly Challenge for the design of my layout.
And I can't resist adding cut files to my layouts, so I used one of the feather cut files from Nicole Nowosad. You can have access to Free Cut Files, by signing up for a FREE account on the Hip Kit Club website!
Tuesday, October 27, 2015
Simple Stories | Carpe Diem Planner
This is a personal blog. All editorial content and projects are intellectual property of ashleyhortondesigns.com. I do receive compensation and material product from Simple Stories to develop my craft posts, but all ideas and opinions are my own.
This past Friday, some awesome news was posted on the Simple Stories Blog! The new Carpe Diem Planners and coordinating collection were introduced! The Planners will be available through retailers starting in mid November. I've already had a chance to get started in my Coral Planner and wanted to stop in to share a few of my pages with you.
If you would like to check out more of the Carpe Diem Planner colors and coordinating products, visit the Simple Stories website HERE. And if you would like to know where you can purchase these products starting mid November, visit the Store Locator on the Simple Stories website.
This past Friday, some awesome news was posted on the Simple Stories Blog! The new Carpe Diem Planners and coordinating collection were introduced! The Planners will be available through retailers starting in mid November. I've already had a chance to get started in my Coral Planner and wanted to stop in to share a few of my pages with you.
If you would like to check out more of the Carpe Diem Planner colors and coordinating products, visit the Simple Stories website HERE. And if you would like to know where you can purchase these products starting mid November, visit the Store Locator on the Simple Stories website.
Thursday, October 22, 2015
Hip Kit Club | Hello Fall
This is a personal blog. All editorial content and projects are intellectual property of ashleyhortondesigns.com. I do receive compensation and material product from Hip Kit Club to develop my craft posts, but all ideas and opinions are my own.
Give me some Fall themed papers/embellishments, photos and cut files and I am a very happy scrapper! I am still going strong with the October 2015 Hip Kit & Add-On Kits, from Hip Kit Club. For today's layout, I wanted to incorporate some of the Hip Kit Club cut files, and used the background cut file I created and some of the cute leaves from one of Kim Watson's cut files!
I started by cutting the background cut file from White card stock from the October 2105 Cardstock Add-On. Then I layered it over one of the Amy Tangerine patterned papers. Before machine stitching, I cut some of the background words from one of the Jen Hadfield papers and then placed them in the negative spots. I really liked the mix of typography this added in the background.
Once I had the background completed, I added my photo and started layering embellishments from the October 2015 Main Kit, October 2015 Embellishment Kit and the October 2015 Project Life Kit. I wanted to keep my photo and embellishments clustered in the center of the layout, to keep from covering a lot of the background work.
I've still got more in store, using the October 2015 Hip Kit & Add-On Kits, so make sure you keep checking in on the Blog and Facebook page! And we've got some awesome Kits coming up! Make sure you head over to the Hip Kit Website to check out the November Hip Kit & Add-On Kits and keep an eye out for the upcoming December Daily Kit!
Give me some Fall themed papers/embellishments, photos and cut files and I am a very happy scrapper! I am still going strong with the October 2015 Hip Kit & Add-On Kits, from Hip Kit Club. For today's layout, I wanted to incorporate some of the Hip Kit Club cut files, and used the background cut file I created and some of the cute leaves from one of Kim Watson's cut files!
I started by cutting the background cut file from White card stock from the October 2105 Cardstock Add-On. Then I layered it over one of the Amy Tangerine patterned papers. Before machine stitching, I cut some of the background words from one of the Jen Hadfield papers and then placed them in the negative spots. I really liked the mix of typography this added in the background.
Once I had the background completed, I added my photo and started layering embellishments from the October 2015 Main Kit, October 2015 Embellishment Kit and the October 2015 Project Life Kit. I wanted to keep my photo and embellishments clustered in the center of the layout, to keep from covering a lot of the background work.
I wanted to also incorporate some of the other cut files, included with this month's Kits. I separated one of the leaf shapes from the fun Fall wreath cut file, created by Kim Watson. Then I cut them from two different colors of card stock, included in the October 2015 Cardstock Add-On Kit. Once the leaves were cut, I ran them through my sewing machine, to get a bit of added texture.
I've still got more in store, using the October 2015 Hip Kit & Add-On Kits, so make sure you keep checking in on the Blog and Facebook page! And we've got some awesome Kits coming up! Make sure you head over to the Hip Kit Website to check out the November Hip Kit & Add-On Kits and keep an eye out for the upcoming December Daily Kit!
Wednesday, October 21, 2015
Simple Stories | Happy Holidays
This is a personal blog. All editorial content and projects are intellectual property of ashleyhortondesigns.com. I do receive compensation and material product from Simple Stories to develop my craft posts, but all ideas and opinions are my own.
And by Happy Holidays, I mean Happy Halloween, Happy Thanksgiving and Merry Christmas! October through December is my favorite time of the year, and I love creating Fall and Christmas layouts. And Simple Stories has you covered with some great collections for the upcoming holidays...Pumpkin Spice, We Are Family and Claus & Co. Today, I'm sharing layouts using the Pumpkin Spice collection (with a bit of We Are Family mixed in) and the Claus & Co. collection.
Let's start out with the layout using the Pumpkin Spice collection (might as well stick with chronological order!!). I had a lot of fun with this layout. I thought it would be fun to cut a large pumpkin shape and then back it with an Ombre look, using patterned papers from the Pumpkin Spice collection.
After I cut the pumpkin shape from White card stock, I traced the shape onto a second sheet of White card stock. Then I cut strips of patterned paper and made sure they were placed outside of the pumpkin shape traced outline. Before placing the die cut pumpkin paper over the second piece of card stock, I machine stitched through each of the paper strips.
Then I adhered the die cut pumpkin paper over the background card stock piece. I decided to mix in hand-stitching with the machine stitching, so I stitched around the outside edge of the pumpkin with a mix of embroidery floss.
Once I finished the hand-stitching, I started going through the Pumpkin Spice Chipboard, Bits pack and Sticker Sheet, to add coordinating embellishments to match the color of the patterned paper strips. I also wanted to add some embellishing around the outside edge of the pumpkin, so I added a mix of embellishments, as well as Enamel Dots.
This look can be created with lots of different shapes and collections! Hearts, stars, a large letter, etc. would work great to create this same effect on your layout!
________________________________________________________________
On my second layout, I used the gorgeous Claus & Co. collection. I took this photo of my hubby and the kids last year on Christmas Eve, as they were checking out the Santa tracker. I loved that it was a candid shot, with no one making faces, crying or hitting brother or sister! HA! It was one of those photos I wanted to save for just the right collection, and Claus & Co. fit the bill!
I knew I wanted to use the frames from this collection in a prominent way on my layout. So I started by mixing three patterned papers in the background, and then added a mix of the Chipboard Frames to the right hand side of the layout.
I placed the frames on the layout, and moved them around several times, to get just the right placement. When I had them where I wanted them, I went ahead and adhered each one. The frames made perfect spots to add embellishments from the Claus & Co. collection. I added a mix of Chipboard, Stickers, Bradz and Wood Veneers to each of the frames to give the layout dimension and texture.
I finished the layout, by adding my title on the left hand side of the page, to balance out the design. It also created a visual triangle on my layout, that helps to guide your eye around the page.
So whether you are scrapping photos from Christmases past, looking forward to creating new layouts for this season, or prepping your December Daily, the Claus & Co. collection is perfect for documenting all of your holiday memories!!
And by Happy Holidays, I mean Happy Halloween, Happy Thanksgiving and Merry Christmas! October through December is my favorite time of the year, and I love creating Fall and Christmas layouts. And Simple Stories has you covered with some great collections for the upcoming holidays...Pumpkin Spice, We Are Family and Claus & Co. Today, I'm sharing layouts using the Pumpkin Spice collection (with a bit of We Are Family mixed in) and the Claus & Co. collection.
Let's start out with the layout using the Pumpkin Spice collection (might as well stick with chronological order!!). I had a lot of fun with this layout. I thought it would be fun to cut a large pumpkin shape and then back it with an Ombre look, using patterned papers from the Pumpkin Spice collection.
After I cut the pumpkin shape from White card stock, I traced the shape onto a second sheet of White card stock. Then I cut strips of patterned paper and made sure they were placed outside of the pumpkin shape traced outline. Before placing the die cut pumpkin paper over the second piece of card stock, I machine stitched through each of the paper strips.
Then I adhered the die cut pumpkin paper over the background card stock piece. I decided to mix in hand-stitching with the machine stitching, so I stitched around the outside edge of the pumpkin with a mix of embroidery floss.
Once I finished the hand-stitching, I started going through the Pumpkin Spice Chipboard, Bits pack and Sticker Sheet, to add coordinating embellishments to match the color of the patterned paper strips. I also wanted to add some embellishing around the outside edge of the pumpkin, so I added a mix of embellishments, as well as Enamel Dots.
This look can be created with lots of different shapes and collections! Hearts, stars, a large letter, etc. would work great to create this same effect on your layout!
________________________________________________________________
On my second layout, I used the gorgeous Claus & Co. collection. I took this photo of my hubby and the kids last year on Christmas Eve, as they were checking out the Santa tracker. I loved that it was a candid shot, with no one making faces, crying or hitting brother or sister! HA! It was one of those photos I wanted to save for just the right collection, and Claus & Co. fit the bill!
I knew I wanted to use the frames from this collection in a prominent way on my layout. So I started by mixing three patterned papers in the background, and then added a mix of the Chipboard Frames to the right hand side of the layout.
I placed the frames on the layout, and moved them around several times, to get just the right placement. When I had them where I wanted them, I went ahead and adhered each one. The frames made perfect spots to add embellishments from the Claus & Co. collection. I added a mix of Chipboard, Stickers, Bradz and Wood Veneers to each of the frames to give the layout dimension and texture.
I finished the layout, by adding my title on the left hand side of the page, to balance out the design. It also created a visual triangle on my layout, that helps to guide your eye around the page.
So whether you are scrapping photos from Christmases past, looking forward to creating new layouts for this season, or prepping your December Daily, the Claus & Co. collection is perfect for documenting all of your holiday memories!!
Subscribe to:
Posts (Atom)