Tuesday, January 31, 2017

A Flair for Buttons | #Together

I'm stopping in today, to share a layout that went up on the A Flair for Buttons Blog yesterday!  I thought I would work a little bit of Mixed Media into this layout, using a few spray mists.  I chose a couple of Flair Buttons from the AFFB Shop that would coordinate with the new Amy Tangerine On a Whim collection and the spray mist colors that I wanted to work with.


I started the layout with a large alpha die cut for the title and added my spray mist colors where they would coordinate with the patterned papers for each part of the title.  I also hand stitch around each of the letters in the title for extra texture. 


I used both of my Flair Buttons to create small embellishment clusters on two of the letters in the title.  I decided to keep the rest of my embellishing very simple, so I wouldn't cover the large title and Mixed Media.  I had so much color going on with the patterned papers and Flair Buttons, the layout didn't really need a lot of embellishing.


I have a Process Video to go along with the layout, if you would like to see how everything came together.  You can watch it here, and head over to my YouTube channel to Subscribe!


Thanks for stopping by, and make sure you check out the shop and pick up some flair for your next layout!

Monday, January 30, 2017

Pink Paislee | Love Your Laugh

I am so excited to join the Pink Paislee Design Team for a new term!  I had so much fun last year, and I'm glad they let me stick around for another year!  This week, the new and returning designers are in the Spotlight, showcasing their signature style.  I kicked things off yesterday, with my layout using the new Oh My Heart collection by Paige Evans.  I love to work with cut files, a lot of patterned papers, and hand stitching, so I decided to include all three on my layout.


I wanted to use as many patterned papers from the new collection as possible, so I set up the 6 pointed star design in Silhouette Studio. Once I had it sized correctly, I repeated the diamond shape on the mat in Studio. And believe it or not, all of these colors and patterns are from only two patterned papers in the collection. Paper #12 and Paper #24 have a mix of patterns and colors from the entire collection, so it was easy to cut my diamond shapes from just these two sheets, but make it look like I used multiple papers from the collection. Once all of the diamonds were cut, I arranged them on a white cardstock background to recreate the original star shape I designed in Silhouette Studio.

 
After all of the star shapes were completed, I used my paper piercer to poke holes along the Hexagon shapes created by the pattern. I used several embroidery floss colors that coordinated with the Oh My Heart collection to stitch around each of the shapes. I really liked that the hand stitching added more texture to the layout and helped define the hexagons on the layout.


To continue the hexagon shape, I printed and trimmed my photos into hexagons also. I placed the photos on opposite sides of the layout and added a mix of embellishments around each photo to draw attention to them and help bring them out from the colorful background. I used the “Love Your Laugh” chipboard piece from the Good Life Chipboard Stickers, to create my title. The placement of the title helps connect the photos and embellishment clusters on the layout. I completed the layout with a few hearts from the Ephemera pack placed in the center of some of the hexagon shapes.


Make sure you stop by the Pink Paislee Blog all this week, and get to know all of the Designers that will bring you inspiration this year!

Crate Paper Design Team 2017-2018!

I am in love with all things Crate Paper, and I am so excited to share that I will be back with the Design Team for a new term!  I had so much fun designing with all of the CP collections from this past year, and I am looking forward to all of the collections that will be released this year.  There are some amazingly talented designers continuing on from last year and new designers that are joining us this year.  I can't wait to work with them and see what they create!

http://crate.typepad.com/

Make sure you are following the Crate Paper Blog, as well as their other social media sites to keep up with all of the upcoming inspiration!

Friday, January 27, 2017

Altenew January Release Blog Hop II + Giveaway!

http://www.shareasale.com/r.cfm?B=888816&U=1386704&M=66850&urllink=
Welcome to the Altenew January Release Blog Hop II!  Altenew is releasing 18 stamp sets, 18 die sets, and 12 inks today! You can join in the Blog Hop from the beginning, by visiting the Altenew Blog Post HERE. You should have arrived at my Blog from Heather Hoffman's Blog.

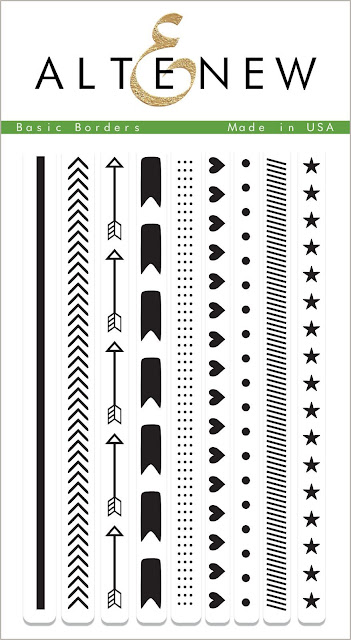
I am sharing a layout today, using the new Hibiscus Bouquet stamp set and the Basic Borders stamp set. I have to say, that I am no expert stamper, but I really love the stamp designs and ink pads from Altenew. They make stamping so easy, and I Iove the stamped images on my layout, mixed with products from the Reflection Scrapbook Kit.


I started my layout by stamping several of the flowers and leaves from the Hibiscus Bouquet stamp set, on to White card stock. I used a variety of ink pads from Altenew, including Warm Sunshine, Coral Berry, Frosty Pink, Forest Glades, Olive, Moss and Bamboo. Next, I fussy cut all of my stamped images and started the design of my layout. I used a large cut file in the background of the layout, backed with patterned paper from the Reflection Scrapbook Kit. Then I placed one of the large floral chipboard pieces from the Kit on the bottom left side of the large circle. 


I wanted to use the chipboard piece, as the anchor point for adding all of my stamped flowers. I arranged the flowers on each side of the chipboard, adding pop dots to some of them, to create varying dimension in the large cluster. I also used the fun arrow image from the Basic Borders stamp set, around the outer edge of the cut file. I placed the border stamp on my background paper, in a curved shape, and then picked it up with my clear block. I used the Coral Berry ink to repeat the image around the outside of the cut file.


http://www.shareasale.com/r.cfm?B=888816&U=1386704&M=66850&urllink=

http://www.shareasale.com/r.cfm?B=888816&U=1386704&M=66850&urllink=

You can find the stamp sets I used, as well as all of the other new designs, by visiting the Altenew Shop.


1. To celebrate this release, Altenew is giving away a $50 gift certificate to THREE lucky winners! Please leave a comment on the Altenew blog by Thursday, February 2nd at 11:59 PM EST for a chance to win. The winners will be announced on the Altenew blog on Saturday, February 4th.

2. I am giving away a $30 Gift Certificate to the Altenew Shop. Just comment below and one random winner will be selected on Saturday, February 4th at 8:00AM EST.

Now, it's time to continue on the Hop! Next, you'll be visiting Kelly Latevola's Blog. And in case you get lost along the way, or if this is your first stop, here's the full Blog Hop order:


Have fun on the Hop!!

This post contains affiliate links, which means I will receive a small commission from any purchases made from product clicks on this post.
 

PRODUCTS USED:  
Jet Black Crisp Dye Ink
from: ALTENEW 

Coral Berry Crisp Dye Ink
from: ALTENEW  

Warm Sunshine Crisp Dye Ink
from: ALTENEW  

Frosty Pink Crisp Dye Ink
from: ALTENEW

Sunday, January 22, 2017

Crate Paper | XOXO

Hey everyone!  I've got a new layout to share with you, using the Heart Day collection from Crate Paper...and believe it or not, a new PROCESS VIDEO!!  I know it's been a while, but sometimes you just need a break.  I'm sharing a layered heart technique using several of the patterned papers from Heart Day, so here's a look at my layout, and don't miss the process video at the end of my post.


I think it's safe to say, that Crate Paper knocks it out of the park when it comes to any of their collections!  I love the different shades of Pink in this collection, with little touches of Yellow and light Teal.  And the various patterned papers were perfect for creating these fun, layered hearts.


I had this family photo on my desk, that was originally for another layout, but just wasn't working for the theme of the layout.  I saved it because I knew I could use it on another layout sometime in the near future.  And tada...it was just right for this layout.  I love that you can use Heart Day for photos of you and your sweetie or for family photos...and maybe even your pet photos!  We all love our fur babies, right??!!


If you would like to see how this layout came together, you can check out my new Process Video.  And if you haven't already subscribed to my YouTube Channel make sure you head over and click subscribe.  I'll have more videos to share with you soon!


Thanks for stopping by, and I hope you have a great week!

This post contains affiliate links, which means I will receive a small commission from any purchases made from product clicks on this post.

PRODUCTS USED: 


Friday, January 20, 2017

ALTENEW Design Team!

Happy News!!  I'm so excited to share that I have been invited to join the Altenew Scrapbook Design Team!  I recently joined in the Altenew Release Blog Hop for their gorgeous, Reflection Scrapbook Kit.  I had so much fun creating with the Kit, that I jumped at the chance when May invited me to join the team!

I have a couple of sneak peeks of new layouts, using the Reflection Kit to share with you today, to go along with my DT announcement!  You can see the full layouts on my intro post on the Altenew Blog!


There is a big variety of patterned papers in the Kit, so you can create so many different looks from one Kit.  I loved this wood grain pattern, with pops of color from some fussy cut flowers and embellishments from the Kit.  The colors also coordinated really well with the colors in my photo.


I LOVE this rainbow patterned paper that is included in the Kit, so I wanted a fun way to feature it.  I cut a mix of heart shapes from the patterned paper and then I placed the patterned paper over my White cardstock background.  Then I pulled each heart off of my Cameo mat and adhered them to their coordinating spot.  Once I had all of them in place, I pulled the rainbow patterned paper up and each heart was perfectly placed.  

I am looking forward to working with all of the gorgeous products from Altenew, and I'll be sharing my first official Design Team post at the end of this month.  


https://altenew.com/

Thursday, January 19, 2017

Pink Paislee | Shine Bright

This week on the Pink Paislee Blog, the Design Team is sharing ideas for using Rub Ons.  I wanted to feature the rub ons from the gorgeous, Moonstruck collection on my layout.  I tend to use rub ons sporadically on my layouts… one or two strategically placed among other embellishments, but I thought it would be fun to incorporate them in a large focal design.


I wanted a patterned paper background so I chose a subtle design that would allow the rub ons to stand out. I used my Silhouette Cameo to cut a large heart shape. Then I used a pencil to lightly trace the shape onto my background paper. I started placing the rub ons at the bottom of the heart on the left hand side of the heart shape. Then I continued following the pencil outline until all of the shape outline was filled with the rub ons.


Once I had all of the rub ons in place, I machine stitched around the heart shape so I could cover any of the pencil line that might show through. I placed the photo and title inside the heart to fill the open shape. Since the rub ons were a flat element on the layout, I used some of the cork pieces and puffy stickers to add dimension to the layout.


Once I had everything in its place, I decided to add some black Color Shine splatters. I loved the contrast it added against the watercolor look of the background paper. If I’m adding my Color Shine to a completed layout, I always cover my photo with scrap paper to keep any of the mist from getting on it.  But I don’t mind it splatters over my embellishments.

If you're looking for more ideas on how to use rub ons for your projects, make sure you stop by the Pink Paislee Blog and check out all of this week's posts.

Wednesday, January 18, 2017

A Flair for Buttons | December Story

Hi there!  Today, I have a new layout to share with you for the A Flair for Buttons Design Team.  I took a little break from AFFB over the past few months, but I'm excited to start sharing some new layouts with Shelley's fun flair designs!  I've got a good bit of Christmas flair buttons in my stash, and I've got a lot of Christmas photos to document, so I decided to create a Christmas layout.


I decided to use the Cork Flair Set, because they are neutral and perfect for any collection that you're using.  I cut a large cut file from White cardstock and backed it with a mix of patterned papers.  The center of the star design on the cut file, was a perfect spot for the December 25 Flair Button.  I wanted to do something a bit different, than the typical photo in the middle of the design, so I made the Flair Button the "star" of the show, and placed my photo on the right hand side of the layout.


I added a mix of embellishments around the photo, for texture and dimension.  I also wanted to bring in another Flair Button, so I placed the star flair below my photo.  I love that it had the star image to go with the cut file and a couple of other star embellishments that I added to the layout.


You can check out the full Flair set that I used, in the A Flair for Buttons shop!  While you're there make sure you take a look at all of the other Christmas designs that are available!

Thursday, January 12, 2017

Crate Paper | Emma Madeline

Oh how I love working with a brand new collection from Crate Paper!  Whatever collection Maggie Holmes comes up with, it's always my favorite...and now I'm adding Chasing Dreams to my favorite list!  I am in love with the colors and fun embellishments and of course, the beautiful patterned papers!  I am so glad I have two girls, which allows me to go full on girly with this collection, but there are great patterns and elements that can also be used for masculine layouts.


Our middle daughter’s birthday is the day after Christmas, and I always have a photo shoot for each of the kids for their birthday.  Emma’s photo shoot is never boring, because it usually involves funny faces, stuffed animals and a Peruvian hat.  I captured some great shots of her, and this one pretty much sums this girl up!  As I looked through the Chasing Dreams patterned papers, the Delicate pattern caught my eye.  I loved the Pink on Pink polka dots and the large pattern.  I wanted to make it even more interesting, so I layered the Glitter on Acetate paper over it.


If you’re intimidated by using the Acetate papers, it’s very easy.  Here’s what I like to do.  Start out by figuring out the rough design for your layout…where you want to place your photo and any embellishments.  Once you have that in mind, add adhesive to your background paper and then place your Acetate sheet over it.  This will secure the Acetate to your background paper and the adhesive will be hidden behind your photo and embellishments.  You can also add a bit of machine stitching, if you have a sewing machine, for extra adhesion.

  
I tend to use smaller photos on my layouts, but I wanted this photo a bit larger, so it wouldn’t get lost in the embellishments and background paper.  I used a mix of the Ephemera Pieces, Puffy Stickers, word phrase Stickers and Chipboard to create a layered banner under the photo.  I wanted a simple title, so our daughter’s name was perfect for the layout.  I grabbed one of the tags from the Ephemera Pieces pack and layered the title over it, using the Cloud Puffy Letter Stickers.

  
When I have a large polka dot, I can’t resist placing embellishments in the center of the circle!  I wanted to fill several of the polka dots around the layout with a mix of embellishments from Chasing Dreams.  I used the Vintage Buttons, Puffy Stickers, Stickers and Collect Chipboard Stickers to balance out the design on the layout.

If you missed the reveal of the full Chasing Dreams collection, make sure you check it out on the Blog.  I know I can’t wait to create more layouts and projects with this amazing collection!
 

Pink Paislee | Washi Photo Board


Trends come and go, but washi tape is here to stay!  It’s just such a fun product… totally cute with all of the different patterns and very versatile in its uses. I love the washi sheets that come with the Moonstruck collection. They are perfect for layouts and cards, but you can also use the sheets for other projects as well. I have a washi photo board to share with you today, and a tutorial to go along with my project!


Step 1: Gather the supplies you’ll need. I picked up an inexpensive plank board at my local craft store. Print your photos ahead of time so you’ll be ready to get started. Make sure you leave your photos untrimmed after they are printed.


Step 2: Use twine to wrap around the board. I started on the back side of the board and used a stapler to secure the twine to the wood.


Step 3: After you secure the end of the twine, you can begin wrapping it around the board. I criss-crossed my twine to create an interesting pattern on the front side of the board.


Step 4: Now it’s time to play with the washi tape. I chose the skinny strips from the Moonstruck washi sheets and placed them along the four edges of each of my photos.


Step 5: After each side of your photo is covered with washi tape, you can trim away the excess photo paper with your paper trimmer.


Step 6: I decided to use small clothespins to attach my photos to the twine. The clothespins are perfect for covering with washi tape too. I placed a few designs on my clothespins. If you need to trim off any excess washi tape, just use a craft knife along the edges of the clothespin.


Step 7: Now you can add your photos to the board. Just clip them to the twine with your clothespins and grab some of the embellishments from the Moonstruck collection to embellish your photos. 


And that’s it! You can interchange the photos and coordinate your collections and washi tape to create unique looks for your project!