
On my first layout using the Midway collection, I decided to use my Silhouette Cameo for some fun background action on my layout. I thought it would be fun to use 4 different background cut files to create some negative effects on my page. I cut two Chevron patterns, a rounded square pattern, and an arrow pattern. Once I had each of the backgrounds cut at 4.5x4.5, I arranged them in a grid design on my layout. To make the rounded square pattern stand out a little more, I backed it with the Neon Lights patterned paper. I also added some of the positive cut arrows to the Balloons & Darts patterned paper, that I used to cut the arrow background. And, of course, that is one of the great things about negatives...you also get positives. I used some of the positive shaped arrows from the Balloons & Darts patterned paper to embellish my layout. Adding pop dot adhesive gave them just the right amount of dimension. And here is a look at how all of the negative cuts came together on the layout:


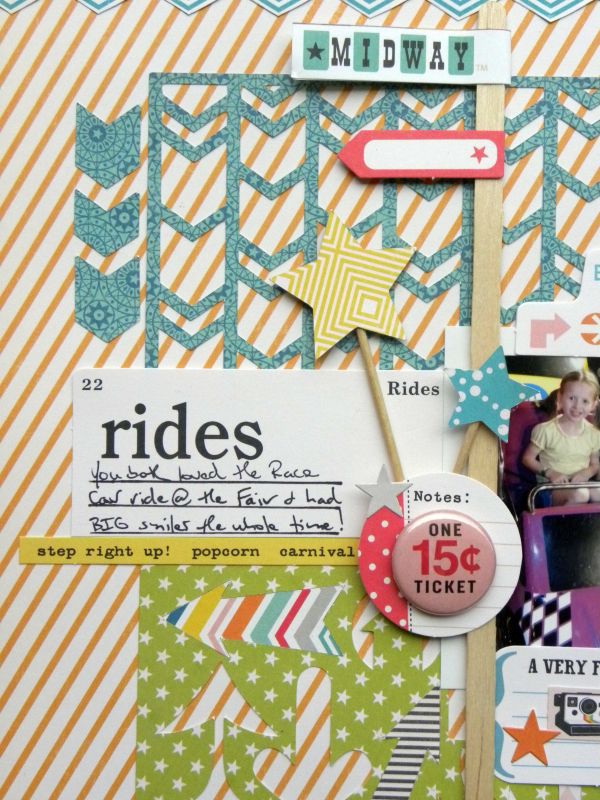
I wanted to share a fun little tip for using the OA Washi Tape. To create the border strip at the bottom of my layout, I used the Midway Talk Bubbles Washi Tape and backed it with a piece of the Tilt-A-Whirl patterned paper. I love how the bright Blue background shows through the transparent Washi Tape!

I also did a second layout using the Negative Cut technique, with the Farm Girl collection. Instead of focusing on background cuts for this layout, I decided to use the Negative Cuts for Text. The area that we live in has a lot of open Farm land and I love driving in the area, because it's always so breath taking every time you look out of the window. While we were out driving to lunch one day, we drove past one of my favorite Farm areas and I snapped a couple of photos of two of my favorite spots...don't worry, hubby was driving at the time. :) I knew the Farm Girl collection was a perfect fit for these photos. I wanted to add some "word art" to my page, so I used the Cameo to cut several words and then used them at the top of my layout. I backed a few of the words, to help them stand out. And, I used the same technique to create the title for my layout on a banner pennant.


I used a fairly basic design for this layout and the Grid patterned background worked perfectly for lining up my photos. I embellished, by using the Designer Brads, Journal Card, Word Stickers and Shape Stickers. And I will share a little secret...October is my favorite month of the year, and anytime I work on a layout with photos from October and I'm using October Afternoon product, I always try to work in the OA logo from the bottom of the patterned papers!! On this layout, I was able to add it to the cluster around the corner of my bottom photo:

So don't be afraid to try the Negative Cut trend on your next layout or project. It's a fun way to use some of the amazing patterned papers that October Afternoon puts out with every collection. Whether you use it for creating backgrounds or Text, just make sure you have fun and let your imagination do the work! And don't miss out next Friday...I'll be back, to share my final Guest Designer post with you!!

No comments:
Post a Comment