
CONGRATS KRISSYCLARKMCKEE!!

And even though Valentine's has come and gone, I wanted to share the Valentine's Day Home Decor piece that went up on the American Crafts Blog last week.


You could adapt this type of wreath for any holiday, but I will share a tutorial with you today, for creating the Valentine's look.
First off, I wanted to add a heart banner across the opening of the wreath. I used Silhouette Studio to create several heart shapes. I welded two of the heart shapes together so that I could fold them over once they were cut.

After my shapes were cut, I folded each of the heart shapes in half. I roughly measured and cut a piece of twine to string across the wreath and attached it by wrapping it around each side and securing the ends on the back with hot glue.
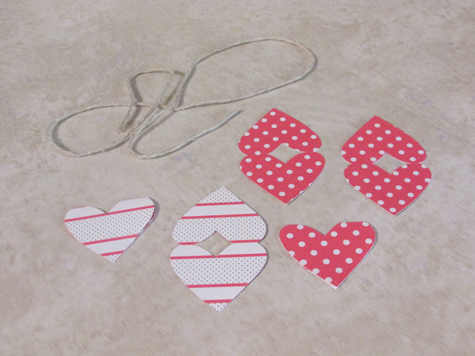
Once the glue dried on the twine, I started to add the heart shapes over the piece of twine and then just used adhesive on each heart to secure the front and back of the heart shapes. This gave me the ability to slide my hearts along the twine to get the spacing just the way I wanted it.


I wanted to keep most of my decorating on the left hand side of the heart. So I used Silhouette Studio, once again, to cut the word "LOVE" to place on the side of the heart.

I added a shape from the new Plus One Bits pack where my banner met the wreath on the left side. Then I placed each of my letters according to the placement of the Die Cut Cardstock Shape.

Once the word was in place and I embellished with a few hearts cut from cardstock, I decided to make an arrow to add over the "O". I used a paper straw and added a rectangle cut piece of patterned paper to the end. I shaped the top piece of paper over the straw and then adhered both pieces to the top and bottom of the straw.

When the pieces were secure, I cut an angle on the top and bottom to create the fringe at the end of the arrow. You can just use regular scissors to create the fringe look.

I cut one more heart to add to the tip of my arrow and placed one of the Adhesive Flowers in the center.
I love the shabby chic look that the Polka Dot Party collection created on the wreath!
Supplies: Fascinating Friends (366165) - Polka Dot Party, Polka Dot Plates (366177) - Polka Dot Party, Cutesy Cupcake (366164) - Polka Dot Party, Clothespins (366208) - Polka Dot Party, Bits (366849) - Die Cut Cardstock Shapes, Adhesive Flowers (366203) - Polka Dot Party
No comments:
Post a Comment