It's the end of August and that means Fall is right around the corner. Yikes!! It's hard to believe that we'll be ready for Fall in September. I'm sure all of you are looking forward to creating, some fun layouts, cards, and other projects for Fall, and I wanted to stop in today to share a set of Free Printables I created for the season.
The card sizes are 3x4 and the circle images are 1 inch. I used a non-traditional Fall color scheme, because I like to change things up, to keep from getting in a rut from year to year. I hope you enjoy these, and you can download the JPEG HERE or the PDF HERE.
I would love to see how you use the Printables, so if you post on Facebook make sure to tag me, and if you post on your Blog, I would love for you to add a link in your post back to my Blog!
Enjoy and thanks for stopping by!! And if you have any ideas that you would like to see for upcoming Printables, I would love to hear your suggestions in the comments. I will try to accommodate, as long as it is in my powers of creativity!! :)
Thursday, August 29, 2013
Wednesday, August 28, 2013
Hello Bliss!
I'm popping in today, to share my last layout with the August Scrapbook Kit, Hello You, from The Paper Bakery! This has been such a fun Kit and there are still some available in the Shop, if you haven't picked one up yet. There's a great mix of Carta Bella, Pretty Little Studio and October Afternoon. We also had our newest sketch challenge posted this past Sunday, and I based today's layout on the Sketch.
Did you know that on top of the awesome kits offered...Scrapbook Kit, Mixed Media Kit, Project Kit, and Capture 365 Kit...there is also a Paper Bakery Shop??!! If you haven't been over to check it out, make sure you stop by. There are a lot of new items, including Stamps, Custom Flair Buttons, Custom Stencils/Masks, Washi Tape, Sequins and so much more! You can also sign up for a Kit Subscription while you are there, to make sure you have a guaranteed Kit of your choice, each month!
And we would love to have you play along with our Sketch challenge. Just use the above Sketch, before the deadline of midnight on Saturday, September 7th, and link up on the Sidebar of The Paper Bakery Blog.
Monday, August 26, 2013
Beach Bums
Today, Team B is up with a new reveal for this week's Sketch at Let's Get Sketchy! I feel like I have had a ton of Summer layouts this year, but I just can't resist using all of the fun Summer and Nautical collections that are out there. I loved the photo on this layout, even though the kids "posing" didn't really turn out the way I had envisioned it...which it rarely does! But I love the sky, water, and sand in the background and each of the kids kind of doing the opposite of what they were actually supposed to be doing!! :)
I kept the basic design of the Sketch for my layout, but I changed up the banner in the top left corner, by creating a sunshine and clouds cut on my Silhouette Cameo. It's good to remember, that you can use Sketches exactly as they are or as a starting point. And sometimes it's fun to change up the design elements of the Sketch, to create your own unique look.
I hope you will come play along with us this week and that you will stop by the Let's Get Sketchy Blog to see what the Design Team did with this week's Sketch!
Supplies: Cardstock: Bazzill; Patterned Paper & Wood Veneers: Studio Calico; Stitching Templates & Wood Veneer Card: Amy Tangerine; Washi Tape: Love My Tapes; Flair Button: The Paper Bakery; Enamel Dots: My Mind's Eye; Font: Abadi MT Condensed Extra Bold; Other: Shipping Tag
Thursday, August 22, 2013
Sketch Week | Chalk Art
It's hard to believe, that it has already been more than a year, since Sketch Support closed down. But I am excited to say I will be working with Allison Davis' sketches once again, each month for Sketch Week. Allison has created an awesome single page Sketch for the month of August. You can download the full Sketch at the Scrapbook Generation online store.
This is a great multi-photo Sketch, that also offers a lot of space for your title, embellishing and journaling. Here is how I used this month's Sketch:
I didn't change much in the design of the Sketch. I matched my embellishing to the spaces provided on the Sketch and created three embellishment clusters, which gave me a visual Triangle on my layout. I only had two photos, that I needed to scrap for this page, so in the 3rd photo spot, I added a small Polaroid frame from The Pier collection and a Flair button from The Paper Bakery.
I hope you enjoyed my take on Allison's Sketch and don't forget, to stop by the Scrapbook Generation online store, to download a full version of this month's Sketch.
Supplies: Patterned Paper: Carta Bella; Mist & Wood Veneers: Studio Calico; Flair Button & Washi Tape: The Paper Bakery; Thickers: American Crafts; Polaroid Frame: Crate Paper; Other: Buttons
Wednesday, August 21, 2013
Elle's Studio Use Your Stash Challenge
This past weekend, Elle's Studio hosted a Use Your Stash Weekend Challenge. I thought it would be fun to play along, because I still had a good bit of the Saltwater and Cameron collections on my hands. Unfortunately, I wasn't one of the three winners chosen, but I did get three layouts finished, that I really love and had fun creating them. So I just wanted to pop in today and share what I made. I'll keep the wording short on this one, since I'll be sharing three layouts! :)
Favorite Part of Summer: This layout is a little unusual for me, because I didn't create my own title with Thickers or cutting with my Cameo. Instead I used a full sheet of the Elle's Lil Snippets layered behind my photo, and used the title from there. Sometimes it's fun to do things out of the norm!
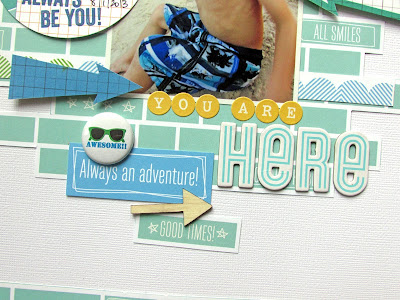
You Are Here: This layout was really fun, because I took inspiration from Suz Mannecke's layout "PNAM" and fussy cut the brick patterned paper from the Cameron collection. I used a larger photo and...are you ready for this??!!...added no mist splatters! AHHH! Just a fun, clean and simple look on this one.
Down by the Sea: This layout is another one that is out of my norm, because I went for a more minimal approach. It is based on the 8/15/13 Sketch Thursday challenge. I love to use the Elle's sketches, because they get me out of my normal page design.
So that is it for today! I hope you will take time to find some challenges that you love, to play along with. It's always fun to push your creativity and to use your stash...that way you can buy more to replace it!! :)
Tuesday, August 20, 2013
Bye, Bye Butterfly
Pinwheels have continued to be a popular trend in Scrapbooking and today, at Get It Scrapped!, the Creative Team is sharing ideas for using Pinwheels on your layout. I had a lot of fun with this assignment, because I have been a big fan of the Pinwheel trend. Here is what I created:
We purchased a Butterfly Garden and the kids were able to watch the caterpillars go through the phases of becoming a butterfly. Their favorite part is releasing the butterflies, once they emerge from the chyrsalis. I wanted to use the Pinwheel trend on this layout, to add a fun whimsical feel. One of the Elle's Studio patterned papers had a Pinwheel pattern, so I fussy cut three from the paper and added a punched circle and sequin to the center of each one. I placed the Pinwheels in a visual triangle on my page to help draw the eye around my layout.
The Creative Team is sharing much more inspiration using Pinwheels, so make sure you visit the Get It Scrapped! Blog, to see what they did!
Supplies: Patterned Paper, Polaroid Frame, Vellum & Tags: Elle's Studio; Wood Veneers & Sequins: Studio Calico; Color Shine: Heidi Swapp: Roller Stamps: American Crafts; Ink: CTMH; Flair Button: The Paper Bakery; Fonts: Abadi MT Condensed Extra Bold & Pacifico
Monday, August 19, 2013
Try This at Home!
We've all seen that disclaimer, "Don't Try This at Home"...and sometimes I think, "why in the world would anybody want to do that anyway??!!" Well today, I am here to share something, that you can definitely try at home, using the August Kit from The Paper Bakery! If you're like me, I'm sure you have a huge stash of scrappy products and it is always fun to find ways to mix those with the awesome Kits that come to your doorstep each month.
For today's tutorial, I combined the August Kit, with some of my left over Thickers to create a custom background. This was a great way to get rid of some of those Thickers that have been sitting around and are older than two of our children!! Plus, it gave me a fun way to jazz up one of the sheets of Cardstock, that come as a new Add-On now, each month!
I used four different colored Mists on the Cardstock, to blend with the papers included in the August Kit. Here's an easy tutorial, showing the process for creating the background look.
1. Choose a mix of letter stickers and Thickers and place them randomly on the cardstock. I used a variety of fonts and sizes.
2. Select your mist colors. You can use one or you can mix several together. I used 4 different colors of Color Shine and sprayed each of the 4 corners to blend the colors together.
3. Remove all of the letter stickers and Thickers and you will have a fun misted alpha pattern on your cardstock.
I hope this inspires you to find fun ways to incorporate your existing scrap supplies, in with your monthly Kits!
Saturday, August 17, 2013
Clear Scraps | Pool Side Cutie
I am back today, to share my final project for the August Guest Designer spot at Clear Scraps. I created a layout, using the Bo Bunny Key Lime collection that I received in this month's Kit. I really loved all of the fun colors and patterns in this collection and it works perfectly with all of the Summer photos I've been taking this year!
All three of our kids took swim lessons earlier in July, and I snapped this photo of our oldest, sitting pool side, waiting for instructions from her teacher. I knew the Bo Bunny papers would look great with this photo, so I started my layout by cutting circles on White Cardstock using my Silhouette Cameo.
Once the circles finished cutting, I layered the White Cardstock over the fun splash patterned paper from the collection and then I placed two other patterned papers behind several of the circles. I also used some of the flowers included with the Kit and layered the Yellow and Blue pieces and added them to the center of the cut circles. Since the background was the show piece of the layout, I kept all of the other embellishing to a minimum, by just adding a couple of clusters near my photo.
Next time you are working on a layout, look for different ways to use your patterned paper! I really love using all patterns on my layouts, but sometimes mixing in a solid like the White Cardstock, can give you new inspiration for creating on your layouts.
I would also like to say a big thanks to Clear Scraps for inviting me to Guest Design this month. Make sure you stop by their Blog to see the amazing projects created by their Design Team!
Thursday, August 15, 2013
Life.Paper.Scrapbook | August Color Challenge
Today is a busy day on the Blog! And I am excited to share my first layout with you, as one of the new Design Team members at Life.Paper.Scrapbook. The Team is sharing our layouts/projects based on the August Color Challenge, and it's a really great color scheme this month.
I am an Autumn girl...it's my favorite time of year and I love the Autumnal colors. But I took a different approach to the color scheme, because I wasn't quite ready to scrap any Fall photos right now. I adapted the color scheme to everyday photos, by using a mix of patterned papers from Fancy Pants and October Afternoon.
We would love for you to come play along with us and you can check out all of the details on the Life.Paper.Scrapbook Blog.
I hope you will come play along with us this month and I can't wait to see what you create!
Supplies: Patterned Paper: Fancy Pants & October Afternoon; Photo Frame: Fancy Pants; Mini Market Stickers & Buttons: October Afternoon; Enamel Dots: My Mind's Eye: Spray Mist: Studio Calico & Heidi Swapp; Wood Veneers: Studio Calico; Thickers: American Crafts; Cut File: Kim Watson for Fancy Pants; Mask & Flair Button: The Paper Bakery;
I am an Autumn girl...it's my favorite time of year and I love the Autumnal colors. But I took a different approach to the color scheme, because I wasn't quite ready to scrap any Fall photos right now. I adapted the color scheme to everyday photos, by using a mix of patterned papers from Fancy Pants and October Afternoon.
We would love for you to come play along with us and you can check out all of the details on the Life.Paper.Scrapbook Blog.
The Sponsor for the August Color Challenge, is American Crafts!
American Crafts will be giving away an Amy Tangerine prize pack to our lucky random winner, so make sure you link up on the Life.Paper.Scrapbook Blog!
Supplies: Patterned Paper: Fancy Pants & October Afternoon; Photo Frame: Fancy Pants; Mini Market Stickers & Buttons: October Afternoon; Enamel Dots: My Mind's Eye: Spray Mist: Studio Calico & Heidi Swapp; Wood Veneers: Studio Calico; Thickers: American Crafts; Cut File: Kim Watson for Fancy Pants; Mask & Flair Button: The Paper Bakery;
Subscribe to:
Posts (Atom)