Wednesday, March 30, 2016

A Flair for Buttons | Let's Go

This is a personal blog. All editorial content and projects are intellectual property of ashleyhortondesigns.com. I do receive compensation and material product from A Flair for Buttons to develop my craft posts, but all ideas and opinions are my own. 

We have a 6 year old boy, who is always on the go!  The only time he is quiet and still is when he's sleeping!  With that said, it's hard to get him to stop and sit still for photos, but I got lucky and snapped this cute photo of him at the park one afternoon.  There are a lot of great boy themed Flair sets in the shop, but I just had to use the cute paper airplane Flair from the Paper Airplanes 2 Flair set on my layout.


I wanted to create a lot of motion on the layout, to reflect his busy personality.  I used a bold, black & white striped patterned paper for the background.  To contrast the stripes, I used a pie chart cut file, to add a circular element to the layout.  I left the pie chart cut file in tact for the smallest circle and backed it with various patterned papers from the Amy Tangerine Better Together collection.  Then I placed three of the Flair Buttons from the Paper Airplanes 2 set in several sections of the pie chart shape.


I continued the circle design, by removing the pie chart triangle shapes out of the circle and cut two more large circles to add to the layout.  I kept all of the embellishments clustered inside the two smaller circles at the center of the page.  And I added some wood veneer arrows and Thicker phrases to continue the motion on the layout.  The Paper Airplane Flair Buttons also add motion to the layout, because the planes are pointing in different directions.


I also love how well the colors on the Paper Airplane Flair Buttons worked with the Better Together collection!  They look like they were made for each other!  You can check this set out in the A Flair for Buttons Shop.  Here's a look at the full set, and the other designs that are included with the paper airplanes.
Il_570xN.891072532_hdz4
https://www.etsy.com/shop/TheCutShoppe

Monday, March 28, 2016

The Cut Shoppe Gift Certificate Winner!

Thanks to all of you who stopped by and commented on my Good Egg layout!  I always love reading your sweet comments!  And I had to stop in today to announce the WINNER of the $10 Gift Certificate giveaway to The Cut Shoppe.


http://lospapelesdemama.blogspot.com/


Maria, please email me at ashleyhorton010675@gmail.com to receive your $10 Gift Certificate to The Cut Shoppe!


https://www.etsy.com/shop/TheCutShoppe
 

Sunday, March 27, 2016

He Is Risen & FREE Cut File!

This is a personal blog. All editorial content and projects are intellectual property of ashleyhortondesigns.com. I do receive compensation and material product from Pink Paislee to develop my craft posts, but all ideas and opinions are my own.  

Happy Easter Sunday!!  Last year we attended a Crosswalk service at our church, 3 Circle Church.  Families went through the Easter story and were able to build their own cross.  The kids loved working on the cross and adding flowers to it.  We were able to place it in the front yard, once we brought it home.  I snapped some photos during the process, but loved this one of all three of them holding the cross.


Sadly, the photo quality was not stellar, because I didn't have my DSLR last year.  I tried editing the photo, while keeping it in color, but it just wasn't working for me.  I decided to change it to Black & White to fit in with the colors from the Fancy Free collection by Paige Evans from Pink Paislee.


I created the cut & fold background in Silhouette Studio, and I love that the butterflies go along with the theme of the layout.  I wanted to have a light feel to this layout, so I cut the design from White cardstock and added color behind it with one of the Fancy Free patterned papers.

FREE CUT FILE!  Would you like the Fly, Flay Away cut file for one of your layouts!!  
You can download it HERE.  
This cut file is only available as a Silhouette Studio file.

Thanks for stopping in today!  I hope you and your family, enjoys a safe and Happy Easter! 

https://www.etsy.com/shop/TheCutShoppe

Friday, March 25, 2016

Good Egg & GIVEAWAY!

This is a personal blog. All editorial content and projects are intellectual property of ashleyhortondesigns.com. I do receive compensation and material product from Pink Paislee to develop my craft posts, but all ideas and opinions are my own. 

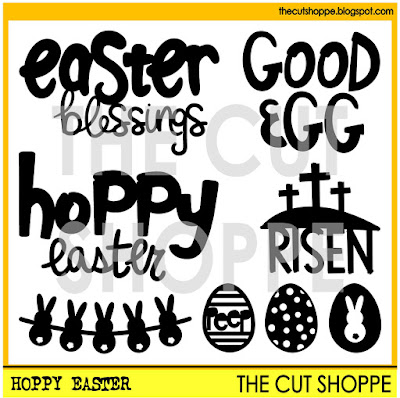
Happy Good Friday and Easter weekend!  I have a lot of photos from last year's Easter weekend, but somehow I haven't put any of them on layouts yet.  So I decided to make one!  I used the Fancy Free collection by Paige Evans from Pink Paislee, with the Hoppy Easter cut file set from The Cut Shoppe 

AND I AM GIVING AWAY A LITTLE PRIZE AT THE END OF THE POST...SO MAKE SURE YOU READ ALL THE WAY THROUGH!!


https://www.etsy.com/listing/286084093/the-hoppy-easter-cut-file-set-includes-8?ref=shop_home_active_23

I love searching Pinterest for inspiration, and I came across several Easter banners.  I thought that would be a fun idea to translate to my layout.  I cut the banner pieces on my Silhouette Cameo, using a mix of patterned papers from the Fancy Free collection and from White cardstock.  Once I had all of the banner pieces arranged on the background paper, I machine stitched through all of them.


I wanted to add watercolor to the layout, so I painted the White cardstock banner pieces with colors that coordinated with the Fancy Free collection.  I embellished all of the banner die cuts with ephemera, Thickers, chipboard and die cuts from the Hoppy Easter cut file set.  And I added a Flair Button from A Flair for Buttons.  


I love the bright colors in this collection, and mixing them with the cut file from The Cut Shoppe, made for the perfect Easter layout!


Now, it's time for a GIVEAWAY!!  I am giving away a $10 Gift Certificate to The Cut Shoppe!  All you need to do is comment below, and I will announce a random winner on Monday, May 28th!  Just make sure you check back on Monday, to see if you're a winner! 
 
https://www.etsy.com/shop/TheCutShoppe

Thursday, March 24, 2016

Hip Kit Club | Spring Fever

This is a personal blog. All editorial content and projects are intellectual property of ashleyhortondesigns.com. I do receive compensation and material product from Hip Kit Club to develop my craft posts, but all ideas and opinions are my own.

It's almost impossible not to create a spring themed layout with the March 2016 Hip Kit & Add-On Kits from Hip Kit Club!  The colors in the kits this month, just have spring written all over them!  This week, I wanted to use the Smell the Roses cut file I created for March, but wanted to do something a little bit different.  I typically make a cut file like this, the focal point of my background, but this time I decided to break it up by layering another cut file over the top of it.


This layout actually ended up with four layers of paper!  I used the wood grain design, created by Kim Watson as the base of my layout.  I cut the Smell the Roses cut file from the Pink side of the Basic Grey paper.  Both of these patterns can be found in the March 2016 Main Kit and the March 2016 Paper Add-On Kit.  Then I cut my second cut file design from the White cardstock included in the March 2016 Cardstock Add-On Kit.  Before I put all of the layers together, I added my photo to one of the triangle shapes and also filled a few of the open spots with patterned paper from the Pinkfresh Studio 6x6 paper pad from the March 2016 Embellishment Kit.


For my title, I mixed the Maggie Holmes Doll Thickers from the Main Kit with the Pinkfresh Studio Thickers from the Embellishment Kit.  I didn't have the word "fever" in the Pinkfresh stickers, so I made it by cutting away the "fe" from the word life and pairing it with the "ver" from the word Ever.  I love the mix of the Green and Silver!  


Since things were so busy on the layout, because of the layered cut files and patterned paper, I decided to add less embellishing.  I mixed in some pops of color with ephemera pieces from the Pinkfresh Bits included in the Embellishment Kit.  I also love using wood veneers, so I placed a few of the Pinkfresh Studio Asterisk wood veneers around the page and added some of the Elle's Studio wood veneers that are in the March 2016 Project Life Kit.

I really liked this technique of layering cut files!  If you own a die cut machine, and haven't checked out the monthly cut files designed by Kim Watson, Nicole Nowosad and me, then you need to stop by the Hip Kit Club website, so you can download each month's designs!
https://www.etsy.com/shop/TheCutShoppe

Tuesday, March 22, 2016

Crate Paper | You Are Loved Little One

This is a personal blog. All editorial content and projects are intellectual property of ashleyhortondesigns.com. I do receive compensation and material product from Crate Paper to develop my craft posts, but all ideas and opinions are my own.

My kids have moved beyond the baby stage (thank goodness), but I just had to use the Little You Boy collection from Crate Paper, with one of their baby photos.  I had a chance to use the Little You Girl collection last month, so I wanted to switch it up to the boy collection this month.

   
I wanted to do something different with the title on this layout, so I drew it out with the Silhouette Sketch pens on my Cameo.  Then I stitched over the lines, using an embroidery floss color that coordinated with the colors in the Little You collection.


Since the title was placed on a tilt, I had the perfect spot to add my photo.  I love the cute little clips that are included with the collection, and just had to add the fox to my photo...though anyone of them would have been perfect.  


I kept the embellishing to a minimum, because I wanted the focus to be on the title.  So I placed a few embellishments from the Little You Ephemera Pack and Chipboard sheet in a diagonal design on the layout.


I waited to add the watercolors to the title, once I had everything else on the layout finished.  Sometimes when you add a wet medium, it can make it more difficult to add your embellishments, because of the mixed media warping of the paper.  I love the look of the matching watercolors and embroidery floss, and the pop that the colors add to the softer colors in the collection!

And these collections can also be adapted for everyday layouts, or to go with photos of older children.  It's always fun to challenge yourself to use a collection, in a different way!

Supplies:  Little One (680370), Chipboard Stickers (680388), Accent Stickers (680392), Embellishments (680396), 6x6 Paper Pad (680384), Clips (680400), Ephemera Pack (680390), Acrylic Stamps (680399)


https://www.etsy.com/shop/TheCutShoppe

Monday, March 21, 2016

Crate Paper | New York in Bloom

This is a personal blog. All editorial content and projects are intellectual property of ashleyhortondesigns.com. I do receive compensation and material product from Crate Paper to develop my craft posts, but all ideas and opinions are my own.


Last year, we took a trip to Ohio and while we were there, visited Niagara Falls in New York.  The trees were blooming around the park and falls, so I snapped a quick photo.  It was the perfect picture to use on my spring layout for Crate Paper!  I also thought it would be fun to create a coordinating spring card, while I had out all of the pretty Bloom products from Maggie Holmes!


There are so many pretty flowers in the Bloom collection, and I decided to use them to create a wreath on my layout.  I drew a large circle on the background paper using a Silhouette Sketch pen and then used it as a guide for placing my flowers.  Most of the flowers are from the Bloom Ephemera Pack, but some were also fussy cut from patterned paper in the collection.


Once I had the flowers in place, I machine stitched over them, to add more texture to the layout. I placed the photo at the top left of the layout, to leave a large space for my title. I used the Petals Thickers to add the title “New York in Bloom”, and the stripes on the background paper made it very easy to keep the letters straight.


I finished the layout, by incorporating some other embellishments from the Bloom collection around the wreath.  I love the dimension and texture from the Paper Flowers, Fringe Heart and Tassels. 


While I had the Bloom collection on my desk, I thought it would be fun to create a spring card also!  I used the Moments patterned paper from the 6x6 Paper Pad to cover the base of my card. Then I added three tag shapes to the front of the card, from the Ephemera Pack. Next, I added pop dots under one of the Accent Stickers, to add dimension to the card. I finished the card with a couple of fussy cut butterflies and a paper flower. 


This was a quick and easy card, since I already had all of the supplies on hand, after working on the layout!


https://www.etsy.com/shop/TheCutShoppe

Friday, March 18, 2016

A Flair for Buttons | Ooh La La

This is a personal blog. All editorial content and projects are intellectual property of ashleyhortondesigns.com. I do receive compensation and material product from A Flair for Buttons to develop my craft posts, but all ideas and opinions are my own.
  

Frames and Flair make a great combo!  I love using frames on layouts for your photos, and for adding embellishments.  I thought it would be fun to use a large die cut with multiple frames and use some of the open spots to add Flair Buttons from the Chalkboard Valentines 2 Flair.


I used the C'est La Vie collection from Pink Paislee for this layout, and I thought the contrast of the Black & White on the Chalkboard Valentines 2 Flair would would work perfectly with the colors from the collection.  I had plenty of open spaces to add the Flair inside the frame shapes, so I placed them in a visual triangle.  The Black stands out and draws your eye around the page.


The die cut frames are also perfect for adding multiple photos and patterned paper.  I used the extra frames to add more embellishments from the C'est La Vie collection and I like how they work with the designs on the Flair Buttons.

I love to come up with different design ideas every month, for incorporating Flair from the A Flair for Buttons Shop!  Check out all of the available sets, and I know you will be inspired to create something fabulous with your Flair!
Il_570xN.716778851_6ljz
https://www.etsy.com/shop/TheCutShoppe

Thursday, March 17, 2016

Hip Kit Club | A Walk in the Park & April Kit Reveal!

This is a personal blog. All editorial content and projects are intellectual property of ashleyhortondesigns.com. I do receive compensation and material product from Hip Kit Club to develop my craft posts, but all ideas and opinions are my own.

Hi everyone!  I'm stopping in today to share my first layout, using the gorgeous March 2016 Kits from Hip Kit Club!  I couldn't wait to get started on my first layout. All of the spring colors and images are so pretty. As soon as I saw Kim Watson's March Cut File, I knew I had to use it on my first layout.


I cut it from the multi-colored geometric patterned paper from the March 2016 Main Kit, that was also designed by Kim. After I cut the butterflies, I also cut the outline of the butterflies from a second patterned paper to layer behind them. I added my photo at the bottom of the cut file and then used the Crate Paper Maggie Holmes Thickers from the Main Kit, to create a large title. I used some of the cute Pinkfresh Studio wood veneers from the Main Kit in the center of a few of the butterflies. I also mixed in some of the embellishments from the March 2016 Project Life Kit, including Bits & Pieces and Wood Veneers from Elle's Studio. If you haven't had a chance to check out everything included in the March Kits, make sure you visit the Hip Kit Club website!

AND...while you're there, you can check out the newly revealed April 2016 Hip Kit & Add-On Kits!  Here's a look at each kit, and you can visit the website for the specifics included in each kit! 

APRIL 2016 MAIN KIT:

http://www.hipkitclub.net/april-2016-main-kit

APRIL 2016 EMBELLISHMENT KIT:

http://www.hipkitclub.net/april-2016-embellishment-kit

APRIL 2016 PROJECT LIFE KIT:

http://www.hipkitclub.net/april-2016-project-life-kit

APRIL 2016 COLOR KIT:

http://www.hipkitclub.net/april-2016-color-kit

APRIL 2016 PAPER ADD-ON KIT:

http://www.hipkitclub.net/april-2016-paper-kit

APRIL 2016 CARDSTOCK ADD-ON KIT:

http://www.hipkitclub.net/april-2016-cardstock-kit

That's a whole lot of awesome!  Make sure you grab yours, before they are all sold out!

https://www.etsy.com/shop/TheCutShoppe

Wednesday, March 16, 2016

Pink Paislee | Spring Paper Flower Wreath

This is a personal blog. All editorial content and projects are intellectual property of ashleyhortondesigns.com. I do receive compensation and material product from Pink Paislee to develop my craft posts, but all ideas and opinions are my own.
  

I think it's safe to say, that spring has sprung...at least where we are.  And we are quickly inching toward summer temperatures!  But we'll try to enjoy spring while it's here!  And speaking of spring, the Pink Paislee Design Team is sharing spring projects on the Blog this week.  I was on the Blog yesterday, with a tutorial for a fun Paper Flower Wreath, that brings spring right inside your home!


Here is the step by step tutorial for creating your own Paper Flower Wreath!

Step 1: Cut strips from the patterned papers you have selected. I cut two strips at the same size for each of the accordion flowers. I worked with three different sized strips: 2.5 x 12 inches, 2 x 12 inches, and 1 x 12 inches. You can cut your strips at any width, just remember that the width of your cut will affect the diameter of your circles. - See more at: http://www.pinkpaislee.com/?p=49454&preview=true#sthash.E2NHNnO9.dpuf


Step 1: Cut strips from the patterned papers you have selected. I cut two strips at the same size for each of the accordion flowers. I worked with three different sized strips: 2.5 x 12 inches, 2 x 12 inches, and 1 x 12 inches. You can cut your strips at any width, just remember that the width of your cut will affect the diameter of your circles.


Step 2: Once all of your strips are cut, score them every half inch. A scoreboard is great for this if you have one, but if not you could just use a ruler to mark your paper every half inch before folding. 


Step 3: Now you are ready to fold your strips in an accordion pattern. Fold along your scored line or the marks made from your ruler. I like to fold one strip up and one strip down so that I have a tab on each end to attach the strips together. Add some adhesive to the two tabs at the end of each strip to stick them together.


Step 4: Once your strips are connected at each end, you are ready to create the flower look. Punch or cut a circle that is smaller than the diameter of your flower. Flatten and push the “cupcake” liner shape together, add some hot glue to the backside, and then place the punched circle to the hot glue. This will hold your flower to its shape. 


Step 5: Now you can use your paper flowers any way you want. I chose to create a wreath with mine. I grabbed a cardboard box and cut a large piece from it. Then I used a paper plate to draw a circle shape to cut out for the base of my wreath.  If you are using this technique, you will want to cut a smaller circle on the inside to have an open center for your wreath. You could also use cardstock for this technique, but the cardboard gives a little bit more stability to your wreath.


Step 6: Arrange the accordion flowers on your wreath. I placed the larger sized flowers around the cardboard circle and then added smaller accordion flowers in between each of the larger flowers. I added various sizes of the cork hearts from the C’est La Vie collection in the center of each of the accordion flowers. For the sentiment on my wreath, I used the word “Hello” from the C’est La Vie mirror stickers. 


This is such a fun and easy project!  And it's also great, because you can customize your wreath to go with any season, holiday or decor!